Horizontal vs. Vertical Raised Panel Router Bits
If you want to make a raised panel for a frame and panel door, you'll be in the market for a raised panel router bit.
Are they all alike? No - there are a few important differences. Below, we'll cover the basics of the two main raised panel bit configurations and offer advice on which one to choose.
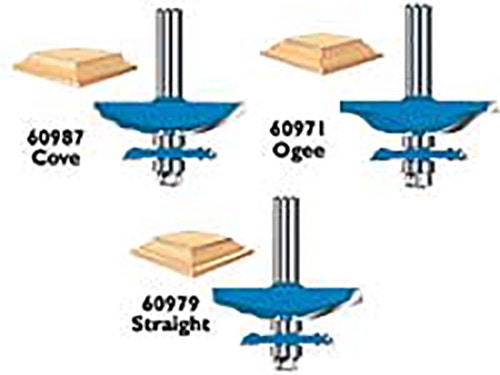
There are two basic types of raised panel bit: vertical bits and horizontal bits. Horizontally oriented raised panel bits, like the ones you see on the right, are similar to the raised panel cutters designed for use on a shaper. To use one, you lay the panel flat on the router table and use either the router table fence or the bit's pilot bearing to maintain a consistent reveal width during the cut.
Horizontal Bits May Take Getting Used To

If have you've never used a horizontal raised panel bit, your first inclination upon installing it in your router table might be to remove it immediately, return it to the store and assure yourself that flat panel doors are what you really wanted to make. In other words, to anyone accustomed to operating your router table with small diameter edge-forming bits and modestly sized straight bits, a horizontal raised panel bit looks gigantic. They are big, for a router bit - a typical raised panel bit is over 3" in diameter. That fact alone doesn't make them a dangerous item, but many (especially less experienced) woodworkers are understandably intimidated at the sight of that much cutter whirling around in excess of a hundred miles an hour.
Vertical Bits - Less Versatile, More Comfortable
A vertical raised panel bit seems small in comparison to a horizontal bit. This is achieved by simply "standing the profile up". By putting the longest axis of the cut in the upright position, the vertical raised panel bit is able to make the same cut with a much smaller bit radius. The smaller radius makes it possible to operate the bit safely at higher speeds, limits the effects of slight discrepancies in its balance, and makes the bit feel more manageable to use. Vertical bits also take less power to operate, making them a better choice for less powerful routers.
There are two drawbacks to the vertical raised panel bit: First, vertical bits can only be used on square panels since there's no pilot bearing to guide the bit along the curved top of an arched or cathedral door template. In Addition, vertical bits have a reputation for not making quite such a nice cut as a horizontal bit. The reason has to do with the bit's geometry. A horizontal raised panel bit has a much greater cutting angle and produces a nice, smooth shearing action when it comes in contact with the wood. By comparison, a vertical bit takes more of a chopping approach, making problems with chatter a little harder to control.
Bits with Back-Cutters

Along with the ability to cut curved panels and an easier route to a nicer cut, horizontal bits offer the option to include a "back-cutter". A raised panel bit outfitted with a back-cutter has another set of cutters oriented to cut a rabbet in the back of the panel at the same time that the face profile is cut. There are a couple of advantages to this arrangement. First, it guarantees that the finished edge of the panel will be of an absolutely consistent thickness, and so will fit into the panel groove in the door stiles and rails precisely (provided the panel raiser and the stile and rail bit you use are attuned to produce a compatible edge and groove).
A back-cutter also makes it possible to use 3/4" stock for your panels and still come out with a door that has all of its parts on the same plane. You could rabbet a 3/4" panel in a separate pass using rabbeting bit, of course. But doing so will give you a second opportunity to produce an uneven edge-thickness, and will also add another step to the already set-up intensive process of making doors.
Which Raised Panel Bit is Best?

Which type of bit should you use? Given the right conditions, both horizontal and vertical bits can safely produce exceptional results. But there are a few factors that can tip the scale in favor of one or the other. Less experienced router table users will almost certainly feel more comfortable using a vertical bit. Fortunately, vertical bits are relatively inexpensive, and you won't be out too much if you change your mind and switch to a horizontal bits later on.
The performance of a vertical raised panel bit can be greatly improved by taking multiple passes to make the completed profile. It's also important to keep the panel standing up and in solid contact with the router table fence throughout the cut, which can be a bit of a challenge with a fence that's only a few inches high. A taller fence, such as the Rockler Router Table ProMax Fence, will give you the needed extra stability, and will also help you keep your fingers up and well away from the bit. Using a stacked featherboard, which puts pressure farther up on the side of the panel, will also help to keep the panel from wobbling or vibrating during the cut. Together the combination of a tall fence, a tall featherboard and multiple passes should have you producing nearly flawless panels without too much trouble.
Still, in terms of cut quality horizontal bits are generally considered the winner. And if what you value most is a reliably accurate cut, they're probably the way to go. In fact, if you want the ultimate in smooth raised panel cuts, consider one of Freud's Quadra Cut panel raisers.
Quadra Cut bits incorporate four cutters into their design instead of the usual two. The four profile cutters are arranged so that two main blades perform an "up-cut" and two smaller ones perform a "down-cut", taking just a small amount of material off of the inner-most lip of the panel profile. The two opposing cutter angles not only help the bit shear off material cleanly, but also make for an especially crisp edge on both sides of the cut.


Keep the inspiration coming!
Subscribe to our newsletter for more woodworking tips and tricks