Video: How to Build a Dining Chair
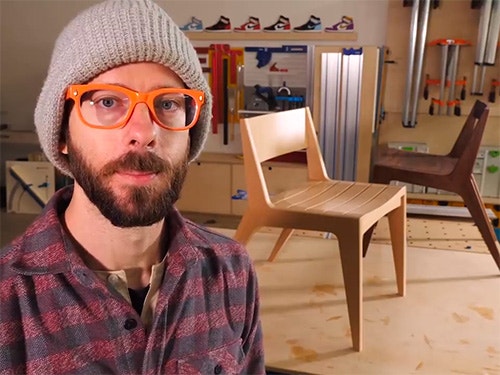
In this video, Chris Salomone builds an angular modern dining chair!
This is the Longview dining chair, and was designed to accompany a Longview dining table, or any dining table for that matter.
You can find more great projects and techniques from Chris Salomone at his website.
Featured Tools:


Chris Salomone I've been building furniture for about 10 years now and this is the first dining chair that I've ever done and for good reason chairs are scary. It's not that they're harder than other pieces it's just they're harder to figure out dimensionally. With something like a media console. it's pretty easy. You've got a wall that's 15 feet long or whatever, you know your 65-inch tv is 57 inches wide, you say, "Well I want a foot on each side." You build something 81 inches long, and it works, or you build something 96 inches long and that works too. Basically, if it physically fits in the space and it looks cool, you're good.
With a chair, it's a little more complex. Not only does it need to fit the space, it needs to fit you and Dolores, and Kevin, and your aunt Sally, and-- Well, you get the point. Thankfully though, those more rigid constraints provide a starting point. You can just measure an existing chair and get a rough idea. That's where we started by getting a baseline, putting together a crude prototype, and using that to finalize where the crucial dimensions would live. Then knowing that I could sort of design around the dimensions and get a look that I liked. I made a lot of iterations, I mean, a lot like a stupid amount. The crazy part is it's still not that comfortable but that was intentional. Let me explain.
This chair which we're calling the Longview dining chair was designed for a set of plans in conjunction with the long view dining table. While I designed it to be functional and useful, I'll be the first to admit that my main goal was looks. I'm definitely willing to sacrifice a little comfort for looks when it comes to a formal dining chair that is going to get looked out about 1,400 times as much as it's actually going to get sat in on, upon, anyway. While comfort and looks aren't necessarily on an inverse scale, for me, they seem to be. In fairness, I'm being harsh on myself. It's not like the design inspiration for the seat was a Prussian helmet so at the end of the day, I'm happy with the outcome. All right, now let's actually build it.
The first thing that I had to do was make myself some templates which I made out of quarter-inch MDF on my X-carve. That said, you don't have to have a CNC to build this chair, and assuming that you don't, you'll notice on our website that you have the option to purchase the plans with or without templates. Also, included with either version are full-scale PDFs that can be printed on paper and used to hand-make templates, as well as SVG files that can be popped into any CNC and cut on your own. That said, template making is probably my number one use for my X-carve, and I know, obviously, it's a tool that's capable of much more.
The ability to quickly and accurately prototype shapes with this workflow is something that I've really come to lean on and take advantage of so much more over the past couple of years. It's gotten to the point where I honestly can't imagine ever going back to not having one. It's almost like it would feel like not having a table saw for me at this point. It's just part of the workflow. Regardless of how you get your templates in hand, the next step will be to rough out all of your chairside parts which consist of a front leg, a stretcher, a back leg, and a backrest piece.
I'm going to start with the back leg and backrest piece and that's because these two are sort of parts A and B of a sub-assembly and they need to come together before the other chair side pieces. I'm starting off with some chunks of wood that are plenty oversized at this point. I'll nest my pieces right where I want them for grain orientation and then I'll mark the angles of the joint face, not measuring anything just striking a line. Then after I've done this on both pieces, I'll cut them along that joint face to get a clean edge. Here you could use a table saw with a sled or miter gauges and I'll show that workflow in a minute. I'm going to do it on my ACS just because, honestly, it's the fastest way for me to do it. I just line up the marks with the track, cut it, and Bob's your aunt. No, wait, Sally was my aunt, Bob's my uncle.
Now, I would suspect that one of the big questions we'll get here is why not just make this entire sub-assembly one piece from the get-go. There are two reasons. A, it would require a really wide chunk of wood to yield that piece bigger than I'm capable of milling anyway, and II, you'd end up with potentially weak grain particularly at the bottom of the foot where the chair is probably going to be carrying the most weight. Anyhow, with that done, now I'm going to trace out my shapes and also mark in some clamping spots which is another nice benefit of the extra material.
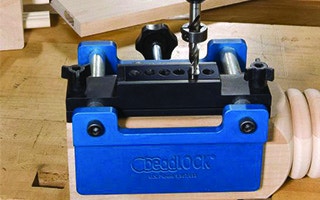
In terms of assembly for all of these pieces, there are a couple of ways that you could go but the two options we cover in the plans are dominos or dowels either those will work fine. A third option would be something like Rockler's bead lock system which I guess would be easiest to describe as the result of a domino and a dowel having a little too much wine one night.
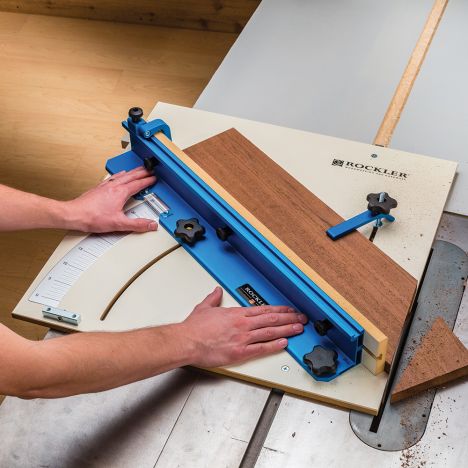
All right, while those are drying, let's turn our attention to some other parts for a bit. The first and largest of which will be the seat. In the plans, we're going to cover three options. The first two are for those of you who are down to power carve a seat dish and we're going to show how to make one version that's a big panel with said dish carved into it. Then for those of you who want to take it a step further, a version where you actually cut the panel into slats that maintain that carve. Even though carving is something that requires a bit more feel and a bit less set your fence to 2.5 inches and rip your piece in order to explain, we still walk you through our process for getting an even and symmetrical result using depth guides to track your progress as you remove material.
For anybody that has a CNC, we're also going to give you a fusion file that allow you to make the dish that we hand-carved or one that has a seat fin or, I guess, is kind of like a Prussian helmet. Anyhow, in addition to that version or those versions, we're also going to cover a version where you essentially cut a bunch of slots that you use a template to shape. This is going to be a template that we show you how to make on your own and only requires a jigsaw or a bandsaw and a sander. Then to transfer that shape onto your slats, we use a router with a template bit and a flush trim bit, and then the sander for final shaping and smoothing.
Technically, we don't cover it but you could also just make a flat panel for this. It would be slightly less comfortable but honestly, the main reason that I wanted the contours was for looks. I guess the most comfortable would be a flat panel that you just set a cushion on.
All right by this time, our chairside sub-assembly should be plenty dry. Now we can finish off those parts and assemble everything. This is a fairly repetitive process that involves using our templates to mark out our shape and then a combination of template routing shapes, and then using our table saw and some really simple sled jigs in order to cut all of the joint faces really precisely. In this shot, I'm tracing out the shape, and then I'll head over to the band saw and rough things out. Nothing accurate here.
At this point, we can get our entire chairside assemblies assembled. Again, you can use dominos or dowels. Once that's dry, we can do our final shaping, which would involve trimming up parts that we left long, cleaning up any transition areas, and just getting things sanded up to about 150 grit or so for now.
Next, there's still a few more parts that we need to make, namely the stretchers and the seatback. For the seatback, again, there are going to be two main versions that we'll cover. The first version will be one that we cut a curve into using a bandsaw and a sander. We show the chair with backrests of varying widths, and with or without underside detail curve. That way, you'll get a lot of looks and you can pick whichever you like the best. Then we're going to go over another version that uses some MDF forms and veneer to create a bent lamination backrest. It's kind of two very different workflows to achieve essentially the same thing. I would venture to guess that 98% of people will pick the first version but I like giving options, and it was fun to try something different.
The last piece that we need to make are the stretchers. Honestly, the chair would be fine without these, but I think they help to complete the look. That said because they're mostly for looks. You're pretty much free to place them anywhere on the chair that you want but we do go over exactly where and how we place them. You can follow exactly how we did it. Again, there are a couple of different looks that you can go for, all of which we provide instruction and dimensions on.
All right, so with all of the pieces made, we can finally start to assemble everything. You're never going to believe this, but there are a few different options on how you can go about this. Now I'm sure by this point, you can guess the first two, and those are, of course, dowels or dominos. I feel like at this point, I should just start calling them dowelminos. In addition to doweominos, you could also use screws, or what was probably my favorite part of the build, since it was something that I had never done, a large floating tenon that only requires a router and a bit of imagination to produce. Since I'm sure you've seen enough dowelminos already, I'll talk about that version.
What we did was measure our seat panel and our router's base plate to come up with an equation. Then we threw on our final set of orange glasses and marked our findings onto a piece of scrap plywood that we could cut to size and then use as a jig for both marking the distance of our offset on the each chairside assembly and as a fence for routing. Once you've cut yourself a similar groove into each of your seat panels, you got yourself a floating tenon. Well, I guess technically, you just have a mortise at this point. Next, you need to cut a piece of wood to slot into the mortises, and then you'd have a floating tenon.
Now before we assemble, we're going to put this what Shaun calls thumbnail edge detail onto the chairside pieces. In my opinion, the little detail really makes this chair pop. You can actually put this on before or after you glue things together. We'll talk about the pros and cons in the plans.


Keep the inspiration coming!
Subscribe to our newsletter for more woodworking tips and tricks