Woodturning a Wood Platter -
A big platter like this could be handy the next time you're entertaining or when the holiday season rolls around. Plus they make really great gifts.
The good news is, if you can turn a bowl, you can turn a platter in any number of different styles. In this video, we'll show you how.
How To Turn a Platter - Video Transcript
Chris Marshall: A big platter like this could be handy the next time you're entertaining or when the holiday season rolls around. And I’ll bet someone in your life would appreciate receiving a platter you’ve turned yourself. The good news is, if you can turn a bowl, you can turn a platter in any number of different styles. In this video, I’m going to show you how to make one like this.
Now, turning a platter this big is going to require a lathe with a significant swing over bed. I was able to tackle it using Laguna’s 15|24 mid-sized lathe equipped with its optional bed extension expansion set. The lathe features a moveable headstock, just like many full-size lathes, so you can slide it down to work over the tailstock end of the bed. This 20” cast-iron bed extension bolts to the end of the lathe’s bed. In the "low" position, it increases the swing over bed from 15" to more than 20". The expansion kit also includes this angled tool rest. It raises the tool rest up to spindle height and provides greater range of motion while also keeping the banjo out of the way for oversized turning.
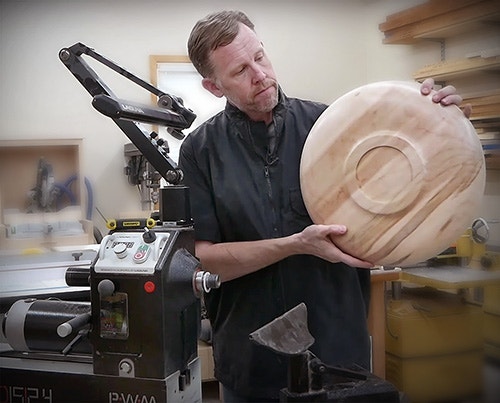
When you think about it, a platter is really just a bowl laid flat. It's got an outer profile that needs to be shaped as well as a base or foot. Now, I'm going to make the base large enough so that the platter won’t tip easily. The interior has a rim that you can make as wide as you like and a contoured recess of some sort. Or, you might decide to leave this area mostly flat, depending on how much stock thickness you have to work with.
I turned these three platters from a plank of 17"-wide, 8/4 ambrosia maple, so that's what I'm going to use again. And I'll be using just basic bowl-turning tools: a faceplate, a four-jaw chuck, a 5/8" bowl gouge with a swept-back grind, various scrapers and a parting tool. But, if you prefer using carbide insert tools like these, those will work, too. And of course, wear a face shield and some form of respirator whenever you're working at the lathe. Now, let's get to it!
I started by marking my blank to its overall diameter so I could cut it round at the band saw. And then here, I'm installing my face plate on what will be the inside of the platter. I'm using #10 screws and driving them into every hole of the face plate. A blank this big is definitely one you don’t want to have fly off the lathe, so make sure the faceplate is securely mounted to it.
And if your face plate has set screws to lock it to the lathe spindle, be sure to tighten those up, too. Better safe than sorry.
With the lathe set to a low speed, my first task was to flatten the outside of the blank with my bowl gouge to begin to true it up. Truing it helps to reduce vibration on the lathe and will let me work at a higher speed.
Using dried board stock for a platter is hard on cutting edges. So, thoughout the process, sharpen your tools often, whenever they begin to cut poorly. I'll sharpen this gouge at least a half dozen times or more before this platter is done.
And now that the outside face of the blank is flat, I can mark the mortise for my four-jaw chuck and the outside diameter of the foot. Here I’m hollowing out the mortise for my four-jaw chuck using a flat-profile carbide turning tool. It only has to be about 3/16" deep to provide plenty of holding power. And now I'm forming a dovetailed recess for my chuck jaws using an angled scraping tool.
Now that the mortise for the chuck done, I can true the edge of the blank to bring it into round and to help further balance it. This also enables me to pencil on a guide line that will mark the top edge of the platter’s rim.
With the lathe dialed up to a higher speed, I can form the platter"s outer curved profile between the foot and the rim layout lines. I remove the waste with ordinary bevel-rubbing push cuts with my bowl gouge. My goal here is to create a gradual flowing curve from bottom to top as well as to form a foot that’s about 1/4" or so tall. This is a lot of stock to remove, so be sure to stop now and then to resharpen your gouge when it feels like it's heating up too quickly or cutting poorly. That will help to reduce tearout and enable the tool to cut more easily.
Once you have the platter's outside profile the way you want it, it's time to clean up the surface. I do that by scraping with my bowl gouge with the flutes turned inward to remove any deep tearout and further refine the shape. Then I sand up to 220-grit. During sanding, I insulate my fingers with a piece of white synthetic pad behind the sandpaper to keep from burning my fingertips. It really helps!
Well, that takes care of the outside of the platter at this stage. So now I can work on the inside face. The setup involves unscrewing the faceplate, installing my four-jawed chuck on the spindle and mounting the platter to it. Make sure to tighten the chuck securely in the platter's bottom mortise.
Now, the first step to turning the inside face of the platter is to flatten it, removing material down to the rim layout line, as I’ve done here. Then I removed some material at the center of the platter, to establish its overall depth. I’m going to keep this platter 1/2” thick at the center. I can determine that pretty easily using a couple of rulers.
After I marked a line for the rim's width, I could get to work excavating the platter’s interior with my bowl gouge. Try to do this in long, sweeping shallow strokes. And remember to stop and sharpen as needed, to make it easier on yourself. As you’re hollowing out this interior, be sure to periodically stop and check the wall thickness to see that it’s staying even and not getting too thin in places. If you turn a lot of bowls, you’ll probably do that by hand as you go along. Or, you can gauge the thickness using a simple inside/outside calipers like this.
After I had the waste removed down to deepest point, I could clean up the interior and rim with a combination of scraping cuts with my bowl gouge and a round-scraper. Then, it was on to sanding up to 220-grit.
Well, that's it for the interior. But, there’s one last detailing step I like to do on bowls that I'm going to do on this platter. And that is, to remove this chucking mortise from the foot. I think it's a nice finishing touch that takes away all evidence of the turning process. To do it, I mount an oversized faceplate to the lathe, made of scrap plywood that's a couple inches larger than the platter. Then I turn a shallow, flat-bottomed recess into it that matches the outside diameter of the platter, and I make it at least as wide as the platter's rim.
Be sure to cut that recess carefully, so when you press the platter's rim into it, you get a good, friction fit. Now, if I could use my tailstock to support this setup, I would, But this lower outboard bed extension doesn’t allow me to do that. So, to make sure it doesn’t come off, I'm using long strips of duct tape instead. It works just fine. Use plenty of tape, just to be safe.
Now, I can turn away the dovetailed edge of the mortise and shape the whole interior of the foot into a gentle concave curve. Go easy on these cuts, especially if you use a scraper. Then give the foot a final sanding to complete it.
Once the foot's done, so is this platter. Of course this is a really simple example. You could experiment with different rim styles and interior treatments, or make the outside profile concave instead of convex. Maybe you'll create a larger well in the middle for holding food dips or salsa. The choice and creativity is entirely up to you.
Whatever you decide, I hope you enjoy the process of making your platters. Because after all, any chance to do some woodturning is a good day in the shop. I'm Chris Marshall with Woodworker’s Journal Magazine, and thanks for watching!


Keep the inspiration coming!
Subscribe to our newsletter for more woodworking tips and tricks