Choosing a Router Table
A router table is one of the most useful and versatile additions you can make to your shop. With the router mounted securely in a table, both of your hands are free for maximum workpiece control during the cut. That extra control makes some routing operations much easier – routing grooves or edge profiles, for example.
A router table is unlike most other machines in a wood shop because you can customize it just the way you want it. Rockler gives you the most innovative options to create the perfect router table for your shop. There are different kinds of tables, bases, lifts and other router table accessories. Rockler also provides the Router Table Configurator to make your shopping process easier than ever. With so many options to choose from, what are the important things to look for when choosing a router table?
Design Your Router Table with Rockler's Router Table Configurator
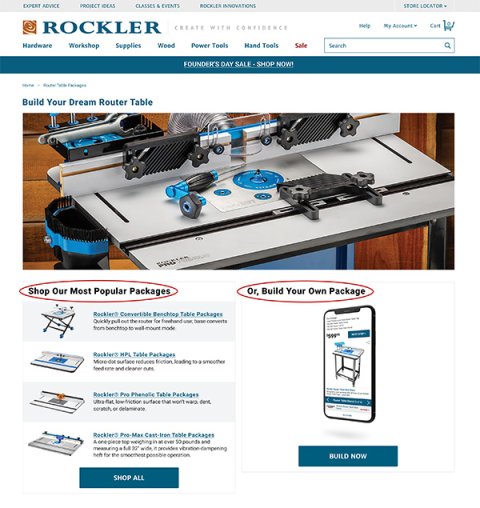
This new tool makes the shopping process easier than ever. Just go to rockler.com/router-table. You’ll be taken to this landing page (photo below). Here, you have the option to either select one of Rockler’s popular router table packages OR click the Build Now button to build your own unique router table package, piece by piece.
What are the most important components for your router table
Step 1. Choose a Flat and Rigid Router Table Top
It's really important that the router table top surface is rigid and as close as possible to perfectly flat. In many router table operations – cutting joinery or treating the edge of a board, for example – precision is crucial. Even minor irregularities in the table surface can lead to skewed joints, uneven edge profiles and other problems.
Rigidity is important for two reasons: First, a router table top that flexes when it encounters the downward pressure necessary in feeding wood won't reliably produce accurate cuts. In fact, it could ruin a profile being routed on the edge of a board or molding. Second, the table must be able to support the weight of the router and plate or router lift without deflecting.
What is the best material for a router table top?
Because of its low cost and reasonably reliable stability, MDF has become one of the most popular materials for both shop-made and commercial router tables. For a hobbyist on a limited tool budget, an MDF table is often the most practical choice. That doesn't necessarily mean compromise. As long as it's made to reasonably high standards, an MDF table top can provide years of light to medium-duty service.
To maintain rigidity, a full-sized MDF router table top should be at least 1" thick. It also should be surfaced on both sides with a material that provides easy sliding and prevents surface wear. Many MDF and particle board tables are surfaced with melamine, which provides basic protection and is slippery enough for easy stock feeding.
Some better MDF tables are surfaced with high-pressure laminate (HPL) Router Table Top, a much hardier material. HPL is made from several layers of phenolic resin-impregnated kraft paper topped with a scratch resistant melamine surface. HPL is thicker and stronger than a single layer of melamine and provides considerably greater impact resistance. An MDF router table top surfaced on both sides with HPL is also more likely to remain flat throughout its life.
A step up from MDF is a solid Phenolic Resin Router Table Top. Naturally rigid and tough, solid phenolic sheet material is an excellent choice for a router table surface. Phenolic router table tops are impervious to moisture, offer extremely high impact resistance and are virtually guaranteed to retain their original dimensions and flatness throughout their service-life. Their durability, lightness, rigidity and dimensional stability make them worthy of consideration, even for shops where they will receive heavy use.
What's the best material for a router table top? As tool manufacturers have known all along, very little beats a hefty cast iron surface for flatness, stability and durability. Cast iron also has the mass to absorb vibration from tool motors and other moving parts. If you use your router table on a daily basis or even if you just want the utmost in accuracy and durability, investing in a cast iron router table top is worth serious consideration.
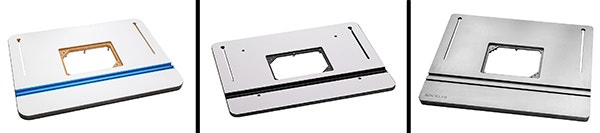
Choose from three router table tops, including the HPL Router Table Top (left), Phenolic Router Table Top (center) and ProMax Cast Iron Router Table Top (right).
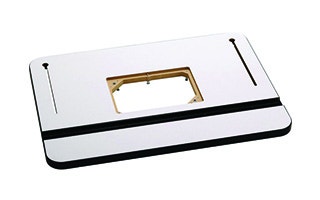
Step 2. Choose a Flat and Rigid Router Base Plate
On most router tables, the router is attached to a base plate, which in turn fits into a rabbeted opening in the table top. The quality and layout of the router base plate can have a considerable impact on the functioning of the table.
Because the router base plate must remain flat while supporting the weight of the router, it needs to be solid and substantial. Solid phenolic and machined aluminum are good options.
Of course, the base plate also must be compatible with your router. Better systems will offer a range of plates that are pre-drilled specifically for one or two router makes and models, as well as blank plates that can be drilled to fit. Be wary of "one-size-fits-all" predrilled router plates; the sheer number of screw holes in their Swiss-cheese pattern makes the plates inherently less strong and offers more opportunity for dust and debris to accumulate and potentially interfere with the feeding of stock. Besides being flat itself, the base plate also needs to sit perfectly level with the surface of the router table, so the table or plate needs to incorporate some kind of a plate-leveling system. A basic system might include four leveling screws adjusted from the underside of the table. A better system will have more points of contact and might include a way of locking the plate down to the table.
If you're planning to use your router both in and out of the table, you'll want to consider how much work is involved in getting the router mounted. Even if you plan to leave your router in the table permanently, the initial setup shouldn't take hours. Check to see whether the router table you are considering makes installation and removal of the router easy.
Step 3. Router Lifts
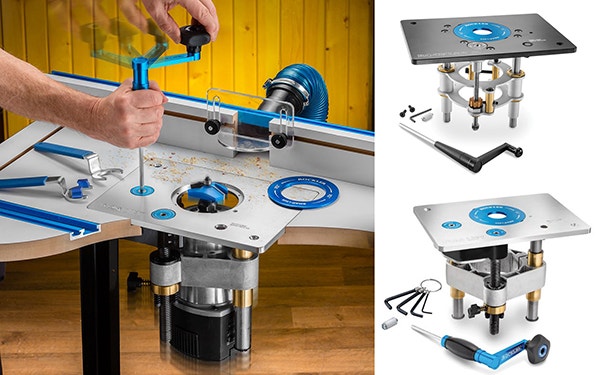
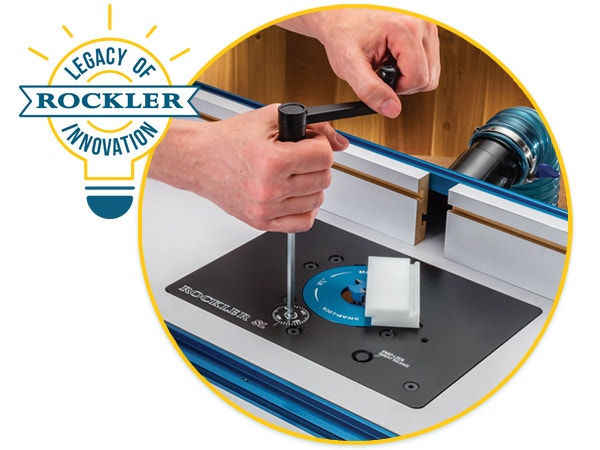
Add a router lift to your router table and you can quickly raise the router to its highest point for easy, above-table bit changes, without having to search for tools or remove screws to get the insert ring out. You can choose between the SL Router Lift or the Pro Lift Router Lift.
Step 4. Miter and T-Slots

As noted above, the lion's share of router table operations involve guiding the stock past the cutter by keeping it pressed against the table's fence. But, sooner or later, you're going to face a task better accomplished with a miter gauge – cutting a dado across a long, narrow piece of stock, for example. So, obviously, you'll need a router table outfitted with a miter slot. A miter slot also comes in handy for securing featherboards and other router table accessories.
Some tables also come equipped with T-slots in various locations for securing featherboards, stops and other common router table attachments. They're often machined into the front surface of the fence but also might be included in other locations. A slot across the top of the fence, for instance, will allow easy attachment of a flip stop or a couple of hold-down clamps when the need arises.
Step 5. An Accurate, Easy-to-Position Router Table Fence

In most router table operations, you'll control the cut by keeping your workpiece pressed against the fence as you advance it past the bit. So you want a fence that is up to the task.
There's quite a range in the quality and functionality of router table fences. The simplest fence might consist of nothing more than a straight piece of lumber clamped to the surface of the table. At the other end of the spectrum are precision after-market fence systems with incremental positioning mechanisms and other advanced features. In between you can find some very good fences, all of which share the same important qualities: They're straight, square and rigid; they're easy to position and have a good adjustment range; and they won't shift when locked down.
There are two basic types of fences: a one-piece fence and a two-piece or split fence.
A split fence consists of two separate, independently adjustable sections. That means the infeed side of the fence can be positioned at an offset from the outfeed side, which allows you to use the router table to joint a straight edge on a board. It also means the fence sections can be moved closer to the bit to provide better workpiece support, even zero-clearance support. These handy advantages come with a potential drawback, though: In nearly every router table operation, whether or not the infeed and outfeed sides of the fence are offset, it's extremely important to have both sides in nearly perfect parallel alignment. With all but the most sophisticated split-fence systems, getting the two halves in acceptable alignment can be a considerable challenge.
With a one-piece fence, the alignment problem doesn't exist. The fence is one solid, straight piece that covers both the infeed and outfeed sides of the table. But that built-in alignment comes with several limitations. First, the clearance hole in the fence for the bit must be big enough to accommodate the largest diameter bit you plan to use. When you're using smaller-diameter bits, a large opening could result in significant gaps between the fence and the bit, leaving your workpiece unsupported in those areas and potentially increasing the chance that it could get hung up in the opening. Second, the infeed side of the fence can't be set at an offset from the outfeed side. If you want zero-clearance support for your workpiece or the option of using your router table to joint a straight edge on a board, you'll have to add auxiliary fence faces.
A best-of-both worlds solution is a sturdy one-piece fence frame outfitted with split sub-fences or fence faces. The solid frame will keep the infeed and outfeed sections of the fence in parallel alignment while allowing you to use shims on the outfeed side to achieve the offset needed to use the router table as an edge jointer.
Step 6. Full-Size Router Table Stands and Cabinets

If you want clean, crisp cuts, you need to keep the workpiece in consistent contact with the cutter and advance it at a smooth, fluid rate. That's hard to accomplish if the table is wobbling or shifting. More important, working on an unsteady base is hazardous. A router spinning a razor-sharp bit tens of thousands of times per minute could do – and sustain – a lot of damage if the table were to topple.
Whether you build a plywood cabinet, incorporate a router table in the extension of your table saw or opt for a dedicated metal stand or cabinet, make sure the table is attached securely and supported properly to prevent shifting and minimize vibration. Some steel stands can be outfitted with locking casters that provide portability without sacrificing stability.

Rockler full-size router table tops can be configured with three bases, including the Rock-Steady Folding Steel Stand, Router Table Steel Stand and Steel Router Table Cabinet.
Benchtop and Wall-Mounted Router Table

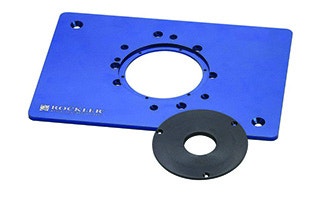
The folding base on our Convertible Benchtop Router Table can be quickly reconfigured for benchtop use, wall-mounted use, or folded up for storage or transport. In addition, the unique router plate (sold separately) lets you quickly remove the router for freehand use, then dock it again for table use—the compact size of the plate makes it light and nimble in freehand applications.
Five Best Router Table Upgrades
Build a Custom Router Table Cabinet Project
Download this Router Table Cabinet Project Plan


Keep the inspiration coming!
Subscribe to our newsletter for more woodworking tips and tricks