5 Router Table Upgrades
What are the best ways to improve your router table? If you're a woodworker who owns a router table, then you already know how much it can enhance your woodworking joinery-making, template-routing and edge-forming tasks. We don’t have to convince you of that! But almost ANY router table can be improved with the right accessories so that it’s safer, more accurate or just plain more enjoyable to use! These five tools and accessories are worth adding to your router table.
5 Router Table Upgrades
1. Install a Router Lift
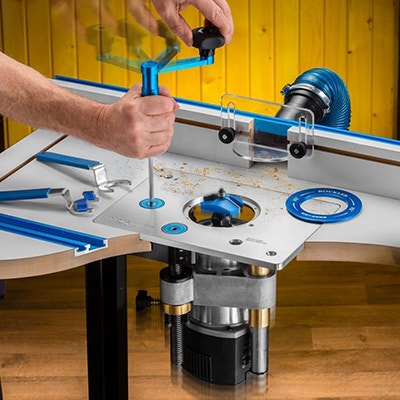
The first one is a router lift. It’s got a plate on top that fits down into a recess in the router table top. There’s a carriage underneath that holds your router motor, and a geared mechanism moves the motor up and down using a wrench from on top of the router table.
Many woodworkers mount their router's standard fixed base plate to the router tabletop and adjust the router’s base to change bit height. It’s a common and inexpensive approach, and it does work okay. But it does have some drawbacks. With this plate system, if your router base doesn’t have though-the-base bit height adjustment, every time you change bit height or change bits, you either have to lift the plate and router up out of the router table or reach around or crouch down to make that adjustment. And that’s a hassle, particularly if crouching or bending over is hard for you.
Here's why a router lift is better: once you’ve got the motor installed on the lift and it’s under the table, you can leave there from then on. The lift raises the motor high enough so you can access the collet for changing bits right at working height. And its geared mechanism engineered for precision. On Rockler’s Pro Router Lift, for instance, each quarter turn of the wrench raises or lowers the router bit just 1/64th of an inch. And that’s the high degree of precision you need to mill joints that fit together properly. Now, there’s no denying that router lifts are expensive. But if you’re serious about taking your router table to the next level of performance and convenience, this is the way to do it.
2. Replace Router Table Fence Small Adjustment Knobs
On the flip side, this second accessory costs under $10, and you’ll appreciate it if you’ve ever scraped a knuckle adjusting the knobs on your router table fence. Oftentimes these fence knobs are too short or close to the fence body to really be able to get your fingers on them very easily.
Well, Rockler has a solution in these new Rockler Easy-to-Grip 5-Star Fence Knobs. They stand more than 4 in. tall, which is taller than most router table fences. So, you can get your fingers all the way around these soft, star-shaped knobs, and your knuckles never touch the fence.
3. Install a Safety Power Switch
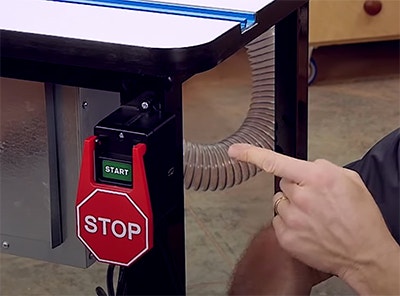
Our third suggestion for an accessory is a safety ON/OFF switch like this. You plug your router into it, and the switch’s plug into the wall. I really like being able to turn my router on or off at table top height instead of having to reach all the way underneath. And let’s hope this never happens, but the big paddle switch can also help you shut your router down in a hurry by hand or even a knee if there’s ever an accident. So, the ON/OFF switch helps you work more easily, but also more safely.
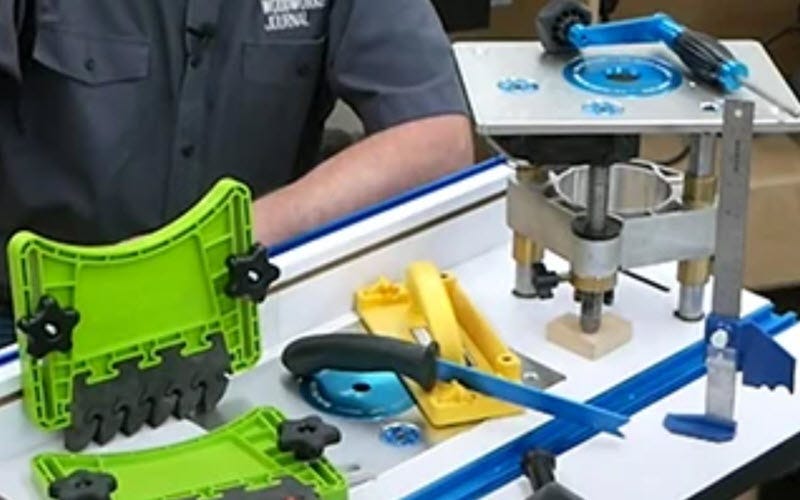
4. Upgrade Your Push Sticks and Featherboards
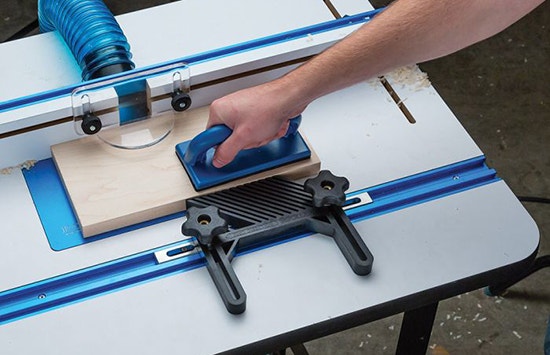
Our fourth suggestion for accessories also has to do with working safely. Use some sort of pushing device — whether that’s a push block or a push stick — and featherboard. Both of these groups will help keep your fingers out of harm’s way while also helping you better control your workpieces for more consistent and accurate routing.
When you're choosing featherboard, buy a pair of them that can be mounted to either the fence or the miter slot. This way, you can press workpieces up against the fence or down against the table. Or both, depending on the situation. And doing that will help ensure that bits can cut properly. They can also help to keep your fingers safe when you’re routing narrow workpieces.
5. Set-Up Your Router Table More Accurately
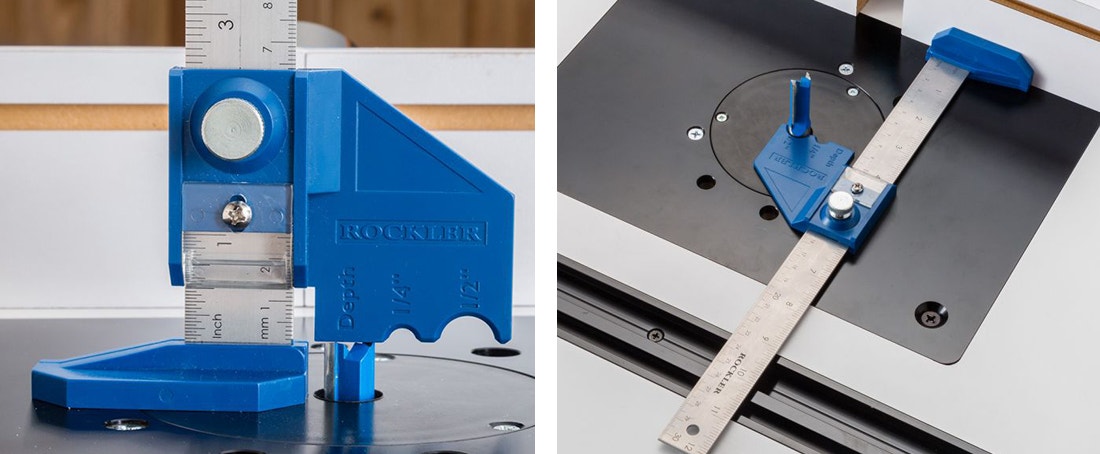
Finally, accessory number five! And this one has to do with bit setups. At times, it’s important to measure bit height accurately. Or, you may need to know the exact distance the fence is away from the bit. The Rockler Router Bit Depth Gauge can help in both ways. It’s basically a ruler that can be stood up on this offset foot. And it’s got an adjustable stop with a clear beveled cursor along one edge.
When you need to set bit height — say, 1 in. — just slide the cursor to 1 in. on the ruler, and tighten the knob. Now stand the gauge up on its foot, and raise the bit until it touches the bottom edge of the stop. The bit height will be exactly 1 in.
And setting the fence an accurate distance from the bit is just as easy, thanks to these two curved notches in the stop. One is for 1/2”-shank bits and the other is for 1/4”-shank bits. Adjust the gauge for the distance you want the fence to be away from the center of the router bit.
Rockler Steel Router Table Cabinet
So, whether its precision, better workpiece control and safety or just to make your router table a little easier and more enjoyable to use, these products can help!


Keep the inspiration coming!
Subscribe to our newsletter for more woodworking tips and tricks