How to Carve a Scandinavian Shrink Box
The basic wood carving techniques for making these Scandinavian-style shrink boxes, or “krympburkar,” date back to the days of the Vikings — but they’re just as fun for modern woodworkers.
Grand Marais, Minnesota, is one of those magical little towns that seem almost unreal. Driving through pea soup fog on the way to get there and on the way back made it seem even more as if I was actually being rocketed through some sort of portal to an amazing place on another planet. Once I arrived at the North House Folk School, the community and dedication to craft magnified the dreaminess of this breathtaking setting.

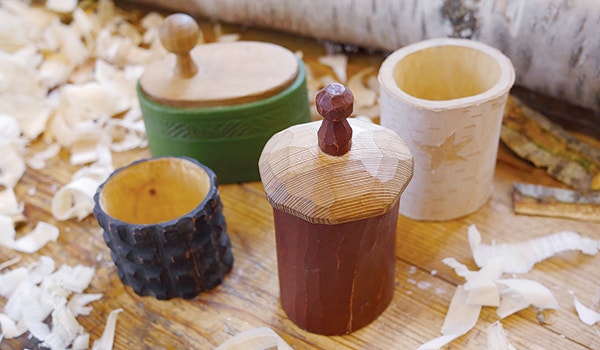
My goal of this trip was to learn how to make Scandinavian Shrink Boxes, which are Viking technology! Thanks to instructors Jim Sannerud and Paul Linden (who made the boxes shown in the lead photo), that goal was easily attained.

These shrink boxes could be constructed using just a saw and a knife, but the steps laid out here make the process quick and easy. When you follow the steps correctly, the shrink box will become watertight for a drinking cup or airtight to store spices or tea.
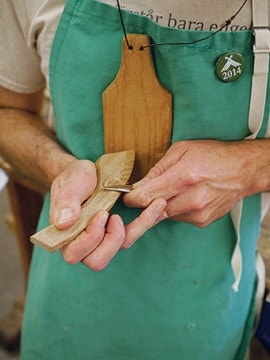
Class started with practice and demonstrations of safe carving techniques. The preferred knife for this type of work is called a Sloyd knife, made by the company Mora of Sweden. We practiced by making butter paddles. The class had all levels of woodworking experience, and Paul discussed changing your technique and using different ways of cutting to help avoid muscle fatigue.
Green Wood, Traditional Tools
The construction of these boxes is rather clever. Essentially, you are exploiting characteristics of green wood. The sides of these innovative canisters can be made using any closed grain hardwood such as birch, box elder, cherry, maple, aspen, etc. My class used birch branches that Paul had harvested the evening before class began. The bottom and lid of the box are made using dry wood that is easy to carve, such as basswood or pine.
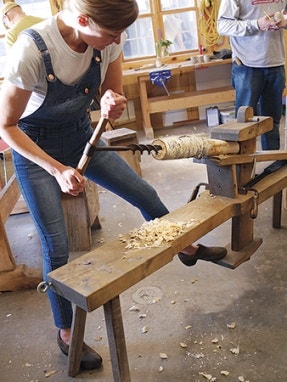
There are a few different tools to use to achieve the following steps. At North House, they have several shave horses and all the hand tools to work in a more traditional way.

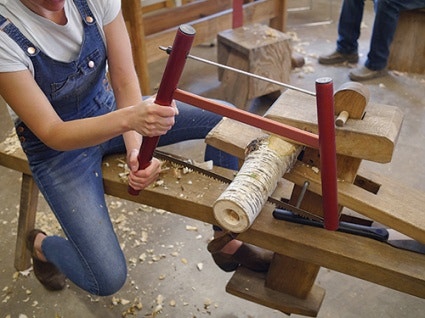
Once you have your wood, drill a hole into the end grain deeper than the desired box height. You could use a drill, vise, and any style drill bit. Then cut off a length for the height of box that you’d like.

Using a sacrificial surface to make downward cuts is a safe and effective way to remove the bark. After doing that, you chamfer the outside edge of the top and bottom just enough so that it won’t be sharp. This cut is made like you are peeling a potato.

Hollowing out the inside of the branch is one of my favorite steps. Roll the wood on your thigh while holding the knife still. When the knife blade is pointed away from you, roll the wood away from you. If that gets tiring, you switch it around holding the blade towards you with your palm up and roll the wood towards you. Work from both ends of the box to achieve a consistent thickness. For a box in the 4" range, a wall thickness that’s between 1/4" and 3/8" is appropriate.
Cut and Fit the Bottom

Now that the inside is hollowed, you will make a groove to capture the bottom. Using a marking gauge with the depth set to scribe about halfway deep into the side of your box, scribe a line about 1/2" up from the bottom.

Then use your carving knife to remove material below your scribed line, keeping the top of the groove flat and angling down over 1/4" for the bottom to pop into.

To make the bottom, start by tracing around the inside of the box onto a piece of wood that is about the same thickness as your box sides. Then cut out the circle approximately 1/16" larger than your traced line.

Make alignment marks on the box and the bottom piece so that you can fit the bottom to the exact shape of the box. You will carve the bottom to mimic the shape of the groove you made, but more extreme.

The goal here is to get the bottom to barely pop into place. Patiently remove material around the edges until you get the perfect fit.

Once the bottom is in place, the wet wood will dry out and shrink around the already dry bottom. It is amazing how quickly this happens! It is best practice to wait at least three weeks before fitting the lid so the wood will be completely dry.
Creating the Lid

Jim and Paul made boxes without lids that would be dry for class so that we could go through the lid making process. There are several ways to make lids: Jim demonstrated one, and Paul showed us another. I chose the method to fit the lid into the opening by giving it a slight angle.

Start by establishing the inside dimension of your box. Put flour into the box. Wet the surface of the wood you are using for the lid. Place the wood on top of the box, and flip it over, putting the flour on the dampened surface.

Pick up the box, and the internal dimension of your box will be left behind. Now go to the band saw and cut the lid out slightly bigger than your line at a 67˚ angle. Put reference marks on your lid like you did your box bottom. Now you will use your knife to carve the lid to fit into the box. Leave the lid sticking out proud about 1/4". By putting the lid on the box, you can make pencil marks where the lid is hitting and then cut that off.

Once the lid fits, chamfer the corners. Then make your knob. I chose to make the knob on the lathe, but you can easily carve a knob, too. Drill a 3/8" hole that is off-center in your lid. Putting the knob off-center actually makes it easier to open the box.

Then make a kerf in the bottom of the knob that is going across the grain so that it will be less likely to spit the whole knob. Carve a wedge that will fit into that kerf. Then glue the knob into place. Glue and tap the wedge in, too. After the knob has dried into place, you can trim the bottom of the knob and wedge flush with the lid bottom.
Finishing Options
Now you are ready for surface treatments! You may want to leave the box textured with your knife cuts. Or you could get out your carving gouges and add more texture. Jim did a great demonstration using milk paint, a wonderful way to add color to any project.
Whether or not you paint your shrink box, you'll want to apply a finish to protect the wood. We discussed walnut oil, non-boiled linseed oil or beeswax as good options. Each of these finishes are food-safe and very easy to apply.
Now that I have learned the process of making shrink boxes, I can make these rather fast. I can do about seven bottoms fitted into the box in one relaxed day. Shrink boxes are great gifts, and it is a wonderful way to accelerate my knife carving skills!
I highly recommend taking the opportunity to go to North House Folk School for any of the awesome classes or events that they offer. The whole experience of being a part of a community focused on enriching lives by sharing skills and knowledge is priceless. Words can't do justice describing the adventure of going to North House Folk School.


Keep the inspiration coming!
Subscribe to our newsletter for more woodworking tips and tricks