Working with Oil Varnish

Originally, the word "varnish" meant a mixture of natural resin and drying oil. Today's oil varnishes usually contain synthetic resin, but like their ancestors, they're durable, beautiful and easy to apply.
Unfortunately, the term varnish may be used for almost anything that contains resin, and that confuses the issue. Before we settle our focus on the use and handling of oil varnish, let’s take a quick look at some of the other coatings called varnish.
The "Other" Varnishes
Spirit varnish is made of just resin and solvent with no oil. Shellac is a spirit varnish, as are other resin and alcohol mixtures. Not surprisingly, they handle like shellac, meaning they can be sprayed, brushed or French polished, and dry faster than oils. Once cured, they are usually more brittle and less durable than oil varnish.
Conversion varnish (or catalyzed lacquer) is a chemically cured, two-part coating designed to handle like lacquer but be as durable as oil varnish. Thus it is formulated to be sprayed and to dry very fast, but over time it cures to a much more durable finish than lacquer.
Water-based varnish is the newest and most confusing, since that term can cover anything from a modified oil to water-based lacquer. Therefore, its flexibility and durability can vary widely.
Waterborne coatings have some or all of their solvent replaced with water. Typically they cure in two stages, first releasing water, then curing by solvent evaporation, polymerization, or a combination of the two. Most waterbornes spray nicely and can also be brushed, though for flat surfaces, I prefer using a paint pad.
Oil Varnish
Though it can be made in many ways, oil varnish is essentially a mixture of a drying oil and a resin. Drying oils, often nut oils, will dry to a solid when exposed to oxygen. The resin can be natural (elemi, colophony, pontianak, kauri) or synthetic (alkyd, urethane). The resin has little effect on the drying, but does affect the durability of the finish. Urethane or polyurethane varnish (the terms are used interchangeably) has the highest degree of both heat and abrasion resistance of all the common oil varnishes.
How It Cures
Irrelevant of the resin, oil finish cures when oxygen, drawn from the air, bonds the oil molecules together. As they go from small to much larger molecules, the varnish goes from liquid to solid. Formulators often add driers which act as a catalyst to speed up the curing time of the oil.
Exterior vs. Interior
Wood left outdoors goes through more intense humidity changes than wood indoors. Thus, the wood moves more and therefore needs a more flexible finish.
In addition to being more flexible, exterior varnish must withstand more intense UV light bombardment, and it must be formulated accordingly.
Traditional spar varnish is a mixture of tung oil and phenolic resin, two components that naturally resist breaking down in UV light. When it does deteriorate, it tends to degrade from the top down, getting chalky on the surface. Sand off the chalkiness and you can reapply more coats again and again without ever stripping the finish. Sadly, that's not necessarily true of some modern varnishes called spar varnish, which is why you need to read the ingredients.
Application
All oil varnishes can be applied the same way, and while most can be sprayed, there are two methods of application I find to be the best. The easiest is to flood the surface with varnish and wipe off the excess. Each coat is applied the exact same way.
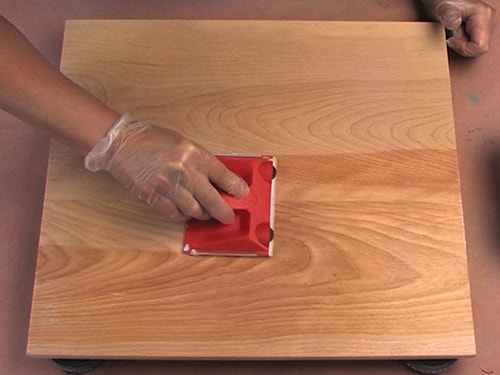
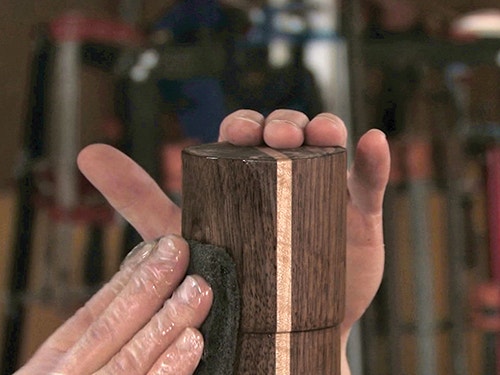
Scrub the finish onto the wood with white or gray nylon abrasive pads as applicators and wipe off with paper shop towels. Apply one coat per day. By morning, the finish will be cured enough so that the subsequent coat won't damage the previous coat. It goes on smoothly even in a dusty environment, but does build slowly. While each coat takes only minutes to apply, a thick coating will require many coats.
Brushing Varnish
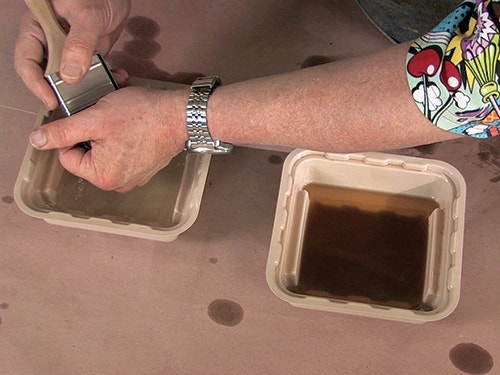
Choose a soft bristle varnish brush, like an ox-hair blend. Put some mineral spirits in one pan and any oil varnish, reduced 10 percent or so, in the other. Make sure the pan has at least one flat side.
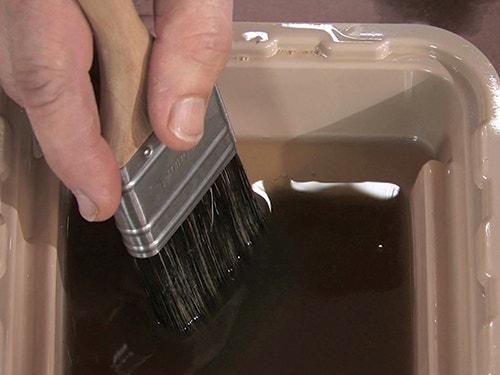
Soak the brush up to the ferrule in thinner, and squeeze out the excess. Hold the brush by the ferrule so the bristles are extensions of your fingers.

Dip only the last third of the bristles into finish, then gently touch only the tips to the flat edge of the pan. That will prevent dripping without unloading the brush.

Starting just in from the edge, deflect the brush so finish rises to the top of bristles. Gently slide the brush out from under the finish, deflecting more as you go. Ease up at the end, then go back and blend the start to the edge of the wood.

As finish starts to thicken on the brush or creep up toward the ferrule, stop and quickly rinse the brush in thinner, squeeze it out and continue with a rejuvenated brush. When the entire area is coated, scrape the bristles over the edge of the pan to unload them.
Holding the still-wet brush at 90˚, gently drag just the tips of the bristles through the finish to blend out brush marks and remove air bubbles.
If you regularly rinse the brush as you work, it will be very easy to clean once you are done and help keep the bristles supple.


Keep the inspiration coming!
Subscribe to our newsletter for more woodworking tips and tricks