Video: Patterned Plywood Roll Top Cabinet
In this video, Michael Alm adds an intricately patterned tambour top to a sturdy roll-top cabinet.
Michael Alm experiments with more patterned plywood, this time adding it to a small cabinet, creating a Tambour top.
You can find more great projects and techniques from Michael Alm at his website.
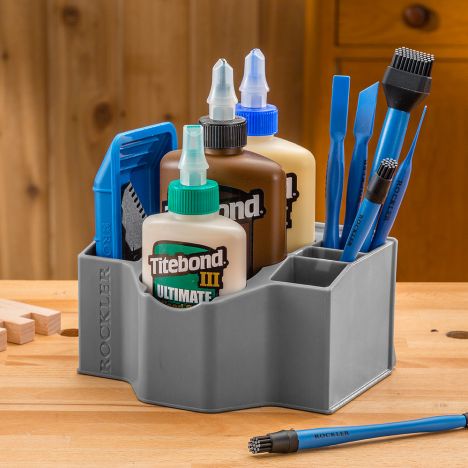
Featured Tools:

Michael Alm: Hey, everyone. Welcome back to the workshop. Michael Alm here. This week we're working on another patterned plywood project. I've had this in mind for a little while now. I really wanted to try patterned plywood tambour. Tambour is the material that makes roll-top desks and things. It's basically strips of wood that run along a track. I thought that the strips of patterned plywood would be ideal for this.
Just like every other patterned plywood project, we'll be starting with a glue-up. I'm just arranging my strips to see if I can get enough length. You've got to measure along the 45-degree angle to determine your length. All I needed was about 10 inches. I got just enough for that and then it was time to grab some clamps and start gluing up. Using Rockefeller Sure-Foot clamps for the glue up. I like these a lot because they're nice and stable and they result in a super flat panel when you're done.
When I do these glue-ups, I like to arrange them on a 45-degree angle. I use a speed square just to double-check that. What this does is just maximizes the amount of material that you're going to get out when you do the 45-degree cut later. We ended up getting three blanks out of that glue-up, and then I can scrape down all of the excess glue. I just use a paint scraper to clean up the majority of it and then I do some light passes with my thickness planer.
I like to only use the thickness planer if it's going along the length of the plies. If you have plies going in alternate directions from the actual knife, it can chip the blade. Use it with caution. Take really light passes when you do that. Now I can make my 45-degree cut. Again, I'm using a speed square for this and my track saw. With that cut, I can bring it over to the table saw and make the individual strips.
Now I can prepare to cut all the strips to length. I use my crosscuts sled with a couple of stop blocks. This first stop block is on a 45. The second one is just flat. I've set it up so that I'm removing just barely that wild edge on one side, and then I'm cutting into linked on the other side. I'm still working on figuring out the math of how much patterned plywood gets yielded out of a certain amount of plywood. [chuckles] As you can see here, I didn't cut enough. It was fine. I ended up actually not making more patterned plywood. I had enough for the main portion of the cabinet, but the roll-top needs upper section too.
For that, I just cut regular strips of Baltic birch plywood three-quarter by three-quarter and I was all good to go. Each patterned plywood strip is going to get a quarter-inch dado on each end. I'm setting that at a height of 3/8. Using a sacrificial fence on my miter gauge, I can make a cut with the quarter-inch dado. Next to that cut, I can add a block of wood. This block of wood is going to function as a stop block. Once I bring in the strips of wood, I just rest it right up against that stop block, and then I can make cuts on either end.
Off-camera, I made a test track for the tambour. I'm really glad that I did this because when I made the first cut, it was obvious that it was a little bit too tight. What I did was I went back to the table saw, raised the blade up slightly, cut the piece of tambour one more time, and then I ended up with a really nice, smooth fit. With everything all set up, then I could just batch out all the parts.
To prep for the fabric glue-up, I needed to find a piece of scrap plywood. It was wide enough and long enough for the entire tambour. I then laid that out on my workbench and attached these off-cut scraps from old two-by-fours down to the sides. I want to make sure that the long ones are longer than the full glue-up and the short ones are going to be the same exact size as one of the tambour pieces.
I pressed those as tight as I could into the frame, and then screwed it down with some deck screws. Once I had the glue-up nice and flat, I could start working on my cloth. I'm just using a drop cloth for this, nothing fancy, nothing expensive. This is literally a $5 drop cloth that I got at a hardware store and I just cut it to width. I didn't want the fabric to run inside of the track because I was worried that it would start to bind up after a bit. I taped that out and then I could apply my glue. I'm just using regular wood glue here, nothing special. When I lay out the fabric, I just want to get all the wrinkles out of it.
I ended up using an iron on this because I think it helps the glue set and it helps get everything nice and flat. I did end up having some issues with the corners though. I had to relieve those because it just kept pulling up, it didn't want to sit inside of that corner. Cutting relief notches, that helped a ton. I ironed for a little while, probably 10 to 15 minutes. With that all ironed and flat, I could remove the excess drop-off material and then I actually pulled the frame away from the glue up.
I didn't want the tambours to accidentally glue themselves together so I actually very carefully lifted the tamBour up, flipped it over, and then ran my hands along each tambour strip making sure it was separated and it wasn't going to glue itself together. The last element for the tambour glue-up is the handle. I'm just basing this on the handle that I used on my router cabinet. I like this curve and this thing's going to sit right above the router cabinet so it just made sense.
With the handle to the right shape, I could glue it up. Just note when I'm putting this on and the shape that I made it, it doesn't have the track on it. It just sits inside of the track. Once I get that secured with a couple of brad nails, I let this whole panel glue up for at least 24 hours. In the meantime, I can start cutting the parts for the cabinet. These are the two cabinets sides that I'm working on here, and they're going to get a rounded top edge. This edge is a three-inch radius. I already made it on the template that I made before, the one that I use to test the tambour so I just trace that out on all four corners.
For the router table, I came up with this concept for doing the curve. I put this plumb bob at the top of it so that I know exactly where the center of the router bit is. Once I approach that curve, I try and keep the panel flat to the fence right at that point. I'm keeping a close eye on it, taking my time and with a little bit of practice, it was good that I did that test run because I learned a lot on that and then these went plenty smooth.
Now that panel has had plenty of time to dry, so I peel back that blue tape and cut away the excess dropcloth. Now to test to see if it works. I was definitely pretty nervous about this, I didn't know what to expect. I've never built tambour before, so this was all a big experiment. It slot in really nice. I knew that it needed to be waxed, so I wasn't surprised when I didn't move very well but I did get it to move on that track and I was super happy. In order to reduce that friction, I sanded all of the edges and then applied a liberal amount of paste wax to the track.
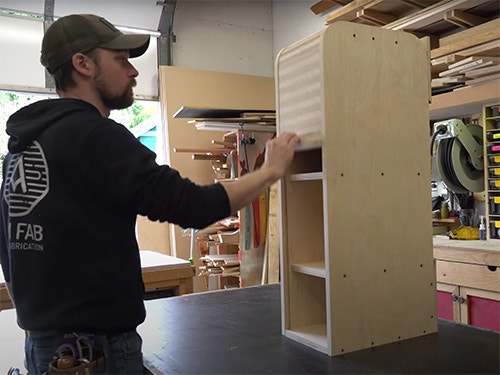
Needless to say, it ran a lot smoother. Now it's time to figure out where to put the shelves. I just experimented with this. I'm planning on using it to store camera gear. I guess keeping it dust-free, I need a good spot for that in the shop. Once I settled on the orientation of it, I could start screwing in those shelves. I pilot drilled from the inside just to get my mark and then from the outside, I actually countersank those holes.
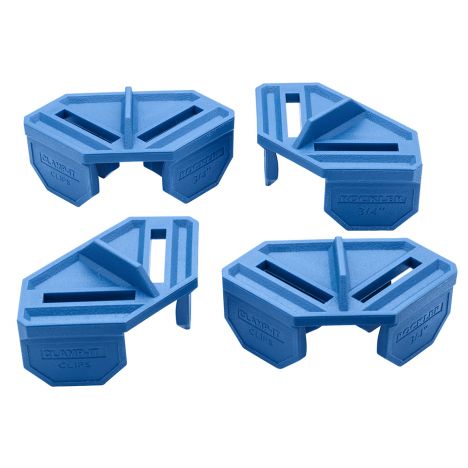
I started by attaching the bottom to the side. In order to hold that in place, I use this clamp-it clip from Rockler. This is super handy. I'm starting to use these a lot in the shop lately. It's just good for holding that 90 degrees while you're screwing in that first screw. With the bottom in place, I can flip the cabinet over and work on the top. I set a clamp at the bottom of it to just hold some tension on that wall, I put it into position and then screwed it in place. The next step was to install the shelves. For that, I just cut a couple of pieces of scrap to the correct height, and then I can just press down on the shelf into those scraps, and I know that that shelf is going to end up perfectly level every single time.
The last element was to install this little block in the back. That's just a stop block to make sure that the tambour doesn't go too far down the track. Now speaking of the tambour, I decided to reinforce that handle. After I installed it, I just was worried that it wasn't going to be strong enough. I added a bit more glue, a bit more of that dropcloth and then I'm ready to install it for the last time. How awesome does that look?
There it is, the patterned plywood tambour roll top. I'm thrilled with this thing. I'm going to be building out the rest of it next week, so stay tuned for that. If you want to watch another video right now, I've got loads of videos on patterned plywood, a whole playlist of it. I also have a playlist on all the shop projects I've done in here so far. Go check those out, and I'll catch you next week.


Keep the inspiration coming!
Subscribe to our newsletter for more woodworking tips and tricks