Video: Making a Walnut Bath Caddy

In this video, April Wilkerson creates a bathtub caddy, perfect for holding a drink, tablet or anything else you need during a long soak.
April Wilkerson's handy bath caddy is a perfect companion to a nice hot bath, the perfect place to store a phone, eReader, drink or book above the tub, with a slatted design to make spills easier to clean up.
You can find more great projects and techniques from April Wilkson at her website.
Featured Tools:

April Wilkerson: Since starting the construction on my new shop, I have been taking a lot of baths, soaking my bones at the end of the long work days. Since I am waiting on my windows to show up, I'm going to go ahead and take the opportunity to make myself a nice bath caddy. I have been using a scrap of plywood for the past few years. However, I think I could do a little bit better than that.
Not only something that could hold a laptop, a tablet, or an e-reader but also something that can hold a glass of wine and of course, my cell phone. Even though this is something that's used around a bathtub, this actually doesn't get wet. However, I did go ahead and make the entire bottom slatted in case a few drops of water do get on it or if a drink gets spilt.
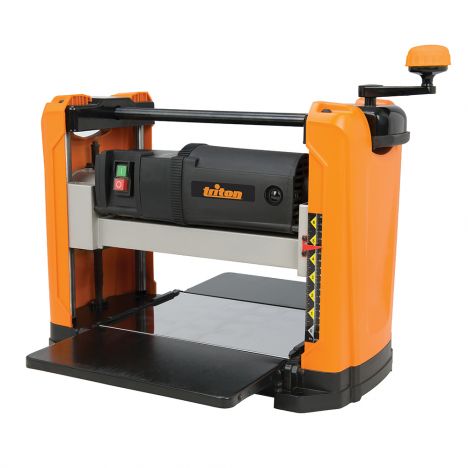
They sent me this awesome hybrid of a laptop tablet that allows me to do a multitude of tasks on one device. From sketching out my design before getting started to viewing it as I'm actively building it. Then at the end of the day, completely switching gears to listen to music, watch Netflix, or even read a book. Yes, that is a touchscreen feature. It is way cool. Now that you see what I'm going after, let's jump into the building process. I have a few chunks of walnut laying around, so I decided to make mine from Walnut. First thing I did was throw it through the planer in order to get a nice smooth surface.
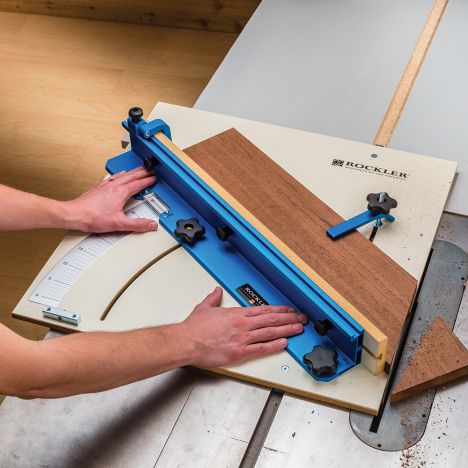
Then I took it to the bandsaw to start cutting it up into what will become the slats. I thought I was going to be able to get all of the slats from this trunk of walnut. However, I ran a few short. I ended up making a few slats from beech to make up the difference. I ended up using another piece of walnut to make front and back rails. Since there's two identical rails in this project, to make it a little bit easier, I'm going to cut them as one and then cut it down the middle. The slats along the bottom are actually recessed into these rails. I used my drop-off platform in order to temporarily attach a board that was as wide as the grooves that I wanted to make.
This created a key so that I could very quickly cut out these grooves. I could place my previous cut on that temporary board, then push my sled forward, and that would make my first pass of the next groove. Then I can align the side of that cut up to that drop platform and make the second pass in order to get a completed slat. Then before switching over to a single blade again, I use the dado stack to then cut in two rivets, which will create the railing system for the Kindle holder as well as the wine holder. Now, I could switch back to a regular blade and cut the chunk in half in order to make up the two individual rails.
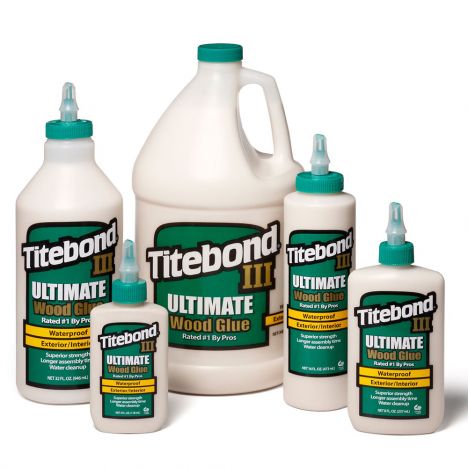
By doing it this way, I can guarantee that both of the rails are identical. Next was to start inserting the slats. I wanted to make sure that I was going to be happy with the pattern that I had planned, so I ended up doing a dry fit before laying down any glue. Once I was happy with it, then I started attaching things with glue. Again, even though this is not meant to get wet, I went ahead and used Titebond III, which is water-resistant on all the applications.
To avoid pulling out every single clamp I own, I came back with a single brad nail to hold the slat in place while that glue had time to set up and dry. After getting one side complete, I then repeated and did the other side. As you can see, I let these slats go wild on both sides because I figured it would be a lot easier to cut them flush afterwards and trying to align them perfectly as I was installing them. After letting it set overnight, I came back with a track saw to cut my slats flush. Oh, getting into my out-feed table a little bit, no big deal. There's options on blade settings on this saw. I changed the setting to plunge halfway and then continued cutting everything flush.
There we have the major foundation of the bath caddy, which looking at it, you could very well just leave it as is. To clean things up a little bit, I stuck the tray in my super jaws and very quickly took a belt sander to the edges just to get things 100% flush, as well as remove any burn marks that I put into the wood. After getting the bulk of the sanding done, I took things back over to my out-feed table and sanded everything down to about 220 grit. Then I got started on the tube platform that will make up the cell phone holder, the wine holder, as well as the e-reader holder.
The chunk of walnut that I'm using for these tube platforms has a lot of cracks and pits in it. Before moving forward with all our cutouts, I mixed together some two-part epoxy to fill in all of these cracks. As you saw, I put painter's tape on the back of these to keep the epoxy from running through the back. Then after making sure that they were filled in, I came back with a lighter to pop any of the air bubbles.
After letting the epoxy fully dry, I was then able to sand it down flush. I used my bandsaw to cut out the very simple wine holder, and then I used a router to make a small recess for the cell phone holder. This recess doesn't have to be very deep. It's just a small enough lip to keep the phone in its place. My router actually comes with an edge cut, but I was being lazy and didn't want to look for it, so I ended up cutting this by free hand. First, cutting around the perimeter, then coming back and removing everything in the middle.
All right. Now, for the Kindle holder, I first made a prototype out of plywood because honestly, I wasn't sure if this was going to work or not, but I basically wanted something that would be able to hold the Kindle in two different positions. One being more upright so that if I'm slumped down in the tub, I can still read. The second position being a little bit more leaned back so that if I'm sitting more up in the tub. I'll tell you what, it actually worked better than expected. Then I took the walnut over to the bandsaw and cut in the slats that I tested to already work.
Now that all of the parts of the caddy are made and sanded, I can now start applying the finish. I'm going to be using the Minwax Helmsman, the spar urethane. This is my go-to finish for anything that's going to be around moisture. Again, it's not supposed to be getting wet, but still, might as well go with something that's going to be really protective in case it does.
I started off with the backside of the caddy, putting it up on bench cookies and then using a brush to put on the finish, and boy, does that walnut look pretty. I applied the first coat and let it set overnight. Then I came back and applied a second coat the next day. Since I would later be gluing in the wine and cell phone holder platform, I left that portion unfinished so that the glue would be able to adhere to it. However, the Kindle platform is free floating so that whenever it's not in use, it can be shoved to the right and used just as a platform. Then whenever I do want to use it, I'm able to slide it into the middle and use it as a holder.
I have seen designs that include rails to keep the caddy from being able to juke left or right as you move it forward or backwards. However, I've been using a piece of plywood for years now. I've never had an issue with it. Therefore, I didn't incorporate it into my design. That's going to be it for this one. I hope that you enjoyed it. I will see you next time.

Keep the inspiration coming!
Subscribe to our newsletter for more woodworking tips and tricks