Video: Making Custom Light Fixtures

In this video, Michael Alm makes his own patterned plywood and brass sconces.
Woodworking techniques and some nice brasswork help Michael Alm build his own custom art deco wall sconces.
You can find more great projects and techniques from Michael Alm at his website.
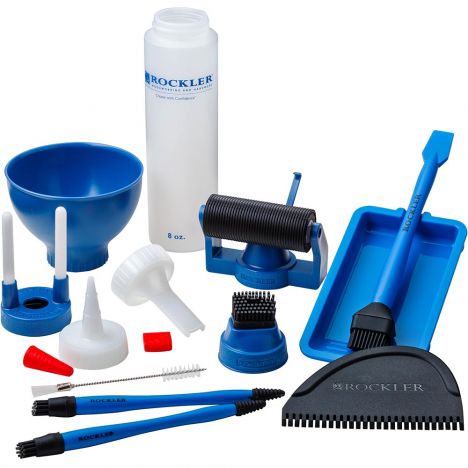
Featured Tools:

Michael Alm: I thought I'd kick this build off by making a little bit of hexagon pattern plywood. I put out a video a couple of months back showing all of the different techniques for making hexagon pattern plywood. If you're curious about that, go check that video out. There's loads of different patterns that you can make with this. The pattern that I've chosen for this one is the art deco pattern.
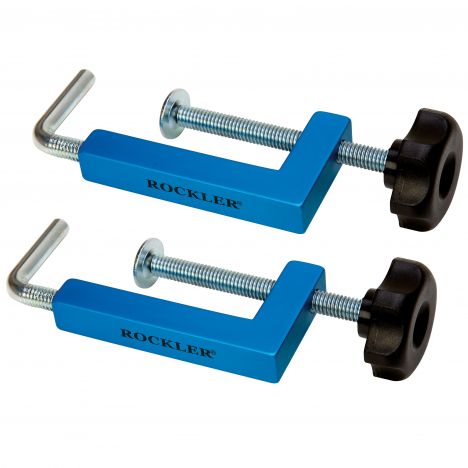
The art deco pattern is made up of two rhombuses and two triangles. In order to make those triangles, I've made an improvement on my jig from last time. Last time I just double-stick taped a block to the side of my fence. This time I added a board and some universal fence clamps from Rockler to hold it nice and secure. With all the parts cut, I could cut them down to size. I don't like to go much longer than 12 inches with these just because it makes the glue-up a lot more complicated. I made these 12-inch strips and then I got set up to do the glue-up.
For the glue-up, I like to use blue tape to hold it together. This is more of a way to just organize the pieces while you're adding glue to them, and then, afterwards, I add rubber bands to hold the whole thing together. If you are interested in learning more about how to make patterned plywood, I'm going to be teaching an in-depth online class on November 14th through Pratt Fine Arts Center. I'm super excited about this. This is the first time I've offered this and you will be able to interact with me live, ask me questions, and I'm going to be demoing a whole bunch of different patterns on there. If you're interested, feel free to check out the link down below and I hope to see you in the class.
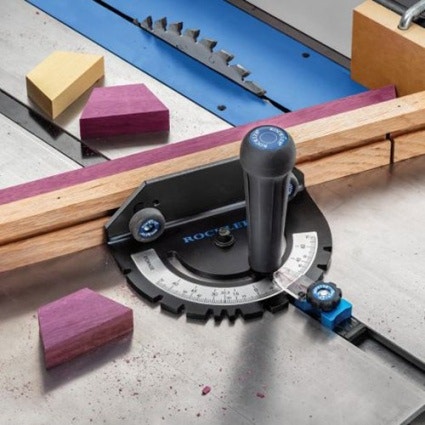
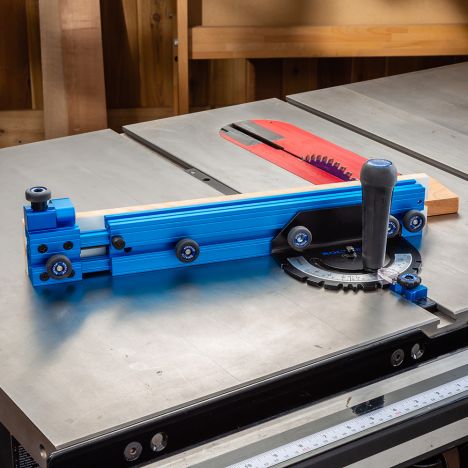
Before slicing the hexagons into individual pieces, I like to sand off all of the glue and for that I just spray glued down some sandpaper to a board. This helps prevent it from distorting. It helps keep it nice and flat and you can get those burn marks off and all the little dried glue bits as well. Using my miter gauge, I cut these blocks into individual pieces. You'll see that I have a spacer in there on the fence so that I just make sure that they don't get jammed in between the fence and the blade.
Now it's time to glue the hexagons up into a panel. In order to do this, I'm just using the same jig that I built in the last video. You'll notice that there are gaps. Hexagons are notoriously hard to get glued up nice and tight. I'm not worried about it because the last time I did this I was able to use wood filler and it looked fine. If you're making this in your own shop, I wouldn't worry too much about the gaps. You don't want massive gaps but a couple of gaps here and there really are not a big deal.
With a little bit of power sanding, you can see that art deco pattern come through. It just looks awesome. I want to make sure that these are nice and flat and I get the question all the time, how do you flatten your panel? I have been power sanding them. A drum sander would be fantastic. I do not recommend putting these through a thickness planer because it'll chew it up and it's actually pretty bad for your planer knives but, again, a flat piece of plywood with some sandpaper glued to it flattens it out just fine.
I had a couple of quarter-inch pieces of ash wood in my shop and I thought it would be cool to add them to the face of these light fixtures. I'm using salt here. The salt prevents the panel from sliding around. You just need a little bit of salt and that locks it into place so it doesn't slip. It was really important that I got the alignment right because I want to make sure that both panels look exactly the same when they're carved so the pattern comes through in the same way. I made sure that the pattern was nice and centered on both panels.
After the panel's dried for 24 hours, I was ready to lay out for power carving. In order to do that, I made this paper template which I just made by folding the paper in half and formed this water drop look. I like this shape because my theory was that the shadow line on it would look really, really cool once it was carved and the light bulb was sitting in the center.
I've definitely missed power carving. It's been a while since I've done it and this was super fun. It's a little surprise underneath that ash wood to have this patterned plywood reveal itself. It's just so fun. I'm definitely going to have to try this again.
For the second panel, it was just basically a rinse and repeat but the nice thing is I have the muscle memory down from the first one. The first one was sort of experimental and this one went way faster and I think it actually turned out a lot better because I kinda knew what I was doing. I'm using the turbo plane for the roughing pass but in order to get a nice finish on the carved section, I'm going to use the flexible sanding pad that comes with the power carving unit. This thing works with the dust collection and as you can see, it gets a nice finish on that pattern ply.
Now that the panels are sanded, I could see all of my mistakes in the hexagon glue-up. It's really not a big deal. You just mix up some sawdust with some wood glue and fill in the gaps. Once the filler had plenty of time to dry, I went over it with the contour sander and went through several different grits getting it all the way up to 320.
The only thing left to do on the panels was to apply a couple of coats of finish. For that, I like to use a water-based polyurethane. I find that it keeps the tone of the wood without yellowing it at all and I just think it looks really good on pattern ply.
I have three coats on the panels and I've made a design decision to go with the brass hardware to go over the top of the light bulb. I thought it'd be cool to match that with brass trim around the actual panel. I picked up some brass. I've never worked with brass [chuckles] so this is going to be new. I've watched some videos on the internet. We'll just see how it goes.
The first thing that I looked up is how to cut brass. Apparently, you can just use most woodworking tools. In this case, I set up on the chop saw. I wanted to make sure I was nice and safe with my chop saw so I got everything locked down and I also added this improvised fence behind there so nothing can get jammed in the blade.
With the pieces all cut out, I decided to move into the metal shop and try my hand at brass soldering. My first instinct was just to epoxy the whole thing together because I was worried that I wouldn't be able to do this part of it, but I figured I'd give it a go. This is the proper way to do it, as far as I can understand, is to solder it. I've soldered pipes together. That's about the limit of my experience. I learned a lot in this experiment and I feel like I understand it now. The main thing is that you want to apply plenty of flux to the surface.
Flux is essentially what cleans it and allows it to adhere to the metal as far as I understand. Then when you have it fully fluxed, you want to make sure that it doesn't shift at all while you're applying the solder. My first two went surprisingly well. I was really happy with those and they were holding up great. Now, I went into the more technical bit of doing the corners and my hold-down method changed a lot during this. I found that you really want to hold it nice and tight. I also found that the 1-2-3 blocks that I'm using behind here kinda acted as a heat sink so I started moving that away.
Another thing that I messed up is that I wasn't very patient with it and I started moving the piece around while it was still hot and I ended up desoldering one of the joints. Another tip that I picked up from someone on Instagram was that I needed to both clean the joint and give it a little bit of a tooth. At this point, I was feeling pretty good. I got a couple of corners going and I was actually able to complete all four sides of the frame. I think eventually I'd like to do a full video on how to solder brass. After this experience, I learned a lot and I think I can do it a lot better. If you guys are interested in a video like that, please let me know in the comments down below.
These sections that I'm putting in right now are to reinforce the corners and they're also a place for me to mount the pattern plywood panel. Now, I struggled with these sections. I could not get the solder to flow, couldn't get it to stick anywhere. I was beading up on the surface and I just ran out of steam. I wait until the next day. I ask a few questions on Instagram and fortunately Jimmy DiResta replied. That was awesome. Thank you, Jimmy.
Jimmy's the man. He knows so much about brass work and he was telling me that I wasn't applying enough heat. I need to apply the heat to the back side, on the other side of the solder so the solder flows towards the heat. Then he also said use plenty of flux. After that, things went my way. It went a lot smoother. I was able to get some really nice strong joints. Thanks again, Jimmy.
These tabs that are on the top of the fixture base are for mounting the light socket too. I probably could have left these square, but I might as well refine them, make them look really, really nice. I found that this stuff sands super easily on the belt sander. That was awesome. I'm loving working with brass now. Now that I've gotten over that hurdle, it's super fun to work with. One of the things that I read is that you need to clean the flux off of your metal. I just used isopropyl alcohol to do that. Then, I could just sand it down with normal sandpaper and then get it a little bit shinier with some Scotch-Brite.
Now, I can prep to mount the panels in. For that, I'm just using a little countersink bit to make sure everything looks really, really nice from both the back side and the front. Then, because that pattern plywood panel is kind of funky along the back edge, it's not perfectly flat, I just ran it through my table saw, did a couple of passes and got it so that both sides are perfectly flat. With the panel inserted, I can flip the fixture base over, pre-drill all the holes with the self-centering drill bit, and then attach with brass screws.
I am so happy with that. It looks so good. All right. The next step is to get it all wired up. For that, I thought it'd be fun to go on a little field trip. My buddy Josh runs a shop here in town called Fixture. He makes custom light fixtures. It's a really cool shop. Let's head over there and get these all wired.
The idea that I have is to put a cut here, pull through here, loop the wire this way, and I think I just want to do a cord on the bottom. These are bushings?
Josh: Yes, they're just inlet bushings threaded just to protect the wire when it goes in and out of metal. It just creates a soft edge. Threading for this and almost all standard lamp parts is 1/8 IPS, international pipe something. I think it's a centering bit. They don't deflect when you're drilling in that stuff. These holes, the other ones will be tapped.
Michael: Okay.
Josh: We'll put those bushings in.
Michael: Two different styles of mounting it.
Josh: Yes.
Michael: One where it's actually tapped, the other ones slides through.
Josh: Yes. I did break. It's always fun working with Michael. We always have fun adventures and don't break many things often.
Michael: Not true. That's not too bad.
Josh: Cracked a joint, easy fix. Fortunately, we'll get our hole finished first. Mostly straight.
Michael: I'm going to get a tap and die set.
Josh: Okay. Let's grab those. Then we'll do the brass socket covers. There's one, two...
Josh: That's amazing. Can you put the whole like fixture base on there and do that.
Michael: Yes. Is there a reason for the reddish Scotch-Brite?
Josh: I like this. They call it very fine. It's got enough tooth to scratch up and clean brass, steel, bronze without leaving giant scratches in it and it's a little heavier duty than-- I think it's called ultrafine, which is if you want a softer finish. This gives nice lines. It's more aggressive than steel wool. We're going to do turquoise Color Cord?
Michael: Turquoise, yes. Josh has some extra Color Cord here in the shop. This is not going to quite cover what we need for this fixture.
Josh: Turquoise Color Cord. It's very pretty, marks pretty easily, so wear gloves or wash your hands very well.
Josh: We'll put those bushings in.
Michael: 16-inch fixture. Maybe another 3 feet?
Josh: We'll do 9 feet. It's the Color Cord 3000. We can use the first one to match the length of the second one, a couple of inches long. We just need four. The part that will go into the socket, you only need about an inch or so of exposed cord. Just clamp it on, go once around, hold the fabric, peel it. You can look to see, make sure you didn't cut any of the wires. We didn't slice it anywhere. Pull the end off.
The reason it's so short is more than about two wraps of the tape, then you'll have a hard time fitting through threaded rod pieces and bushings. It gets too thick. Get our strippers out. You want to strip three-eights of an inch, half-inch of wire off insulation, exposing the wires. This just helps keep the stranded wires from fraying as you are attaching them to your screw terminals in your socket and on the plug.
These little threaded rod pieces, you can get all sorts of lengths. The Color Cord wants to catch on it, so I deburr them with a drill bit. I just hold them carefully and just clean them out. Ceramic grounded plug or the phenolic three-part for one of each?
Michael: What's the difference? Ceramic grounded or phenolic what?
Josh: Cost.
Michael: Cost? Let's do the expensive one.
Josh: All right, we'll do the expensive ones. Ceramic socket, it's grounded. There's the hot gold or live wire and then your neutral is the silver or white wire. Ground is the green. These are bushings that the strain relief is on the outside. We're going to use these because the sockets we have here, I can't put any strain relief inside the socket. If I use these phenolic ones, you can get away without having to use these set screw strain relief parts. I’ll pop the insulator on there, thread this on, tighten the set screw. That'll just help keep your parts from spinning too much. This is the lock washer. Instead of fighting that I’m going to put this like that. Put this part on. It’s a cute little fixture.
I like to use my jeweler's pliers and just give them a little twist. Black to gold and I always have the hook follow the direction of your threading, so to the right. Green to green, white goes to silver. It should look just like that. If you get a few little hairs just make sure you get them out so that there's no shorting.
Socket cap, take one of your screws and carefully drop it down in there. I only need like an inch of exposed wiring. You don't need a lot. Put this all the way down. Slide our wire in. Get it on there. Get it nice and snug. Twist so that when you get it all the way tight that the set screws in the back. This is kind of a dry fit, we'll end up taking the whole thing apart and cleaning up all the brass parts and waxing it before we do the final assembly.
Michael: After the dry fit in Josh's shop, we disassembled the light fixtures, fixed all the necessary parts that needed fixing, and started sanding and cleaning up all of the brass. To keep those parts looking nice we heated up the fixture base with a heat gun and then applied a thin coat of paste wax. Now, all that was left to do was to put all the parts back together.


Keep the inspiration coming!
Subscribe to our newsletter for more woodworking tips and tricks