Video: Make a Corner Cabinet with Etched Glass Doors
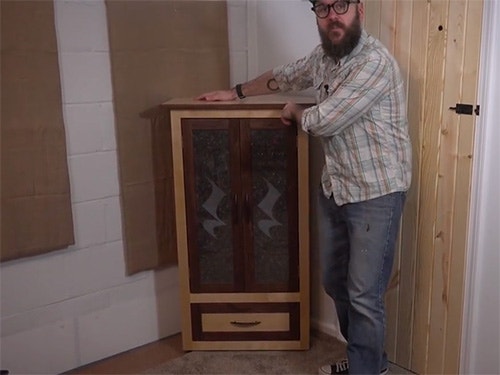
In this video, David Picciuto makes a matching pair of corner cabinets with removable glass doors..
A simplified woodworking project with tongue and groove joinery, face frame, flush glass doors with removable back panel and easy to make drawers.
You can find more great projects and techniques from David Picciuto at his website.
Featured Tools:


April Wilkerson: We'll start off this cabinet by making the carcass, we'll cut the outside pieces and the shelves here in the table saw.
To kick that off, this week's to-do list is a bunch of small things that aren't necessarily challenging or even time-consuming. It's just a matter of taking the time to actually get it done. The goal right now is to not necessarily set things up the way they will be permanently, but more so to get things off the floor, out of boxes, and off all of my horizontal flat surfaces. I started off with pegboard as it's a dead easy solution to get a lot of things picked up quickly.
Now that we have all our pieces cut for the case, I've installed a dado blade in my table saw to the exact thickness of my plywood, and I'm going to cut three dados and each of the side pieces to accept the shelves. Let's do it. While I still have my dado blade installed in my table saw, I'm going to cut a quarter-inch groove along one edge of the side pieces here for a place to put our back panel.
Now it's time to glue up our cabinet. I suggest sanding everything now because it's easier before you assemble it. Also, do a dry run of the glue-up just to make sure you have all your clamps in place and everything fits like you want it. Here we go. I'm going to use these corner guides from Rockler to make sure everything glues up square. I've gone ahead and put a combination blade back in my table saw, and I'm going to cut the face frame.
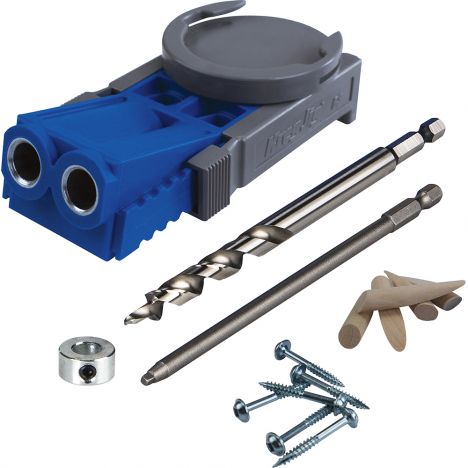
Now that we have all our pieces for our face frame cut up, we're going to assemble it using the easiest way I know how, and that is what this Kreg Pocket-Hole Jig, which comes with these special pocket-hole drill bits. Something to note here, our centerpieces were cut 3/16 of an inch longer than what they need to be. What that means is when we assemble our face frame and attach it to the cabinet, the base frame is going to be a little bit wider than the cabinet. If our cabinet is not perfectly square or our base frame is not perfectly square, and it gives us a little bit more room to play with, and then we can trim that up with a flush-trim bit to make it nice and smooth. Let's get this assembled.
Now we're going to attach our face frame. It is very important that there's a little bit of overhang on both sides and that, that you get to slip right here, just perfect. To keep the face frame from sliding around as we glue it up, I'm going to put little brad nails and clip off the ends here. Just to make sure it is very secure to the cabinet, I'm going to put four pocket-hole screws in here. I don't think the pocket-hole screws are necessary. I've glued on face frames with no other reinforcements, no biscuits or anything, and they've never failed on me. Just to be certain, I'm going to have these pocket-hole screws.
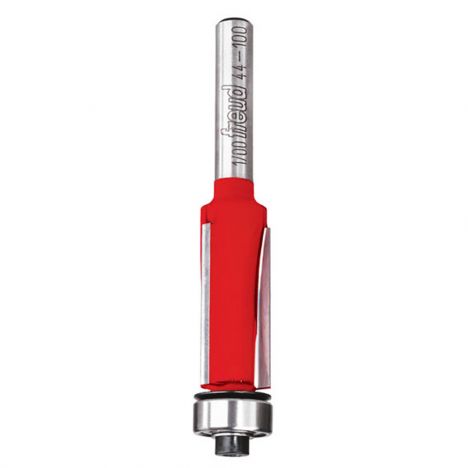
I've gone ahead and started the flush-trim bit in my router. This bearing here, well, right along the case, flushing up the face frame. Next, I'm going to cut all the pieces for the doors and the drawers.
Now that we have all the pieces cut for our doors and drawer, I'm going to cut a groove in all of them. This will accept a tongue-and-groove joinery, and to do so, I will make one pass on the table saw. I'll flip the board around and then make another pass. Let's do it.
Now that we've got all the grooves cut for the top and bottom pieces of the door and the drawer, I'm going to cut a tongue that'll fit in the mating groove. Next, we're going to glue the face of our drawers together. I cut a piece of quarter-inch plywood down to size to fit into the grooves, and we'll just apply some glue to the corners. Now we're going to do the same thing with our cabinet doors, except this time we're not going to enter anything into the grooves. We're going to save that for a later step. Next, we're going to route a rabbit on the back of the doors to hold our glass.
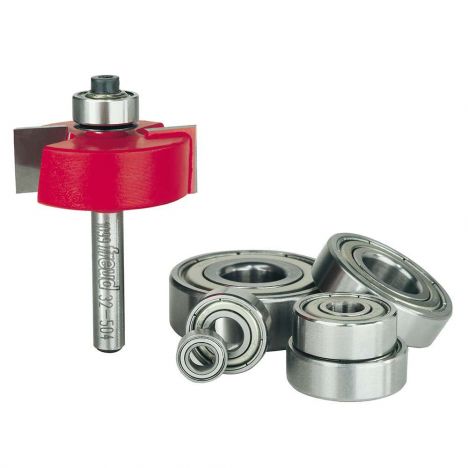
I've got a quarter-inch rabbiting bit mounted in my router. Now I could have done this on the table saw, before gluing it up. I also could have done it on the router table before gluing it up, but I'm choosing to do it this way, so let's do it.
I went ahead and cut all the pieces for the drawer over at the table saw. While at's the table saw, I cut this groove in the bottom of all the pieces to accept a quarter-inch piece of plywood. We're going to assemble this with simple butt joints, glue, and screws. I've already got my doors installed. I'm just using these cheap breasts hinges on the corners here. If you want to see a video on how I installed those, I'll post a link down below. Up next is the drawer here and I've already attached the door slides to the cabinet. I did have to build out the insides of the cabinets so it's flush with the base frame.
Basically, I just took a couple of two-by-fours, playing them down to the right thickness and glue them in there, and then screwed the drawer slides onto that. The next thing I have to do is screw the drawer slides onto the drawer. Then once the drawer is installed, I'm going to take the drawer face and then glue and screw that to the front of the drawer and everything should sit flush. To make sure you have even gaps all the way round, use a deck of playing cards to get everything in place. I'm going to add some wood glue here, but I'm also going to add some hot glue in the corners to kind of temporarily clamp it in place while I get some real clamps on there.
If you're worried about the glue not being strong enough to hold the drawer face, when it comes time to install the handle, I'm going to have the screws go all the way through. I went ahead and cut the top over at the table saw and then cut the angled corners over on the band saw. Then went back to the table saw to cut these thin pieces of walnut that I'm going to glue and attach on the plywood edge. For the doors, I decided to etch a musical quarter rest into the glass. I love the double meaning and the look of the quarter rest so much that I even have it tattooed on my arm.
There are many ways to etch glass. I decided to use the full spectrum laser engraver to do this. If you want to learn more on how to use a laser engraver to etch glass, I'm making a video for Rockler and I'll post the link in the description for that. I've gone ahead and finished the cabinet with boiled linseed oil and polyurethane. I've installed all the hardware glass, the back panel and screwed in the top. I have a few choices of what I could do with the glass. Right now, I have black laminate behind the glass, but I'm not sure that I like it because that element doesn't repeat anywhere else in the project.
I would probably like it better if it repeated in the drawer. I could have nothing behind the glass so you could see the contents of the cabinet, or I could have these birch panels behind it. Let me know what your favorite is in the comments down below. This is the part of the project where you can make it your own. You get very creative with it. You could put anything you want behind the class, gift wrap, cork, foil, even spray paint the back of the glass. The only thing that really makes this a corner cabinet, is the top. The inside is actually rectangular.
I needed a large top to hold my PA speakers in the room. The inside doesn't need to be real deep because that just introduces clutter. I've also made the top removable in case I'm wanting to make a rectangular top and move this up against the wall. Over here on this side of the band room, this cabinet does not have the glass doors. I made this to hold the rack-mountable equipment. To do so, I just installed these walnut side strips here and the gear is screwed directly into that. If you're curious to know what some of this gear is, this is a mixer for the PA here in the band room so we can hear vocals and whatnot.
This is a feedback destroyer. This is a gate, so we don't hear unwanted sounds and it makes it nice and quiet in the room. This is a headphone mixer for when the band is recording, a DI box for recording directly into the computer and a power conditioner. Down here, I'm just going to hold some extra cords and things.


Keep the inspiration coming!
Subscribe to our newsletter for more woodworking tips and tricks