Video: How to Make Professional Quality Picture Frames
In this video, Michael Alm covers the basics of making picture frames.
One of the most confusing parts of framing is how to plan your frame. What kind of mount, what spacing you want around the art, and what allowance you need to make the art fit in the frame properly.
You can find more great projects and techniques from Michael Alm at his website.
Featured Tools:

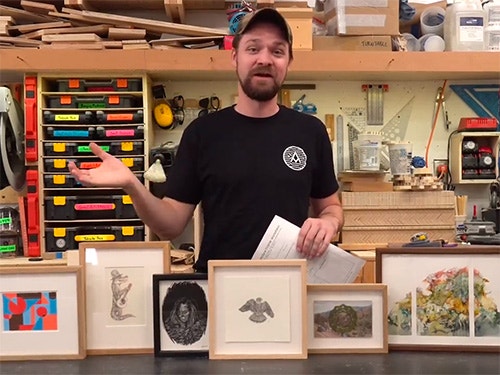
Michael Alm: Hey, everyone. Michael Alm here. This week, I'm going back into frame making. Last week, we made the picture frame sled right here, and this week I wanted to talk about the basics. I was realizing that I've made four videos on frame making already on my channel, but I've never made one about making a basic picture frame, and this is the style that I'm going to be talking about. This style I like to call The Gallery Frame. This is what you're going to see in a lot of art galleries. This is my bread and butter. When I'm working with clients, I make this all the time.
The other thing that I wanted to cover is how to properly measure your artwork for a frame. This is something that is often overlooked, and it's an incredibly important step. I've made these worksheets available for you guys. Whenever I make a picture frame, I will fill this entire form out to make sure that I don't get confused on the measurements, because oftentimes when I'm making picture frames, I'm making like 10 or 15 of them. This keeps all those measurements straight. I'm going to go through all the details, so stick around, and I'll show you how it's done.
Before I start measuring the artwork to fit into the frame, I like to choose what mount I want for that art piece. A mount is just basically how the artwork fits into the frame. There's three main categories of this. There's the matted where you put a matte board surround on the piece of artwork. There's the float mount where it floats in the middle of a matte board backer, and then there is the flush mount, which is where the art piece actually fits inside of the frame. Just note that if you're going to do a flush mount, you'll lose about a quarter inch on all sides of the art piece. Make sure that the art piece is appropriate for that.
The next step is to start measuring the artwork, and for that, I've got this worksheet which is available for free on my website, so make sure you download that. It makes it a lot easier. These are the art pieces that we're going to be framing, and the first one is this little six-inch by six-inch piece by Zoe Keller. I've got a section up there for the title, and then you can fill out the basic art size.
The visible area is exactly what it sounds like, it's the area that will be seen, and so for a matted piece, you would have the mat covering the piece of artwork. Now, I'm going to be float mounting this piece, so I don't need to worry about that. The visible area is going to be exactly the same size as the art piece because you're going to see the entire art piece.
Now, I can move down to the mounting section. The mounting section, you choose one of the three categories, and then you transfer your math down below. Six inches by six inches from the visible area category, and then you add in your reveal. This is however much exposure you want on all four sides. I do the four sides individually because sometimes you want a little extra weight at the bottom. You just add those numbers together, get eight and a half by eight and a half, and then I can transfer that down to the framing area.
When it comes to the frame internal dimensions, the ID, you want a little extra space in there. You want a little bit of wiggle room so that it doesn't bind inside of the frame. I like to add either a 16th or an 8th inch, and then I can continue down the worksheet. The rest of the framing area is just basically what you're going to put inside of the frame whether you're going to use plexiglass or glass spacers, what kind of mat you're going to use, and we're going to get into the details of all those parts in a little bit. The main thing in this section is you're establishing the minimum depth of the frame so that you don't make a frame that's too shallow to hold the artwork.
Then I like to draw a little profile in the bottom right-hand corner so that I have a quick reference guide for all the measurements when I go to mill it up. All right, that's one down, and I'm going to do a couple more real quick so that you guys can see how simple this really is. For this piece, it's seven by five inches. There's a little bit of depth to it. There's an eighth of an inch, and then it's going to be a flush mount. Which for flush mount, I still say the visible size is the same, seven inches by five inches.
Circle that, seven inches by five inches. There's no reveal on it, so it's again seven inches by five inches. Flush mount is really the easiest to measure for, and then the frame ID, I add that eighth of an inch so I have a little bit extra slack in there. Then go down the rest of the sheet, fill out all the different parts and stuff, and draw out my frame profile. That's it. It's pretty quick. I think each piece takes about five minutes to measure out.
Just so we've got all the bases covered, I'm going to quickly go over what it's like to measure out a matted piece, and so this one's already matted obviously. I can show you how it was measured. I did the basic art size which is the actual outside area. I determine what of that artwork I want to be seen, and then that becomes the visible area. From that visible area, I decide on my reveal the matting of this is consistently two inches on each side and on the top, but on the bottom, they've added a little bit of extra weight which is another three-eighths. It's two inches, two and three-eighths. Then another two inches, two inches, and then you add all those numbers up and you get your outside dimension. Take that outside dimension, once again, add an eighth to it, and then fill out the rest of the form like you did before. It's super easy.
Now that everything is measured I can remove the artwork from the room which I like to do because I don't want to damage it at all. I'll then take all of those sheets that I created, and I'll condense them down into like one super sheet where all the information that I need for milling is on there. I'm going to be using three different species of wood on these frames. I'm going to be using white oak, ash, and walnut. I'm going to cut them down to appropriate sizes so that I'm not dealing with super long lengths because these really aren't that big of frames.
When starting the milling process, you really are looking at the outside of the profile. I'm going to cut them to height and to width, and batch out hopefully more than I need.
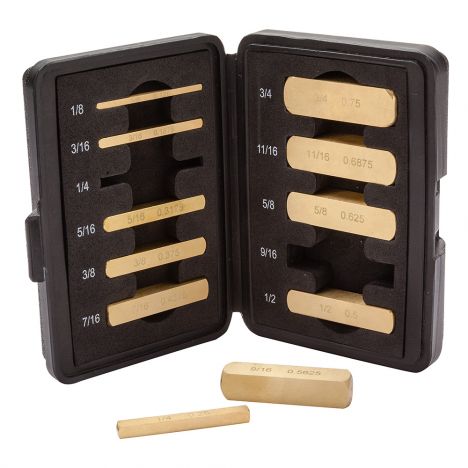
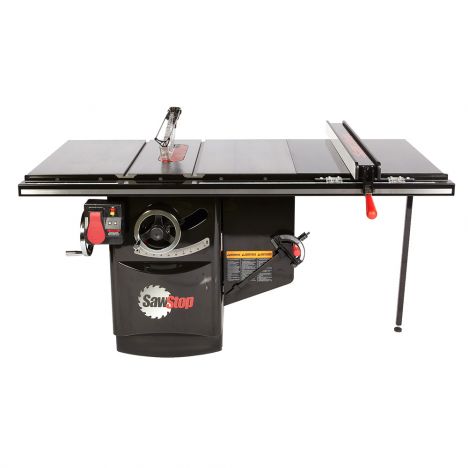
With those all milled to size, I can start thinking about the rabbet, and for that, I like to use these setup bars from Rockler. Super handy to have, they come in all sorts of different sizes. The standard for a rabbet on a frame is a quarter-inch by a quarter-inch. I move all the frame parts back over to the table saw, and set them up so that they're milled in the right direction. This is your chance to choose what side of the frame is shown on top, and sometimes there's a knot in the middle of a board or something like that. You want to hide that either on the inside or on the bottom. To complete the rabbet, I can raise the table saw blade up to height, and then trim out the excess. I have two different width frames that I need to mill up, and in order to do that, I shift the table saw blade over and start milling those other sections.
That is your basic picture frame profile, and for most of these, I'm just going to leave them as is, they're great. For a couple of them, the ones that I made a little bit wider, I'm actually going to use the router table on them, and add a bit of a decorative edge.
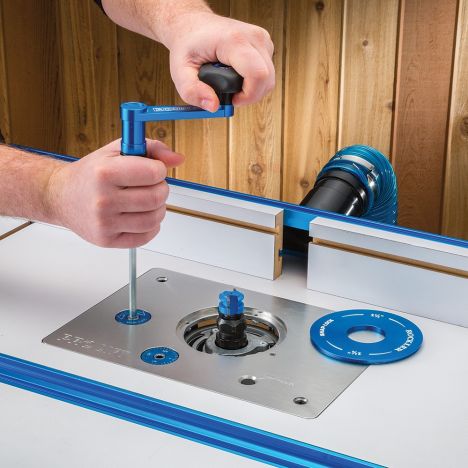
I've made this profile frame many times in my shop, and I really like it a lot. It's super simple. I just use a three-eighths diameter round nose bit set into my router lift so it's just peeking over the edge of the top of the table so you get the full radius. Then I set the fence so it's right in the middle of that bit, so you're only getting half of the bit exposed, and that creates a nice little bead on that front edge of the frame.
With all the frame parts made, I can stack them with the appropriate sheets, and bring those over to the table saw. Now, on the worksheet, you're going to be looking for frame ID, that's the interior dimension of the frame, and that's what you're going to set the shuttle on the jig too. Once the shuttle's set, you can start cutting out those parts. Once you have the first size cut, you can shift the shuttle over to the next size, and then cut that as well.
The beauty of this system is that now it's pretty mindless, you're just copying the things that you have on the sheets and as long as you get those dimensions right, it should come out perfect.
That's a lot of rain. After a brief break to enjoy the rainstorm, I was ready to glue up all the frame sections. I use the blue tape method and as someone pointed out in the notes last time, you don't actually have to use blue tape for this but this is a super handy trick to securing your frames without a whole bunch of clamps.
With the frames all glued up, it's time to add splines. Splicing is a way of reinforcing a miter it's basically cutting through the miter that you just glued up. The miter itself is not inherently that strong because it's basically an end grain to end grain glue up but it's really easy to cut splines into it and I just have this super simple spline jig. I don't really have a video on it. For the thinner frames, I like to just add one spline for this taller frame. I think it looks better and it's a lot stronger with two.
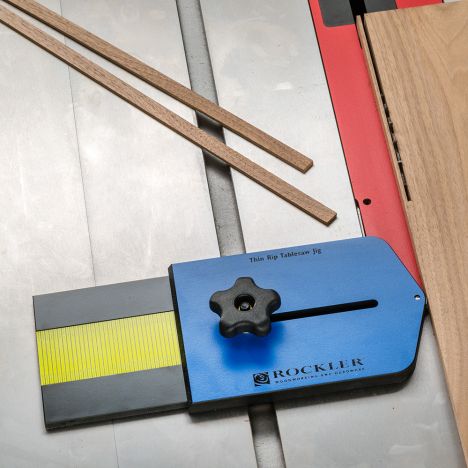
Now that we have the holes cut for the splines, we need to cut the splines themselves and for that, I'm going to be using this thin rip jig from Rockler, this thing's super handy and it makes it a lot safer to cut really thin strips on your table saw. The way that this jig works is it basically acts as a marker so that you know where to lock down the fence of your table saw every time, so it's cutting an eighth-inch on the left-hand side of the blade away from the fence as opposed to in towards the fence.
You see here, I've cut the first strip out, and then I can move the board back, adjust the fence to that mark, and then I can cut a second strip. The fit that you're looking for is tight but not super tight. If it's too tight, it'll end up swelling when you put glue on it and you won't be able to get it completely seated in a joint.
I don't know why but I find splining really meditative. I did this a ton when I worked at the frame shop and it's still something that I really, really enjoy. : There's a bunch of different ways to trim splines, you can use a router table, you can use a bandsaw. I like to use a pull saw. This takes a little bit of practice but by the time you've done four or five of them, you'll definitely get the hang of it. The main thing is you don't want to cut into the frame and so you can cheat outward a little bit and leave a little bit of excess out there to stand away later.
As you probably guessed, the next step is sanding and I like to hand sand these smaller frames. They have a tendency to get distorted if you use a palm sander. Some people are adept enough to use the palm sander on this stuff I definitely am not, so I like to hand sand. I use a bunch of different sanding blocks and stuff to just get into all the little areas of the frame.
I'm also very cautious about the corners of the frame. I don't want to cross over that grain with-- This is 120 grit. It's just really hard to get those grit lines out and so it's better to be cautious on the front end and have to repair on the back end. All the frames that get a water-based finish, I will raise the grain between each grid of sandpaper. I just use a wet rag for this. It pulls that grain up so that when I introduce the water-based finish later, the grain isn't going to raise in that finish.
All right, so all the frames are sanded up and they are ready for finish. If you want to learn more about woodworking finishes, I've done a complete video outlining all the finishes that I use in my shop and I'll leave a link for that right here. For dark frames, I really like to use an oil-based finish. This is Arm-R-Seal and I've had a lot of success with it. It looks great on walnut, it really brings out the depth of that wood.
For the small black ink drawing, I thought it would be fun to use a black ink finish. This is India ink and it is really black. It's great for darkening all sorts of different types of wood. I really like it on open grain woods like walnuts and oaks. The main thing is to make sure you get it fully saturated so it gets into the depths of the pores. After that, I apply a coat of General Finishes Arm-R-Seal, and it's ready to hang up to dry.
For the remaining frames, I want them to stay nice and light in color so I'm using a water-based polyurethane. This is the same stuff that I use on my pattern plywood. I like it a lot. It doesn't darken anything, it doesn't yellow, it's a great finish.
After applying three coats to every frame, I was ready to fit and for this, I'm just using plexiglass. I like plexiglass more than glass because it doesn't shatter. It's easy to work with and you can cut it on a table saw.
When it comes to fitting frames, the main thing that you want to keep in mind is what is archival and what isn't. Archival just means that it doesn't contain acids and it won't damage the piece over time. You've probably seen a piece that is yellowed from the backer or the mat board itself has yellowed. Just make sure that whatever is coming into contact with the artwork is archival. You can use cardboard backers, but as long as there's a piece of matte board in between that is archival, you should be good.
I'm mounting this piece to a piece of archival foam core, and I'm using a linen hinge tape. I will post links down below to all these materials. The main thing with the linen hinge tape is it is archival, and it is water-soluble so it can be removed from the artwork later on down the line if necessary. You apply the hinge tape by folding over one side, you put the broad side down to your backer, and the smaller side to the art piece. This stuff works like a stamp. You basically just apply a little bit of water and stick it down.
One thing that I don't think I'm going to have time for in this video is talking about cutting mats but I will show you how to apply a piece to a mat. You basically just add two pieces of that hinge tape across the top and you want to make sure that it's only hinged on the top. This goes for all of these, you want to make sure that there's room for expansion and contraction because if you put it on all four corners, there's a good chance that it'll buckle in the center.
When using Plexiglas, it always has this static charge, which is so annoying when you're in a woodshop and all it wants to do is attract sawdust. There are cleaning products out there that de-staticize and clean the surface of the plexiglass. It's really essential to use a plexiglass cleaner with plexiglass because a lot of other cleaners will scratch the surface.
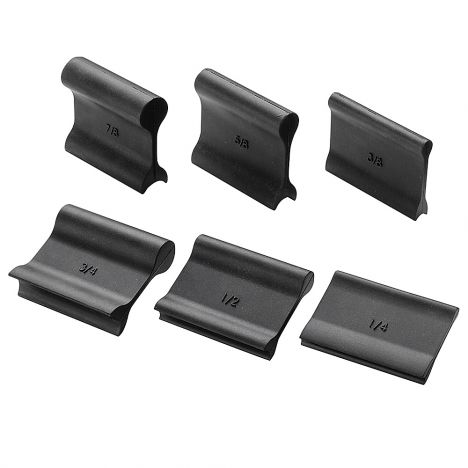
Spacers, so these are spacers and these are the professional kind. These are the ones that you will find in a professional frame shop. You can buy them online, but if you don't want to pick these up, they're a little bit on the pricey side. You can always use scrap pieces of wood with double-sided tape on the back of it or you can even use that archival foam core, scraps from that. There's a lot of ways to work around this. The nice thing about the professional stuff is it already has a sticky back on it and it's already cut to size.
The reason you use a spacer is to make sure that the artwork doesn't come in contact with the Plexiglas. Certain types of pieces will be more inherent to stick to the plexiglass or the glass and sometimes it'll even cause mildew or mold, so you want to make sure that you have a nice air gap in between the artwork and whatever glazing you're using. If you have a mat around your piece of artwork, you don't need a spacer. That is basically functioning as a spacer. Spacers tend to be used more for float mounts or flush mounts.
With the frame prepped and everything ready to go, I can pop the artwork into the frame, and then I use this little point shooter to shoot points into the inside of the frame. This is another thing that is a specially tool. They're not super expensive. I'll post a link down below. You can get away with nails, there are press-in things but really the point shooter if you're going to do more than a couple of frames, it's worth investing in. All right, so there you go, that is the basics of making picture frames.


Keep the inspiration coming!
Subscribe to our newsletter for more woodworking tips and tricks