Video: How to Build a Golf Bag Organizer
In this video, April Wilkerson designs and builds a golf bag organizer.
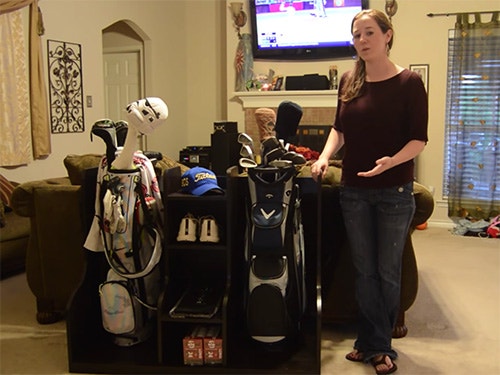
April Wilkerson has a great gift idea for Father's Day (or for yourself) with this golf bag organizer. Perfect for two bags and all your balls, cleats and other accessories.
You can find more great projects and techniques from April Wilkerson at her website.
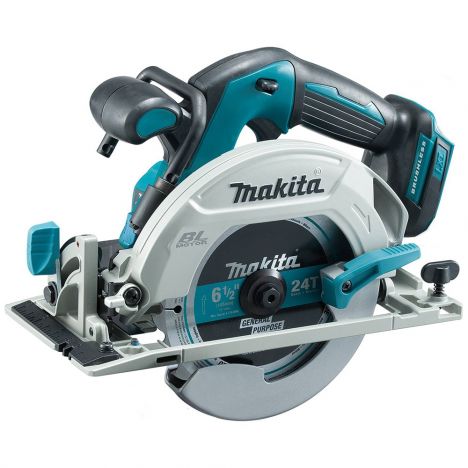
Featured Tools:


April Wilkerson: One of the local high school golf teams is having a fundraiser and they asked me if I would build something for their auction. I thought a golf bag organizer would be pretty perfect for this.
Now, this project actually requires one sheet of plywood plus a little bit extra. I had some scraps that I was able to use from previous projects so I only purchased one sheet of plywood, but if you don't have any scraps you will need two. I cut down the sheet by making the first cut with my circular saw then moved over to the table saw to finish cutting up the material I'll need for my side.
At this point, I just hand-drew a design with some curves to make up the side, then once I liked it, I cut it out with a jigsaw. Then I used this first one to trace out a second to make a second side.
Then next, I cut a footer. I'm sure by now you all know how I work, I just build things as I go. I put everything in place and gave it a good look over, bottom would be flush with the footer, cubby in the middle, maybe an open shelf to put stuff. [chuckles] That's what those hand signals mean. Oh, and taking time to love on your shop animals never hurts the design process. I don't know if it much helps, but it definitely doesn't hurt.
Okay. Next, I cut the bottom and put in a few pocket holes on each end. Then I switched out my regular blade for my dado stack and put in two dados that will later receive the center cubby section.
To start assembling things, I grabbed the footer and attached it on one end then laid it on its side and attached the bottom. I lay the unit on its face to make attaching the second side easier. Then while I was down here, I added three runners to get the bottom a little bit more support.
All right, next was to start on the center section, the cubby section. Once again, I hand-sketched something, cut it out with a jigsaw, then used the first as a template to make the second. Next, I cut three pieces that will become the shelves. Now, when I decide the spacing on something like this, I try and use items that will actually be going inside the shelves. I took the three shelves and put in a few pocket holes on each end. However, before attaching everything, I decided to apply the edge banding. This was a tip that one of the viewers left me in a previous video. I'll tell you, it's a lot easier to apply this edge banding to a loose piece than an assembled piece.
After it was all applied, I came back with a box blade to trim it up. Then I continued to apply it to the rest of the unit as well as the cubby sides. Next, I started attaching the shelves. I would put in the first screw then take a tape measure and measure that the front and back were the same measurement before putting in the rest. When one side was done, I just clamped on the other side and attached that as well.
To actually attach the cubby unit, I first laid down some glue then use my joiners mallet and a spare piece of board to persuade it into place. I went ahead and clamped it and let it dry for about an hour. Then I started attaching the back first by putting glue all over the back edges then using my nailer to hold it in place while the glue dried.
The last thing to do, building-wise at least, was to cut four braces and attach them on the top and the bottom of the two back compartments. This really stiffens it up so an entire back piece is not necessary. Here's the completed unit. Now, just to finish and I think it will be done.
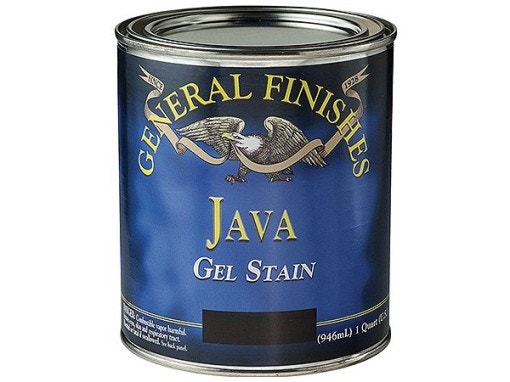
Okay, this is always an exciting point in the project, putting the finish on. Now, I got this gel stain from Rockler and it's made by General Finishes. I've never tried it before but I'm really looking forward to giving it a shot. This gel stain is unlike any finish I've ever used. It has a very thick consistency as you can see here. It made for a very even coloring even though I'm using pine plywood. I went ahead and put down two coats of stain and then two coats of the satin Topcoat finish.
Now, remember that Father's Day is coming up. I don't know about yours, but mine loves to play golf so if you'd like to build them something special, then keep this in mind. Also, keep in mind that you can very easily turn this into a single bag holder by just lopping off one of the ends.


Keep the inspiration coming!
Subscribe to our newsletter for more woodworking tips and tricks