Video: How To Build A Buffet Table With Storage
In this video, April Wilkerson shows you how she built a custom buffet table for her outdoor kitchen.
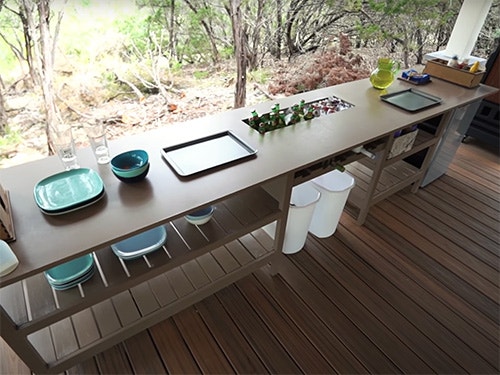
April Wilkerson wanted a spot to serve food and drinks as well as place condiments, napkins and more outdoors. This buffet fits the bill and includes a drink inset and space for a mini fridge.
You can find more great projects and techniques from April Wilkerson at her website.
Featured Tools:


April Wilkerson: It's funny how building one thing leads to an entire list of new things to build. In this video, I'm going to be building a buffet table to go in the outdoor kitchen I just finished. Now that I've been using this space, I found that the grill person uses the countertop by the sink, which doesn't leave much room for the finished food and appetizers. In this video, I'm going to be showing you how I built a very simple solution that not only gives me a place to serve food but also sets out everything that goes along with it such as plates, utensils, condiments, wine, glasses. Let me show you the process.
If you've been a viewer of mine for any amount of time, you know I always model up my entire project first before getting started. This allows me to do all my design tweaking virtually instead of wasting material. Another huge benefit is it allows me to enter into my shop with a cutlass so that I can set up at my miter saw with all my material and cut it down to size. I adjust a stop block on the wing of my stand, then make piles of the parts needed. After I cut my boards to length there, I take everything to the table saw to cut down to width. If you're interested in a set of plans for this project, please check out my website.
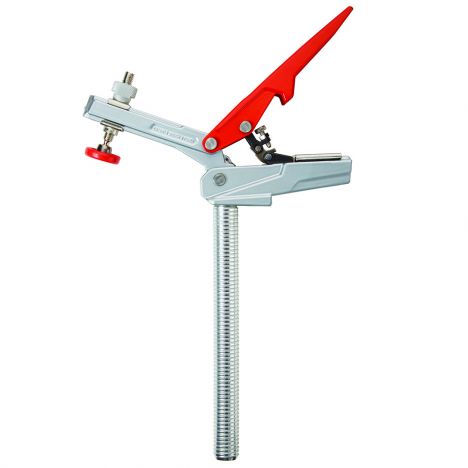
After getting all of the parts cut that will make up the body, I started drilling in pocket holes. You can, of course, use any joinery method of your choice, but pocket holes is great for this project. I'm using the armor tool self-adjusting jig that adjusts the collar on the bit, the drill block guide, and the tension on the clamp at the same time, all based off the material thickness you're using. In my case, I'm using a one by board, which is actually three-quarters of an inch thick. By the way, I built with this project with 100% of scraps in my shop.
That's why it's such a hodgepodge of materials. You'll see me use treated, untreated walnut ply and cedar. I don't care, as I'm going to be painting mine to match my cabinets in the space. For assembly, I set things up on my armor workbench and started joining things together. I'm starting off with the four uprights. Each one has boards connecting the front leg to the back. Since I already drilled in my joinery, I just had to apply glue, get the spacing correct, and attach it with a screw. You can see me using a scrap piece of wood as a spacer to make things go quicker.
I'm using my bench dog clamps to clamp down on the leg as well as the stretcher. This keeps both parts flush with one another instead of letting the screw entering the leg push that part out of flush. Oh, also, for glue, if this unit has potential of getting wet, make sure to use an exterior wood glue. Next, I repeated the process but now started attaching the stretchers that will attach each leg assembly to each other. After getting one side attached, I flipped it over to the other and repeated. After making the large unit, I did the same to make the smaller unit.
Now, I know my table is pretty long, but keep in mind, you could take just the large or the small unit and make it a standalone table. Then we need slots that will create the shelves, then we need a top to create a top. Okay, that is the framing of both units done. Now I just need to lay down slots to create shelves. I'm first gluing then brad nailing on runners. These are made from more scraps, then positioned so that when the slots are attached, the end grain will be hidden behind the stretchers. You can see I'm using a scrap of wood that the slots will be made from as a spacer for this.
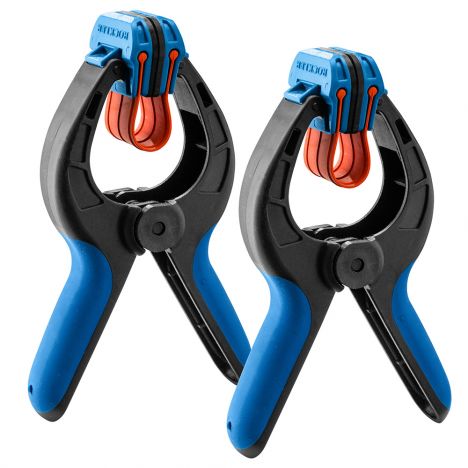
I'm also using Rockler’s Bandy Clamps to hold them in position while I come back with a brad nailer. Now, the slots are one thing I didn't cut at the start, although I could have. I went ahead and set up another stop block on my wing, then quickly chomped through a few boards to break them down into the needed pieces. Just a reminder, if you ever set up a stop block, make sure you're holding down the side of the board that's between the blade and your block. This is the piece that has the chance to bind and cause kickback. Since I have my block on the right, I'm securing the board on the right then using my left to lower the miter.
Now it is as simple as attaching all the slots in place. I carried over a small pile then attached them one at a time. I'm again using an exterior wood glue before laying down any board. I often use scraps cut to length for longer dimensions, but for smaller gaps like these, I pull out my spacing blocks. By the way, a set like this makes a great gift. Then, before you know it, it actually starts looking like something. Now let's make the unit that will combine the two. This section will be used to set in the cooler insert later on. This is all made up from a few different two by fours. I actually have three different wood species here because I'm still pulling from my cut off bin.
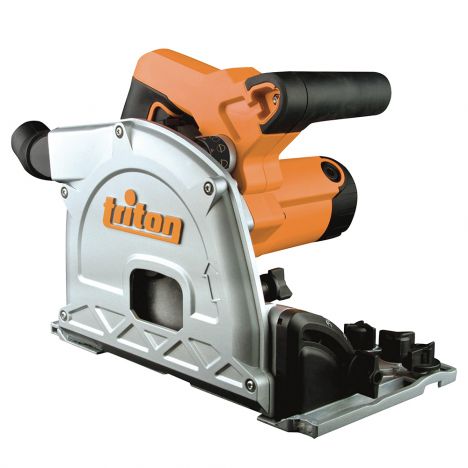
After attaching everything together, I could have attached it to the two units. However, the entire thing still needs to get a coat of paint, and it is much easier if they are left as individuals. With that in mind, I set everything aside to start being painted but then cut down the top. For the top, I'm going to use two sheets of three-quarter-inch plywood glued together to make the top thickness of one and a half inches. I pulled up my Triton track saw and made all of my cuts, making sure to roll along my Rockler Dust Right separator to cut down on the amount of dust made.
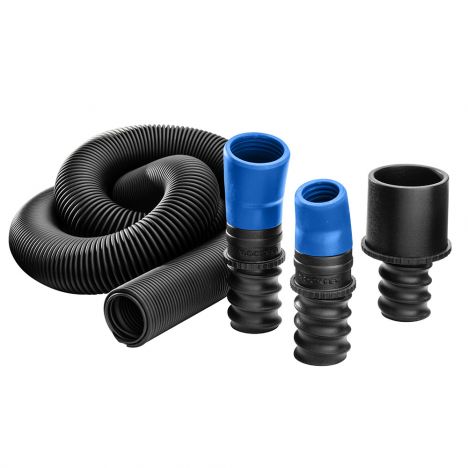
I use the FlexiPort hose kit, which expands up to five times its collapse length. It also swivels, which prevents me or the tool I'm using from getting bound up, but by far, the best feature is the almost universal fit of the kit. The two ports that come with it fit just about any power tool, meaning that no matter what you're working with, you can pull it along and help control the dust. The ports are simple thread-ons, but I personally bought two hoses that I could switch back and forth between the two, instead of swapping out ports.
When cutting the plywood, I use my Triton jigsaw to cut out a rectangle in the center section. This will be for a drop-in cooler. I have a mini-fridge in the space, but when hosting a large gathering, I love the idea of having an open cooler with ice. That way, people could just walk up and grab a drink. Hopefully, that turns out to be cool, but we'll see. Okay, and that is the entire body done besides paint. Now let's make a few accessories. For the meantime, I've been storing everything under the cabinets in the outdoor kitchen, but it isn't organized, and I hate it. Let's whip up a few things including a napkin holder, a condiment caddy, and someplace to put out utensils.
I created all of these designs using my Glowforge laser. Let me tell you guys, this thing is awesome. It's a desktop-ish laser that can take anything you can design and cut it out. If you know me, you know I love playing with CNCs, but one advantage the Glowforge has is being able to make sharp corners on the cuts, since it uses a laser instead of a router bed. I started off using quarter-inch MDF for my prototypes, thinking I would make sure everything fit, then change over to something else, but actually, I ended up loving the look and the feel of it. That's so cool. The charred edges the laser notoriously leaves behind gives the entire piece a cool accent, I think.
Glowforge has their own web browser-based software system, where you can import in your files, then pick from the different options on how it cuts. On the utensil holder, all I did was the cut action. However, when I moved on to the napkin holder, I chose the engraving option for the decoration, then the cut option for the profile. Each part just takes a few minutes to cut, and what I love is the software gives you an accurate countdown on when the job is going to be finished. Typically, while a job is cutting, I use a few minutes to begin creating the next file.
Again, I'm utilizing a lot of scraps. You can easily scale it to size, then select the operation you want it to perform. Now, all of these are pretty functional designs, but honestly, the options for what you can do are limitless. My buddy Bob just showed how to make a stunning pendant light, but Glowforge has a huge library of files and projects you can browse through to get inspiration. You can certainly see the accuracy with its cutting, the friction fit of each of these units is unbelievable. I use a Dabba CA glue when assembly, and that's all that's needed to hold everything together. Now, of course, I can't place MDF into the elements, the second water not on any part it would start to go bad.
I sealed all of my parts really good by dunking them in Shellac. I left each part in a bucket for 24 hours to fully absorb as much as it would. This way, it's protected from the weather but also leaves it raw again. Okay, now let's move everything to the outdoor space and see how it looks. This will not only give me plenty of table space for serving appetizers but also gives me an area, where I can serve guests in a buffet-style fashion. There's room on the far right for a mini-fridge to be positioned. The center location has a spot for a recycling bin for all the aluminum cans and glass bottles.
The cooler insert allows me to dump a case of beer and a bag of ice for easy access, but don't you wine drinkers fret. I also have a storage rack for wine bottles. On top of all of that, I now have a place to put out plates, bowls, cutting boards, a basket of games, utensils, which also has coasters and straws, condiments like ketchup, mustard, sugar, salsa-- oh, yes-- and, of course, napkins. Oh, my gosh, did I leave anything off? Even if you can think of something I've left off, please don't ruin this idea that I've thought of it all. All joking aside, maybe you don't have a large outdoor space, well, maybe you do. Either way, hopefully, my buffet table design has given you an idea on one for your space.
Remember that you can very easily modify the plans to just be a portion of the overall build that I did. If you're interested, I do have the plans linked for you down below as well as everything I've used in the video. I'll see you on the next one.


Keep the inspiration coming!
Subscribe to our newsletter for more woodworking tips and tricks