Video: Hexagon Patterned Plywood
In this video, Michael Alm tests out new patterned plywood, this time working with with hexagons.
These plywood patterns may look complicated, but Michael Alm guarantees they are easier to make than you think. Also, it's a great way to use up the scrap plywood you don't know what to do with.
You can find more great projects and techniques from Michael Alm at his website.
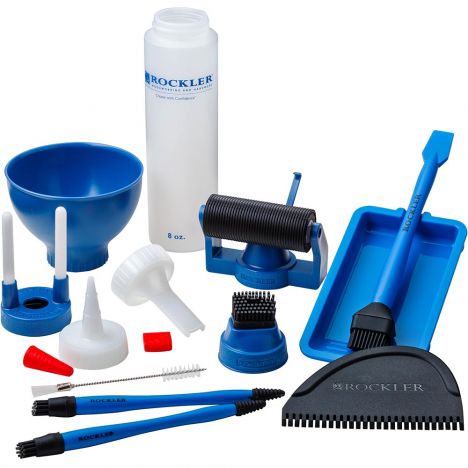
Featured Tools:


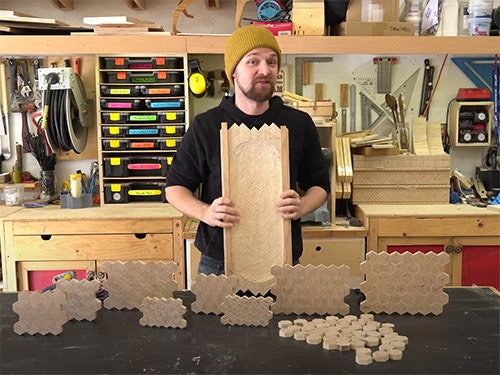
Michael Alm: All right. It is patterned plywood time once again, and this week, it's hexagons. I've been wanting to do hexagons for awhile. You guys have been asking for it. I did a deep-dive this week into all the different patterns you can make with hexagons. I don't even know if I scratch the surface, but I came up with loads of cool patterns.
I know these look crazy complicated, but they're really not. Once you understand the principles of them, they're pretty easy to make. Stick around, I'll show you how to make all these different patterns. This video is sponsored by Rockler. Thank you, Rocker.
This entire project is going to be built out of this one piece of scrap plywood. This is a piece of Baltic Birch plywood, and it's 7 inches wide by 36 inches long. I'm going to start by ripping it into a series of 60-degree strips. The first step is to remove that outside edge.
Once you have a 60 degree edge for reference, you can then set up the fence. The way that I like to do this is to press the board in between the fence and the table saw blade, and that way, you know that it's set to the same thickness as the thickness of the material. You can flip the material over and start ripping.
Now that I have a bunch of strips, I can cut them down to manageable links. I cut these at 12 inches, mostly because my board was 36 inches and it divided nicely into three, but you don't want to go too much longer because it'll make the glue up more difficult later. Right off the bat, we can make a couple patterns with these pieces. The one on the left is a star pattern when it's all glued up, and then the one on the right is more of that 3D cube look.
All right. You'll notice that I saved a little bit of this board, and that is because I want to make some equilateral triangles out of this. What I'm going to use for that is this little piece of scrap. This is cut at the 60-degree angle as well. What I'm going to do is, I'm going to flip that over, set it against the fence and bring the fence in to the saw blade. Once it's right there, I have a new fence that I can ride this board up against, and I can cut through those triangles.
Notice that I've taped that piece of scrap wood to the fence with some double-stick carpet tape, so that it doesn't move at all during the cut. Once again, I'm going to cut all those triangles down to 12 inches. With the addition of all these triangles, there's loads of new pattern options. The first is just to assemble all the triangles together into this concentric ring hexagon thing. It's like a bullseye.
There's the first basic three patterns. From that, you can form a countless number of other patterns. You just take those elements that we used before, in this case, combining two rhombuses and two triangles, and you have this U-shape. It looks like a fish scale when you combine it all together. Another one that you can make is with four triangles and one rhombus. This is like a spiral.
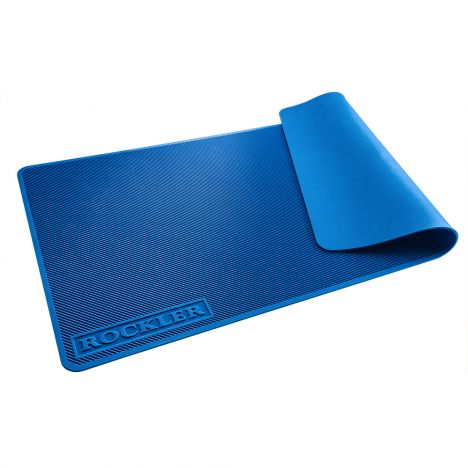
The last one that I'm going to glue up is this fasted diamond. It's made with two triangles and two rhombuses. Now that I've selected all my patterns, I can begin the glue up. I use blue painter's tape to hold it together, so that I can fan it out. Then, I also like to lay down a glue mat, so that I don't get it all over my table.
You want to use a lot of glue on this because the plywood has a tendency to absorb it into the end grain. Then, when you roll it back up again, you want to put some pressure on it with your hands, so that the glue squeezes across all the surfaces. When it comes to clamping, all I use is a bunch of rubber bands.
All right, it is day two, and these are looking really good. They've had plenty of time to dry, and I think I'm going to run over them with the sander real quick, just to get rid of any glue squeeze out, and then I can go over to the table saw and crosscut them.
After sanding off all the excess glue, I decided to check their fit. I'm glad I did because they weren't fitting super well. You can see that center one is moving around quite a bit. In order to true it up, I decided to use the same jig I made before, that 60-degree jig, and run each glue up along the blade, just taking light passes.
Just make sure that all the angles were exactly 60-degrees. I'm really, really glad that I did this because they fit up way nicer after doing this. Doing tests earlier, I had issues with chip out. I decided to switch out my blade for a higher tooth count blade. This is an 80-tooth blade. The other one was 50 or 60, and that's just going to help when it comes to cutting all this plywood, and making sure that it has the least likely chance of chipping out.
Then, I set up a stop block on my cross-cut sled. I'm setting it at half an inch here. You can determine what thickness you want your panel to be, but half inch seemed to be plenty thick enough for me.
All right, so this is the fun bit. There are five patterns in front of me, and depending on how you orient the pieces together and combine them from other groups, you can come up with loads and loads of different designs. I got to play around with a little bit, figure out which ones I like the best, and then glue up a couple of panels.
Once I've picked out all the patterns that I want to glue up, it's time to build a jig. This is really simple. Just a couple of boards nailed to a piece of melamine, and this will act as a straight edge, so that when you glue up the panel, you have something to press against. I also want to seal all the surfaces with packing tape and wax, just to make sure absolutely nothing sticks to it.
As you can see, it just hooks onto the edge of the table, and then I can load in my hexagons. When it comes to this glue up, I've found that the best way to do it is just to press the individual hexagons into place. I tried clamping and every time I use clamps, they ended up distorting. You just have to be patient and press these in, and be real careful with how they're arranged.
Don't worry if you get a couple of gaps here and there, but the fewer of the gaps, the better. Don't be shy with the amount of glue that you use. I was pretty liberal with it, and it can actually function to fill some of those gaps that you may have. After letting each panel dry for several hours, I was able to pick them up, sand them and, man, they just turned out awesome.
All right, so, that is a deep-dive into hexagon plywood. I'm super happy with how these have come out. I know I'm going to get questions whether I used wood filler on them or not. I definitely did. I did the sawdust and wood glue mix. It just goes from looking a little bit loose, to really tightening it up. It's subtle, but I think it's an important step. Make sure to use some wood filler on the surface of it. If you got gaps, don't worry about it. You can fill them in.
I'm sure you're wondering what this is. This is next week's project. Make sure you're subscribed and hit that notification bell, so you can see it, more patterned plywood. Also, a big thank you to this week's sponsor, Rockler. Thank You, Rockler, for supporting my channel time and time again.


Keep the inspiration coming!
Subscribe to our newsletter for more woodworking tips and tricks