Video: Easy DIY Bluetooth Speaker Build
In this video, David Picciuto explains his process for making a wireless Bluetooth speaker. It is an easy woodworking project using plywood and veneer.
Looking for something a little smaller thank David Picciuto's retro guitar speakers? This time he's throwing all his designs away and building a small, portable speaker on the fly.
You can find more great projects and techniques from David Picciuto at his website.
Featured Tools:


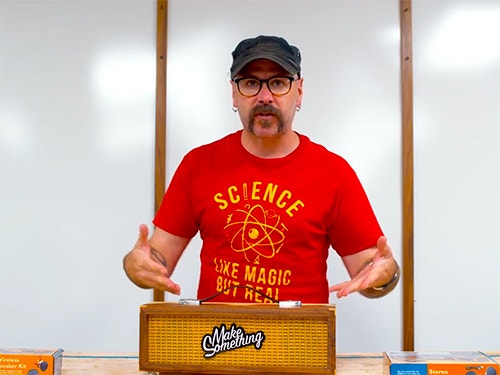
David Picciuto: Today we're going to make some Bluetooth speakers. There's a lot of science and knowledge and technology that goes into making the enclosures for speakers. Today, we're going to ignore all of that. I find with myself a lot of times and in certain things that take years and lots of knowledge to make like knives and speakers, playing music, sometimes we create these barriers because we think we have to learn all of this stuff before we can do what we want to do. Today, we're just going to throw all that science and technology and knowledge right out the door and just have some fun and make some enclosures.
Recently, I watched a class by Tom Morello on teaching guitar, and the first 40-50 minutes of that class, there was no technical knowledge, no skill, no notes, no nothing, just making noise and just having fun with the instrument. It just removed this barrier, just allowed you to dive in and have some fun. That's what we're going to do today with this. We're just going to have some fun, and not worry about the size of the enclosure, the batting that needs to go in the inside; we're just going to make something that I think looks cool. I've been stressing out about the design of this and I've been drawing things up. I haven't liked everything that I've done.
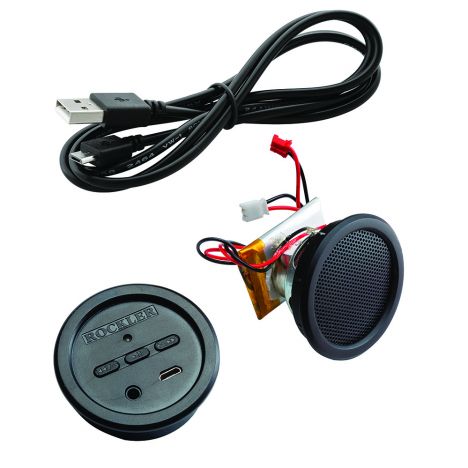
I'm removing that barrier as well. I don't have really any clue on what I'm going to do. We're going to tinker; we're going to wing it. I'm just going to make the enclosure and then I'm going to figure out how to decorate it. It's about tinkering. I want you guys to just remove the barriers, dive in, and make stuff. That's why we're here. Rockler is going to help us out with that. They sent me some of these Bluetooth speaker kits. It's already wired up; you don't need to do anything. It's really, really cool. You just have to drill or cut the holes for the speakers and for the electronics here.
You're probably not going to use these speakers to listen to the latest Bon Jovi record and hear the clarity of the Cowbell in Track 3. This is now what these speakers is about. This is about just having some music on in the background in the shop, or listening to an audiobook, a podcast. It's about having fun. I did go on and play with these and you can hear the difference when you move these from the bench to inside a box to other materials. Check this out.
I'm not sure if you'll be able to hear this or not. I have a microphone underneath my shirt but it sounds a certain way when you hold them or when I put them against the bench, it's a little bit more bassy. Over here, this is hollow and it amplifies it a little bit. That like totally changes the sound. The point of that is there is science and knowledge and technology that goes into making the enclosures. We need to appreciate the people who have studied this, that teach us this, we're going to do that in another video. Today, we're just going to have fun. The instructions that come with these Rockler speakers does give you a starting point for the enclosure that you want to make for them.
We're just going to have fun. We're just going to have fun. We're going to listen to audiobooks on this; I'm not worried about sound. Here's another thing, Camera Dan, he's one of those audiophiles. He's been building speakers for a long time and I know this project is just going to just eat away at his soul. I'm sorry, Dan. Silence and motionless. I have this piece of half-inch plywood. We need a tape measure.
I know we're trying to ignore all the technical stuff and just have fun, but Dan says you don't want to put two stereo speakers in the same box without some separation. Thanks, Dan. I'm going to cut a little 1/8 inch kerf in there so I can put a piece of 1/8 inch plywood. That way those sound waves don't interfere with each other and you get some crazy phase cancellation. I have no idea what I'm talking about. I'm just having fun.
Now that we have that little divider, it's just 1/8 inch plywood that fits in the groove there and we got our two end pieces. Before we connect all this together, I need to drill the holes for the speakers. Friction fit in there. I'll have to drill a hole in this divider to get this through. We'll have these wires come and connect to this in the back. Clamp is just temporary until we get the screws in there. Then once we get all the screws in, we can take the clamp off. probably way too many screws but woodworkers love overkill.
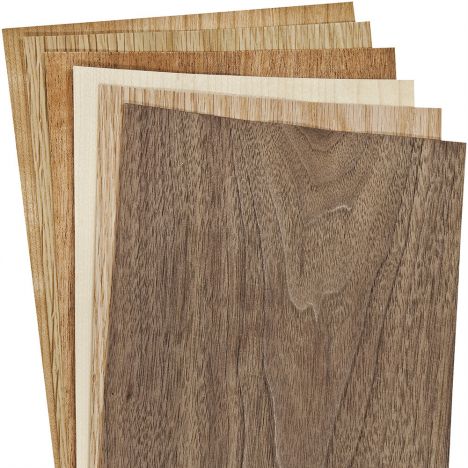
We got it in there, tested it out. I think I want to veneer this with walnut. I'm wondering if walnut would look good with some of this white grill cloth on the front. You can get veneer from Rockler. This is a variety pack that I've had for a long time. If you just get plain wood veneer, plain on both sides, there's a couple ways you can attach it. You can use some contact cement, brush it on this, brush it on the veneer, let it tack up for a little bit, instant bond and it works great. I don't like using contact cement because it smells for a long time and it's a really strong odor. This is a trick that I learned recently, it is using wood glue. Put wood glue on the surface of this.
Put wood glue on the surface of this. Let it dry and then, you can iron that on. That trick works really well. Dan made these speaker enclosures here, using that iron-on just regular wood glue trick and it came out really, really good. I am going to do something different. I want to get fancy with it. I want to have fun. I am going to cut up some veneers on the laser cutter. Of course, of course, you don't need a laser cutter for this, you could just take a veneer and cut it and glue it on there, but I want to have some fun.
This particular veneer it's already pre-finished and has a sticky back, which is just going to make life a lot easier. I think that'll work. Then that is definitely cheating. Cutting it on the laser, it's pre-finished I don't have to do all that. You do what you got to do to get by in life. Cheat, lie, and steal is what grandma always said. New T-shirt idea, "Cheat, lie, and steal, make something." I guess we could be done but why not get a little fancy with it and do a little [background noise] grill thing a little [background noise] If you know what I'm saying? Do you know what I'm saying? A little [background noise] Dan knows what I'm saying. Jerry knows what I'm saying. What's up, Jerry?
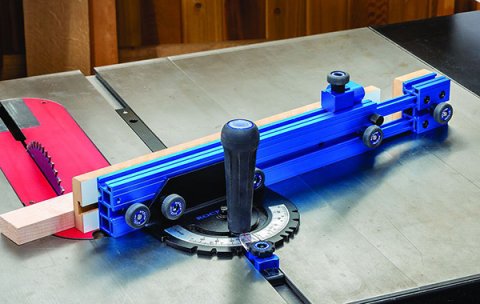
Since we're basically making a picture frame, I'm using my picture frame sled. I've got a video on this guy, of course. Of course, I've got a video on this guy. For this frame, I got some blue on the corners. We're going to make this real simple. I'm just going to stretch some tape over that. If you stretch the tape, it'll try to pull it close a little bit. This is just an easier way than clamps and jigs. I wish I had a small jig for picture frames. It's been on the list of things to make for a long time. He just said it's easier than a jig and then he just said he wanted to make a jig. Then he used his baby voice and then I unsubscribed.
This is my spline making jig, which cuts little spline slots. I've got a video on this as well. Of course, I do. Of course, I've got a video on this. Now we're just going to cut some maple to fill in those splines, and that's going to strengthen up those corners. I think I already have some thin maple laying around from the last time I had to cut splines, so that saved me time, it saved you time because you didn't have to watch me cut it and plane it and sand it. We're busy. We all got stuff to do.
It feels like a crime to spray lacquer on walnut. At first, I was going to go with the white and I think I'm changing my mind and we are going with this gold here. I think it really helps and you probably can't see on camera but the lacquer on the maple here doesn't look very good. It's very, very yellow, but I do think the gold helps that a little bit more. I can live with that color of that maple. That T-Track that we installed in the bench the Rockler T-Track, look just like we're joining fabrics, you tape this to the bench.
One of the reasons we're taping it to the bench is so we can stretch it and then also get the lines in a parallel perpendicular orientation. I actually don't know if this is going to work. This is an experiment. This is Rule 4, in effect.
Then the mating piece of Velcro on here. One of the problems that I ran into, and this is one of the things that happens when you design on the fly is, I didn't like the gap that I'm getting here between the front grill and the speaker enclosure. These speakers stick out a little bit and when this Velcro is on there, there's this huge, huge gap. I've been brainstorming, "What can I do? Maybe I should put another piece of wood to cover up this mess back here." This is a piece of white acrylic that I cut out and that's going to get glued on there. Then this can then Velcro and it helps fill the gap and makes for a nice little [background noise] If you know what I'm saying? What's up Jerry?
Okay, so the hardware, the good news is it definitely works, but I think the best comparison in terms of installing them would be something like bloom drawer slides. They're great, but if you give them to your average weekend warrior just doing little tasks around the house, they're probably going to run into some trouble trying to install them if they can get it done at all. Basically, I would only recommend these to somebody who is at least a hobbyist woodworker. I think it's just too involved for somebody with no woodworking experience and or tools.
In terms of the reviews, I would actually be curious to see how the reviewers found the product. For somebody who goes to rockler.com and finds them that way, I have a good feeling, they're probably going to be able to get the job done. I noticed that if I googled heavy duty floating shelf hardware, these were the second result right after an Amazon link. If that's how a person finds these, I think that there's a higher chance that they might have a tough time. I guess another way to say all that is if you're still watching this right now, you're probably the type of person who can handle it.
Okay, so now for a couple of tips or tricks that I found for actually using them. I think that the designers realize that people might have trouble drilling perfectly straight holes in the backs of their shelves, or in the wall. The mounting plates have these little set screws that you can use to shim the post in any direction that you want. Actually, what I found is that having a tiny amount of error in your drilling can actually be beneficial.
On a few of my shelves, I had to use the set screws to make the posts angle slightly outward. Then to slide the shelves on, I could pull it into place and that created stress that makes pulling them away from the wall even more difficult, which is a good thing. This is especially helpful if you can't get it to fit right the first time and you have to enlarge your holes a bit. I did that a few times by just sticking the drill bit in there and wiggling it around back and forth while I was drilling. Anyway, I guess that's about it. Thanks for watching, and I'll see you in the next one.


Keep the inspiration coming!
Subscribe to our newsletter for more woodworking tips and tricks