Video: Dust Collection System Upgrade
In this video, Michael Alm shows how he installed his new central dust collection system.
Michael Alm discusses the installation and design of my new 6" thin wall PVC central dust collection system.
You can find more great projects and techniques from Michael Alm at his website.
Featured Tools:


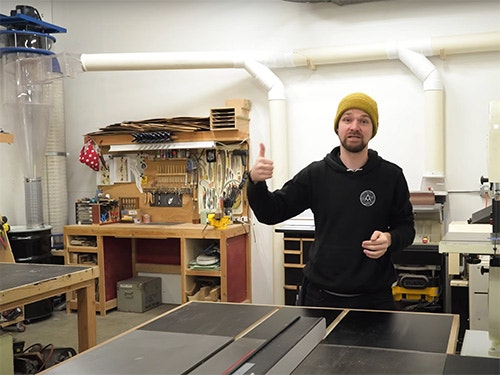
Michael Alm: Hey, everyone, Michael Alm here. This week I built a dust collection system. I am so happy to have this in my shop. I have been thinking about this, talking about it for probably about six years. It's finally put together and I could not be happier. I can't wait to share the details with you guys. This video is sponsored by Rockler. Thank you, Rockler. Let's get into the build.
Before we can talk about all the ducting and the connections to the tools, let's talk about this, which is the heart of the system. This is the Clear Vue Cyclones CV1800. I decided not to film the installation of this, mostly because that's in a whole separate video, and that video has already been made several times on YouTube.
I'll link to the ones that I followed down below, but this system is a major upgrade from my previous one. I had a single-stage dust collector, this is a dual-stage cyclone separator, so it separates the dust into the barrel before it goes through the impeller and out through the filters. If you want a review on this machine, just stick around to the end of the video and I'll go through how it works on all my different machines and my takeaways from using it for the last couple of days. I've been planning on installing a dedicated dust collection system in my shop for a number of years now. This back wall has always been slated for that use.
As a result, it's just gotten covered in junk because I don't want to build any nice shelving or cabinets, and so everything seemed to be temporary. Temporary is relative because I think these shelves have been there for about four years, and it's definitely time for them to go. With that wall all cleared off, it made it really easy to tape and mud all the seams, which when I first moved in seemed like the last thing that I wanted to do. Once the joints were dry, I was able to give it a fresh coat of paint and start in on the piping. I picked up this six-inch thin-walled PVC pipe from a local plumbing supply shop.
While you watch me struggle to cut it with a handsaw, I would like to talk about my experience of that shop. I went to actually three plumbing supply shops and the first place wanted to charge me $1000 for all the pipes and fittings. What I learned is that a lot of these industrial suppliers, they'll charge all sorts of different prices for different people, and if you just walk in off the street, a lot of times they'll charge you a max price. By the time I reached the third plumbing supply shop, I found somebody who was willing to sell me all these parts for $350. It became apparent pretty quickly that I wasn't going to be able to cut through all of these parts with a handsaw.
It was just way too time-consuming, but for now, I had the first length and I could connect to the first fitting. This is called a Wye fitting and it's a 45-degree fitting. You don't want to use 90-degree fittings because it's just a little bit too tight of a bend for the dust collector. I was installing this system by myself, so I had to build a system to support it while I was holding it up in the air. This worked like a charm, it was a super simple like two-by-four construction, but it just gave me an extra little bit of leverage so that when I put it into the dust collector, I had something to set it down on.
Now, round two for cutting these pipes I tried the Sawzall and this might have to do with a lot of things. This was the only blade that I had long enough, it's a little bit the course of a blade and it definitely just shredded that pipe. It was not a good way to do it, not a good way to hold on to it. You can see it actually broke through the edge of the pipe. The solution I came up with, and it seems really obvious now, was the table saw. The crosscut sled was perfect for this, and when I got long links, I could support it with the table on the right. If you're wondering why I didn't use my chop saw, my chop saw can only cut about four inches.
These cuts came out super clean. I was really happy with them. I barely even had to deburr them, and then I could just start cruising and putting pipe into place. I have a five-foot straight run, which is the requirement of the dust collector, and then that meets to the wall at a 22-degree elbow. I knew that I needed some sort of holster or bracket to hold these things on the wall, and I didn't really want to do metal strapping. A lot of people do that, but it's not a great look, so I decided to design my own bracket. I just made these out of a piece of scrap plywood that I had sitting around the shop.
It was a little tight in the shop with all the tools pushed in the corners. I had to sit on my thickness planer to cut this thing out. When I have a bunch of identical pieces that I need to make, I love this method of taping together one big block and then cutting it all out at once. This meant that I could get eight pieces out of this one block super quickly. In order to beef up the bracket a little bit, I doubled up the pieces, glued them together, nailed them off, and then drilled pilot holes for the screws. I positioned the screws and the bracket over a stud in my wall and then just drove them home with the impact driver.
I only really needed two on this wall since that PVC is so lightweight. It really didn't need a lot to support the load. Now with that first pipe into place, I could remove my support and start cutting more pieces to stitch into place. Now I'm setting up to make the corner. This is a 90-degree bend, and instead of just going with a straight 90, I'm using two 45-degree elbows. This just softens the curve, which makes it easier for the dust to flow through the system. Now I can add another bracket into place and take another piece of PVC pipe with a Y on it and slide it into location. This one I may have miscalculated a little bit.
My arms were not long enough to reach it and I'm just scrambling to get it into place. I'm going to need position well enough to stay put and then could drive it home with a rubber mallet. I screwed the final bracket into place and can slip in the final piece for the upper ducting. You'll see on the right-hand side there's another 45, 45 thin that makes a 90-degree elbow. With that in place, I can start in on the drops, and this one will be a floor sweep. I decided to use the bell end of the pipe as the intake. I just trimmed out a semicircular section out of the bottom of the pipe. The next step was to install the 6-inch blast gate and because I used thin-walled PVC, I had to thicken that diameter up with Whitson tape.
It wasn't a big deal, I just kept adding tape until I got a nice friction fit. The second and the third drop are exactly the same. They are 45-degree fitting down to a pipe, which gets a splitter on the end of it, and these splitters are sold by Clear Vue Cyclones. They divide a six-inch port into two four-inch ports and already have blast gates installed on them. The fourth and final drop in the system is for my table saw, and the table saw requires a four-inch dust port. I'm adding a reducer to the system. This is a bracket that I'm making that will attach to the top of the reducer. I added a few blocks so that I could screw it into the wall.
The two screws on the right are attached into plugs and then the ones on the left go into the stud, so it's really nice and sturdy. With that in place, I can slot the tube in and you can see I've got the 45-degree elbow on there as well. You'll notice that the bell end slots over the top of the reducer, and then I just added a little bit of persuasion to get the two parts to sit together. The table saw is also going to require a blast gate, and this will be a 4-inch blast gate. I'm just building up a little block here so that I have something to mount that blast gate to. The blast gate I'm using is made by Rockler and it is really nice, it has a mounting bracket on it.
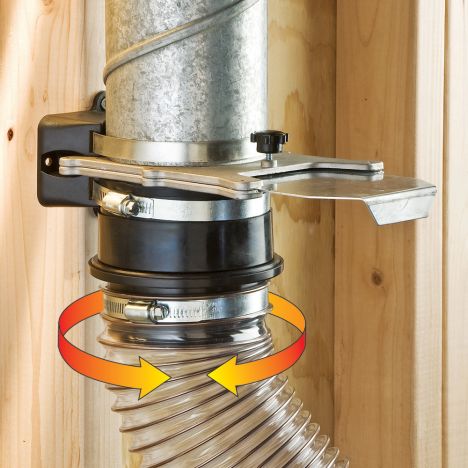
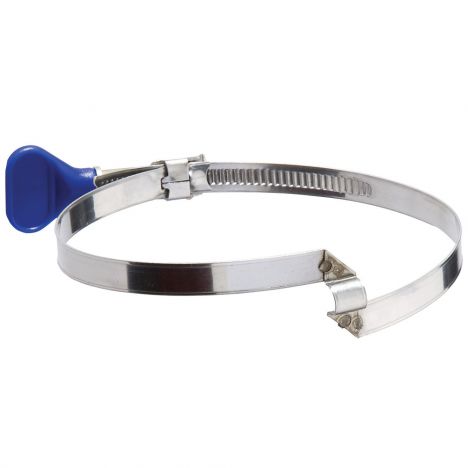
I hadn't seen these before. It's really handy, you're able to mount it directly to the wall and give it a little test. It works really nicely, and then these are four-inch pipes and they're full-thickness PVC. I don't have that issue with needing tape to enlarge the port. I did, however, decide to attach a couple of screws into them just to make sure that they wouldn't fall away and take a little bit of pressure off the system, then I could attach the port. This is known as a Swivel port. It's also a Rockler product. I use my Jimmy DiResta I just picked to slide it into place.
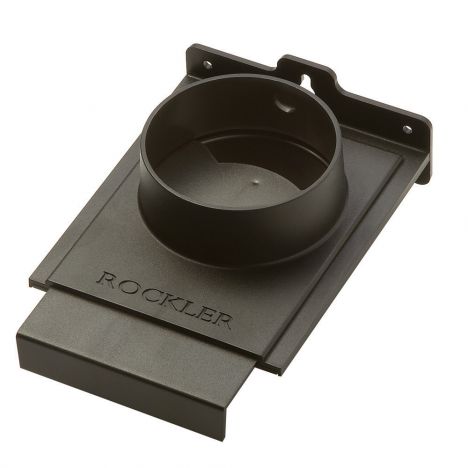
The reason this thing is called a Swivel port is because the base of it turns, and it turns to relieve pressure off of the hose so that it doesn't get dislodged when you move your tools around. I have every single tool in my shop on wheels, and the table saw is no exception. Hopefully, this will prevent the hose from dislodging over time. Speaking of dislodging, I decided to tie in these ports with a couple of screws and then attache the hose for my band saw. Now I'm installing a wall mount for the Rockler dust right quick-change system. This is a pretty cool system where you can just connect this to whatever tool you need, and you just attach a corresponding port to it.
I'm going to be using it for my thickness planer and to vacuum the flat surfaces in my shop. I'm now attaching the two-and-a-half inch hose to my sander, and this was just a slip and friction fit with a Swivel port. I've got this stretchy tube so I can attach it easily to the tool as well. The final machine to tie into the system is my router table, and if you guys haven't seen that video, I'll link it down below. I've got full build plans on how to make this router table, and the tying in the dust collection is something that I've been wanting to do for a while. I'm just connecting a two-and-a-half-inch flex hose to the fence and that connects into a two-and-a-half by four Y-fitting, and then the four-inch port goes into both the back of the machine and the splitter.
Now that the whole system is in place, I could tie in all ducts with screws. I just used half-inch wafer head screws, and then wrapped the exposed joints with a silicone tape. I like this stuff a lot, it only sticks to itself, which is really nice, and you just stretch it in a place. It has a nice look to it, as opposed to using foil tape. It's also very easy to remove if you ever need to change out the ducts. This system is completely installed. I'm so excited to turn this thing on, see how it all works. Let's give it a test run.
I'll mute out that dust collector noise for you guys so you don't have to listen to it the entire time, but it's really not bad. It's a little bit louder than my old system. I'm locking together the Quick Connect System so I can vacuum off all the tabletop, so I can get a really good gauge of how much sawdust comes up on all these different tools. It's so nice that I can pretty much reach every flat surface in the shop with this thing, I can get all the way to my chop saw which is across the room, and vacuum it up. Now I can remove that bench nozzle attachment and test out the floor sweep attachment.
I wanted to really put it to the test, so I decided to sweep off these mats, and it vacuumed up even the little cracks in between it was really, really impressive. Now I can use my other sweeping tool, which is the open floor sweep, and that thing just inhales dust, it's incredible. Now that all my surfaces are clean, I can put the tools to the test. I'm going to start with a table saw, and I ripped this board down a couple times, I think three times in this process, and got it into thin little strips.
I was really curious about this because I know I don't have overarm dust collection, so that's something that I'm going to add in down the road. You can see little chips are flying here and there and they end up landing on the fence and on the surface of the saw, you'll see some of the back rail, but I think that that's not really the fault of the vacuum system. I think it's more that lack of overarm dust collection.
We're going to deal with the same thing when it comes to the band saw. The band saw is notorious for having bad dust collection. I'm going to cut out a couple of spoons here that I already had prepared, and you can see that the dust is collecting on the side of the sob, but it's really not a lot. This is a lot of cutting. I was pretty impressed with this. I can again add some dust collection that is closer to the to the saw blade. That would probably pick up the remainder of the dust. The thing that surprised me the most was how much suction there was in the body of the machine.
Look at this, I just dumped some random sawdust into the body and it just inhales it. I'll use spoon carvers out there, look away now, this is not the way you carve a spoon, but I wanted to try out something that would take off a lot of material and really put my sander through its paces. This was easily 10 to 15 minutes worth of sanding and, yes, there's definitely some on the table. The way that this tool is engineered is not great for dust collection, but I would say considering it did really well, and I was able to clean up all the extra stuff with the hose. I think down the road I'll probably upgrade that to a four-inch collection port.
I'll just have to make a port that fits onto the machine. Last but certainly not least is the router table, and this one just blew me away. I've never seen anything like it. There's no dust at all. You can barely see even the chips flying- Look at that, I did all four corners and nothing came up on my hand when I touched the tabletop. Really, really impressive. There it is. That is the full dust collection system. I couldn't be happier, honestly, it is so nice to have a powerful dust collector on all of my tools, and I actually think it looks good too.
That was something that I was actually worried about, was living in a shop that was just full of tubes that you have to wade through. I think it looks nice and clean having everything up against the wall and the ports nice and low. I just like it a lot, the CB-1800, it gets some thumbs up from me. I'm really happy with it. It's a bit of a project to put it together, but it works great. It's really powerful with that five-horsepower motor, and it's nice that I can mount it up high, and it's got a small footprint. Just so you know, I bought that with my own money, Clearview didn't send it out to me, but I'm very, very happy with it.
Thank you to Rockler for sponsoring this video and sending me out a whole bunch of fittings and everything. I think, when it comes to dust collector parts and fittings, there's no one better than Rockler, they just have lots of selection, lots of options. I love the Quick Connect System. The fact that I can go across my whole shop and vacuum up my chop saw and everything. Just really, really thrilled with that.
I also wanted to shout out this thing. This is the hip belt. You've probably seen me wearing it. This is great. I've been looking for something like this for a long time and it's able to Velcro on my dust collector port. I did have to sew on the Velcro, but this thing is super handy.
Improving Table Saw Dust Ejection
How to Join Carcase Miters with L-shaped Tenons - A Free Video from the Center for Furniture Craftsmanship
-
 Dust Right® 2-1/2'' Expandable Shop Vacuum Hose KitSpecial Price $38.39 Regular Price $47.99 Save $9.60
 -


Keep the inspiration coming!
Subscribe to our newsletter for more woodworking tips and tricks