Video: DIY Concrete Bluetooth Speaker
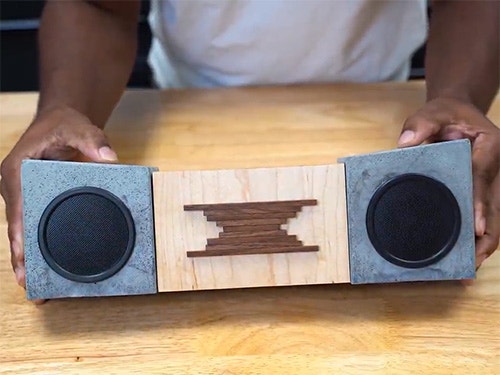
Combine concrete construction techniques, woodworking and a little design ingenuity in this unique speaker project.
Build this Concrete Bluetooth speaker, a perfect project for desk setup. This is also a fun project to do with the kids, get creative, and build something.
You can find more great projects and techniques from DIY Creators at their website.
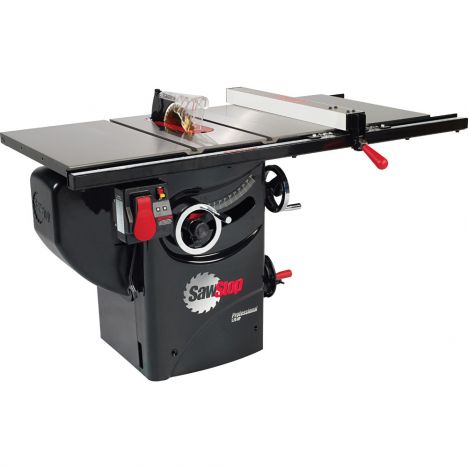
Featured Tools:

Glen: For a while now, I've been wanting to utilize cement which is one of my favorite elements to work with because I just think you have so much creative flex with that you could just expand creativity to the next level. Creating forms and different things are always the biggest challenge to coming up with something cool. I think I like working with this and I also want to be able to incorporate that with different elements whether it's wood and metal and so on.
When I create things, my end goal is always to give a thing a sleek simple look. Even though it takes a lot of work to get to that point, it's worth it in the end. Building this bluetooth speaker allowed me to get a feel for what's possible and also open up some other ideas and what I can do in the next creation using cement. All in all, I'm really excited about this project and ready to show you how it's made. Thanks to Rockler for sponsoring this video, let's do this.
The most difficult part of this is creating a mold. To build a mold, I need to cut down some melamine. This mold is the most complicated one I've created to this point. For the size of this, there's a lot of parts. The majority of the cuts is simple. This one is a bit more complicated requiring a seven-degree cut. Then there's this cut which you can use a jigsaw to cut this out but a bandsaw just makes it a lot easier. As you can see, I taped the two parts together so I can cut both at the same time.
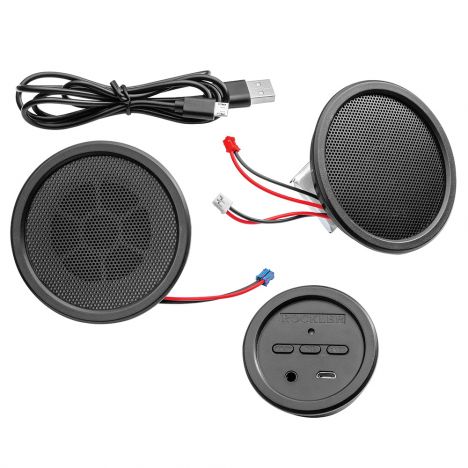
At this point, all the parts are cut to size. If you'd like to build your own, I have a free cut list down in the video description. Let's take a look at what we'll need for this project. The first thing we're going to need here is some melamine. I'll also be using this bluetooth stereo wireless speaker kit from Rockler. Although this was not easy to come up with, you'll also need some PVC end caps. Another crucial piece of this puzzle is a piece of PVC pipe. To build this form, I lay one side of the melamine down. Then I glue all the required parts to this.
By gluing the form together, I'm hoping that the de-molding process is going to be a lot simpler. Here's a quick look at the form in progress. As you can see, I have an exposed edge to the melamine facing the inside of the form. It's important to cover this up somehow so I'll use some aluminum tape here. Leaving that exposed can be a bonding area for the cement, and that's what we don't want because that would make it much difficult to remove the form. As I mentioned, I'm using aluminum tape here but I can also see duct tape working here as well. The next thing I want to do here is to apply silicone to the corners. The silicone should leave a round edge on the finished product, but also seal the form. I'll put this in every corner that seems to be a potential leaking point. I'll remove the excess and let the silicone cure.
Most of the effort in this project will go towards building the form. I'll take the same aluminum tape and attach it to one end of the PVC pipe. I'll press this on here firmly and cut off the excess. I'm doing this to prevent any cement from getting inside. I'll place this on a form and attach it with some hot glue. In the final product, this will be a port for the control panel.
Although these PVC caps are slightly bigger than the speaker opening that's required, this should still work. As shown, I place hot glue going around the interior of the PVC cap.
With the cap facing down I'm hoping that gravity will pull the hot glue down to the surface of the melamine and attach itself. All I need to do is center it up and let the glue adhere itself. I don't want to put hot glue going around the outside of the cap because this will be visible later. The control panel will be placed in the center and two speakers will be spreaded out to each side. This means I need to run wires from the center to the outside.
With that in mind, this will be impossible to drill later. What I'll do here is add foam in here so I can dig the foam out later and not have to drill. Hot glue would melt the foam so I use silicone to hold that in place. I'm anticipating the middle part of this form to be a weak point so I need to add some sort of wire mesh inside the form. Now I need to modify this wire mesh so that it can fit. I would like for it to sit here but I don't want it to touch the PVC, so I use two pieces of foam block to act as a spacer. Again, I'll silicone those two pieces in place and wait for it to set up.
The wire mesh is elevated just above the PVC caps. I know this will look rather complicated but it's pretty simple. It's just layers of things. At this point, it's rather complicated to wipe on any wax type mold release. My next best option is to use some WD-40 here. To close up the form, I'll place the finer side onto that and then clamp it on. By clamping this on, I should be able to de-mold this rather fast. I need everything to stay in this exact position as I pour the cement.
Speaking of cement, I need to mix some. Here's what I need cement, water, flow control, cement color, and a mixing tool, of course. Don't worry, this belongs to the shop. I added water to the mix and then dropped in some color. I begin mixing with my mixer and slowly added water as needed. The mix looks pretty good to me but I want this to be a little more fluid. Adding too much water would diminish the structural strength so I'll need some flow control here. To keep the structural strength of this mix, adding flow control loosen this up and make it very liquidy. This is the best way to keep the strength of the cement while making it perfect for pouring in any form.
This looks very loose which is exactly what I was going for. Now I can pour this into the form and it should easily get into the cracks and crevices. There's a black cloud hovering in the mix and this is the pigment separating from the mix. I'm not quite sure why it's doing that but it shouldn't affect the overall look. Notice how fluid the cement is pour into the form, which is exactly what I want. That is the power of the flow control powder added to the cement mix.
With the cement poured into the form, I need to vibrate it, this way I can help any air bubbles trapped in the bottom rise to the top. Now that I have the cement poured into the form I need to vibrate the form and help release any trapped air bubbles. In my experience when working with this fast-setting cement, a sander doesn't do too much for vibrating it. I recommend using a hammer tapping the outside of that applying a little more force to the form. The next option is to vibrate the table with force.
Regular cement should work just fine for this project but of course, if you're using a fast-setting cement, you're going to be required to sit around this project for a good 35 to 40 minutes. In real time it's been about 15 minutes since I've poured the form. While the chemical is working here, this gets extremely hot and although it's raining outside, that's not good enough to cool this down. This is why you have to babysit this project for about 30 to 40 minutes.
By not keeping this cool you'll more than likely see hairline cracks in this. I needed to walk away from this project so I ended up submerging it in water, and right now it's been about 35 to 40 minutes since I've made the pour. With all my efforts to keep this cool, I still saw some cracks within the form. The crack centimeter was definitely the most concerning but since I had the wire mesh in here, I wasn't too concerned. Having the crack going through the middle actually made it easier for me to remove the PVC. Now I need to safely remove the molding without creating any further damage.
Now that I have the majority of the form off, I'll leave this middle section on to provide additional support as I remove the PVC from the speaker holes. I used a knife to carefully remove the cement from around the rim of the PVC cap. On a positive note, the PVC caps move within the hole so they're not adhered to anything. The downside is there's a defective area on each one of the caps and that little defect is just enough to prevent me from pulling the cap straight out. Had I known that before, I'd send that piece off so it wasn't an issue. I definitely don't want to force anything here because I don't want to damage the concrete.
Since I cannot see the defective area, I need to cut this out to play things safe. Now that I have it out of the hole, this little imperfection here caused all that trouble. This wasn't something I noticed earlier but it can be avoided by sanding that off. To remove the remaining pieces from the form.
Although there's a crack going through the middle, I'm pretty satisfied with where I'm at. Because I added the foam earlier, now I can dig it out and create a passage from the speaker hole over to the center. This was so satisfying for me.
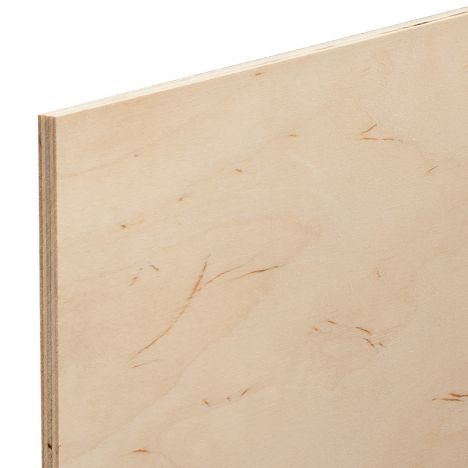
I'll go ahead and cut down the wood panel desk on a wrap-around this concrete form. To give the cleanest look here, I'm going to do a miter joint. After making the first miter cut, I'll flip the waist around and make another miter cut going the opposite direction. This is really important if you want to continue to grain off the wood to wrap around. For the final cut, I'll face the miter edge towards the fence and run that through the table saw. Now that I have the two miter parts, I'll take masking tape and attach it to one side. I'll apply wood glue to the miter edge and spread it evenly.
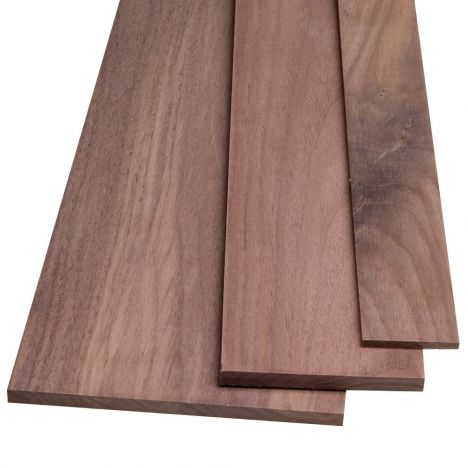
Join the two parts and use the masking tape to hold the parts together. I double-check to make sure the joint was squared and let it sit to the glue cured. To add a more interesting look to the final product, I cut down a few strips of Walnut. I didn't have a true direction for these pieces so I'll have to make something up on the fly. I cut down more pieces than I actually needed because I wanted to play with different designs and see which one I liked. I sand these pieces down by hand using 220 grit sandpaper. This was good enough to remove the saw blade marks and also lose fibers.
Finally, I sand this part down so I can prepare it for the small strips.
I could have went a number of ways with his final PC, but I decided to add the strips on it as a way of adding an accent. Had I thought about this prior, I could have also used the CNC machine to create a simple design on the face of this. I kept it pretty simple using fast-setting glue to attach these small strips. I'll use Tung oil as the finish. It'll bring the color of the wood out while keeping everything to a set and look.
I'll pass the wires from both speaker location over to the center. To secure the speakers, I ran a beat of hot glue around the perimeter of the speaker. I quickly learned that it was probably better to run the hot glue within the hole than place the speaker on top of that.
While the glue is still hot, I flipped the speaker over and placed it down in the hole. I'll repeat the same thing on the other side but this time around, I'll place the hot glue within the hole.
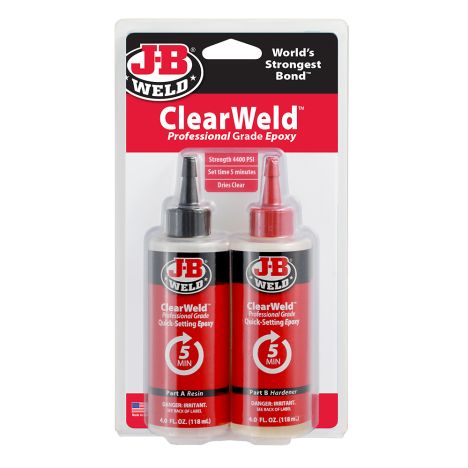
In order to attach the wooden an accent piece, I'll need adhesive that can attach to both wood and concrete and the epoxy works great for this. This is a two-party epoxy. After I mixed the two parts together, I paste it on the concrete. This middle area here is the area of concern for me so I'll be sure to add some epoxy here. I feel adhering the wood and concrete together should improve the structure of this. Now, I can place the wooden part on this and add a clamp or two to hold this in place.


Keep the inspiration coming!
Subscribe to our newsletter for more woodworking tips and tricks