Video: Designing and Building A Modern Credenza
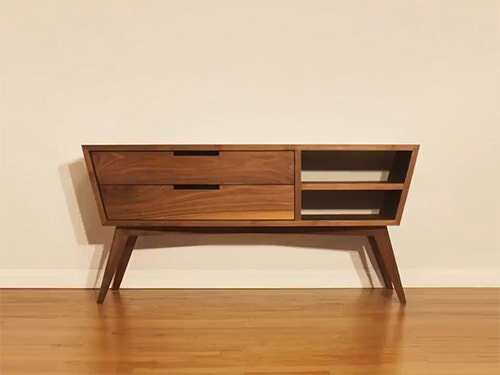
In this video, Chris Salomone builds his best piece to date, a Mid Century Modern-inspired Credenza.
This piece is made from walnut hard wood and plywood. This piece was one of the most requested by his clients, so he thought it was only right that I actually had one for himself.
You can find more great projects and techniques from Chris Salomone at his website.
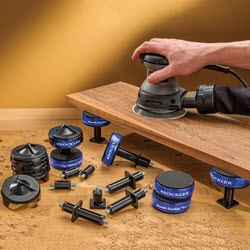
Featured Tools:


Chris Salomone: All right, this is going to be a big one. Let's just get right into it. Strictly speaking in 99.9% of situations, a trapezoidal box is probably going to be less efficient than a rectangular box. There's always going to be inaccessible spots within the cabinet itself, and it's pretty unlikely that it's going to make the most efficient use of the space in the room, and yet here we are.
After I had all my pieces of plywood for my carcass cut to their approximate final dimensions, I started cutting the bevels on the casework. You might remember the video I put out a couple of months ago where I went over how I achieved this, but I'll go over it again here. Basically, I'm going to want to end up with a trapezoidal cabinet where the sides angle in at 15% off of 90, so 105% or 75% depending on how you're looking at it. I achieved this by setting my blade once to 37.5% and making half of the cuts with the workpiece vertical like this and the other half, as you normally would with the piece flat on the table.
One of the problems that I ran into was that the bottom piece of my cabinet, which is about 55 or 56 inches long is actually more than my table sock can handle. To solve this, I cut the bottom piece in half, made the bevel cuts, and then glued it back together. You're never going to know that I cut the bottom piece in half unless you were looking at the finished piece from the back, the underside, or the inside after removing the bottom drawer box. Pretty much unless you share your dirty little secrets on YouTube, you're the only one who's ever going to know.
Once I had all the pieces perfectly cut to size, I moved on to a bit of joinery in the case right before gluing the whole thing up. I use the hand router to cut two dadoes into the bottom piece that will eventually hold vertical partitions for support and for a couple of drawers. Then I use the dado blade to cut a rabbet along the backs of all four pieces for an eventual back panel.
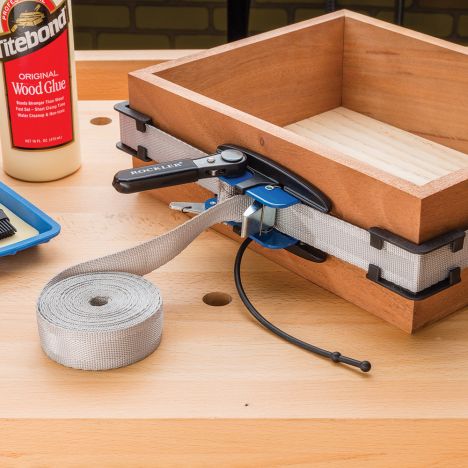
Finally, I tilted the dado stack to 15% to cut the dado that will end up holding a shelf. With everything ready to go, I moved on to the glue. To get things started, I used the tape clamp method to it here the top and two side pieces. You can see that I was going to use dominoes at one point for this, but I didn't like the way that things were lining up, so I abandoned the idea.
The next day, I used a few band clamps to put the bottom on and really pull everything together tightly. Once that was dry enough, I moved on to the vertical partitions. Now you'll remember that I cut dadoes in the bottom piece but not in the top. The reason is that it's actually really tough to precut those dadoes and get them to line up perfectly once the case is assembled when you're working with a trapezoid. I've done it in the past, but I wasn't using drawers, so it wasn't as important that they be perfectly aligned. There was a little more wiggle room.
Instead, here, I tried out something new. I glued my partitions into the bottom dado and then made sure that they were at a 90% angle and clamped everything down. Then I just got a few little pieces of scrap walnut and glued them into the front and the back on both sides to prevent the partition from being able to lean one way or the other. Again, these are only going to be visible from the underside because there's going to be a face frame that's going to cover them eventually.
Speaking of the face frame, with the case totally out of the way, I turned my attention to the hardwood portions of the build, namely the face frame and the base. Once I had figured out where I could get all my pieces from, I started cutting things into oversized planks. I started at the miter saw, then joined it, ripped, and a whole lot of planing, the holy quadrinity of milling stock.
For the face frame, I was basically cutting those same angles that I'd used on the case. Only now, instead of bevels, I was cutting miters, which is actually quite a bit easier. I dialed in my angle on the table saw crosscuts sled and basically just worked my way around the entire unit, cutting an angle, marking the opposite end, cutting it, gluing on that piece, and then moving onto the next one and repeat it.
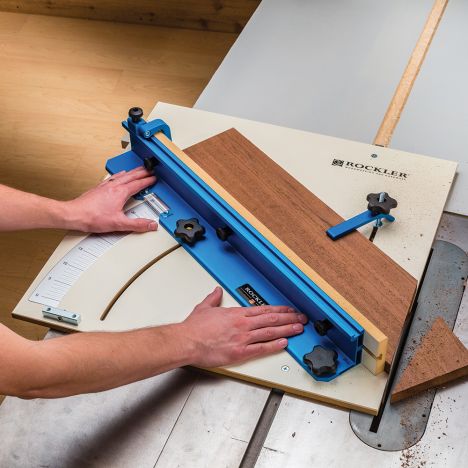
Next, I started working on the base. The base is made of four legs and two cross braces. All of the pieces are joined together with half-laps. I'm sure I'm going to have trouble explaining it here. Hopefully, having this drawing will help you keep things organized and understand which parts I'm talking about. I started by cutting out the four legs. The angle of the outside of the leg is 15% but the inside is kind of unknown angle. I wanted the leg to go from an inch wide at the bottom to three inches wide at the top.
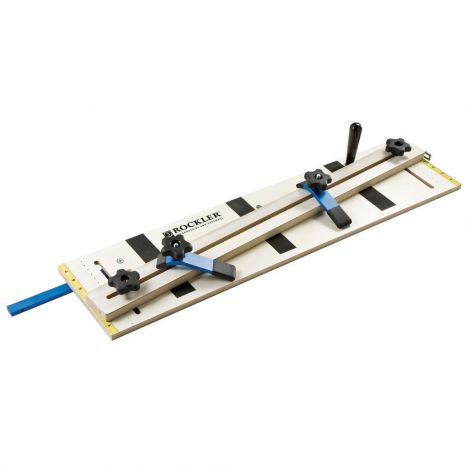
I marked down a line and then put my workpiece on this tapering jig. Basically, you just line up the marks you made with the outside edge, and then you're ready to go. Here you're literally watching me use this jig for the first time ever. I've had a bunch of people comment on my past videos saying that I needed to get a tapering jig. I got to say they could not have been more right.
When I used to make legs, I would refer them out on the bandsaw and then clean them up either on the edge sander or the joiner. I would conservatively say that this method has cut my production time and about a third and the results are actually better and more repeatable. Next, I roughed out the shape of the cross braces by cutting them to length and leaving them with a 15% angle cut on their ends. With the six pieces that make up the base cut to shape, I started laying out the joinery.
I've found that the best way to do this is by actually clamping the pieces together and marking out where everything hits rather than trying to base it off of measurements. It's also a really good idea to make some mark that distinguishes what side needs to be cut and what side doesn't. For cutting my half-laps, I started with the leg because that's the easier cut to make. I pretty much just set my miter gauge to 15% and it was ready to go because the leg is going to end up at an angle of 15%. This leaves a half lap that is parallel to the ground for the cross brace to rest in.
Here, I'm just double-checking things as I go. Then I moved on to the half laps for the cross brace. This part's a little tougher. The angles, that aforementioned unknown angle that was created by the inside taper of the leg. What I do here is line up the marks that I made with the miter slot in my table saw. Then I clamp it down and put my miter gauge fence up against the workpiece to match the angle and lock it all down so that I can just repeat this cut four times. The last thing that I had to do before I could assemble everything was probably the hardest cut of the whole base. That's the half-lap that joins the two cross braces together.
You guys know that I'm a big proponent of marking things out. Whenever I'm confused on a cut, I just start drawing as many guidelines as I can on it. I find that the solution usually reveals itself to me while I'm doing this. That's kind of what you see me doing here so that I can get the pieces to join as closely to their centers as possible. I worked it out and figured that I was going to have to run it across my dado blade at about 60% which is a pretty steep angle as you're going to see. Then once I felt confident in my marks, I had made the cut.
After I'd test fit the cross braces and knew everything was good, I could breathe a sigh of relief and let my guard down a bit. Here, I'm morticing out some spots for figure-eight desktop fasteners. You guys have seen me use these before. I bought like a hundred of them about a year ago, which would last me a good long time.
Funny story, so after all the attention to detail that I paid in making the base, I actually got careless here and installed the clips on the opposite side from the one that I had wanted to. Now, I could have just as easily switched up my game plan and used what was going to be the front as the back. I really liked this side better. Again, you can't see the clips unless you're laying on the ground so I just went with it. I guess the repeating theme of this build is don't look at it from below. Also, don't let your guard down too early.
A saying that gets thrown around pretty often is that form follows function, roughly meaning the look of something should be dictated by its purpose. Then is a trapezoidal box contradictory to that sentiment? I'd say, "No, it isn't." Here's why. Furniture can serve all sorts of different purposes, but at the end of the day, the best pieces should do more than just offer a place to put your things or rest your legs.
They should say something about who we are and make us feel something when we look at them. In other words, an object's primary purpose or function doesn't always have to be about maximizing utility. Sometimes it can simply be looking good. See you next time. Special thanks to Rockler for sponsoring this video. In the description, there are links to all the products that I used. Check them out and see what they can do for you.


Keep the inspiration coming!
Subscribe to our newsletter for more woodworking tips and tricks