Video: Classic Style Wood Record Crates
In this video, David Picciuto shows how to make record crates using router dovetails joints out of walnut with hairpin legs.
David Picciuto creates a classic record storage container from walnut, with joinery that can be adjusted to fit your own style from dovetails, finger joints, pocket holes or splines.
You can find more great projects and techniques from David Picciuto at his website.
Featured Tools:


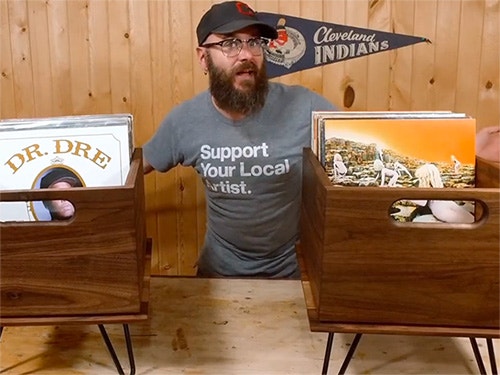
David Picciuto: Today, we're going to make these cool record crates out of solid walnut. It's got dovetail corners and the crates are removable from the base so you can DJthat next party. Stick around because we're going to have fun. Today's video is sponsored by Rockler Woodworking and Hardware, create with confidence.
To get this started, I have some walnut that I got from Rockler.com and we're going to glue them up for the front and side panel, so here we go.
Got some little spring clamps here on the edge to keep the boards nice and aligned. I'm going to write the time down here because I always find myself asking Eric, "Hey, what time do we glue that up?" Eric doesn't know. That's what you get for not knowing. Now that the board has had a chance to dry, I'm going to scrape off the glue here, and then we're going to sand it down. We did a pretty good job of keeping the boards nice and even so there shouldn't be too much.
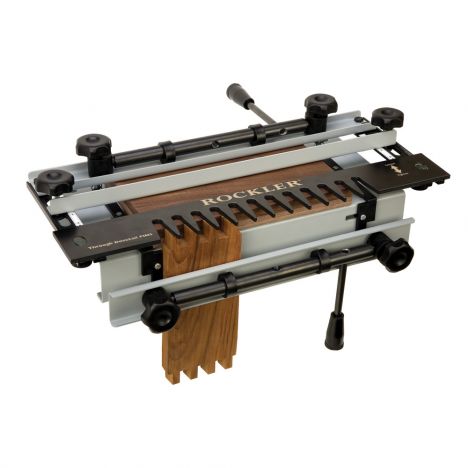
Now we're going to glue three boards that will make the bottom of the base. Get some good squeezer all down the line. Now that the boards are dry, I'm going to rip them to width and then cross-cut them all to length. I've done a couple tests with the dovetail router jig so I have that all set up. The most important thing to remember when using a dovetail router jig is you need to mark all your pieces, you need to know what's going to be the front and back and the sides. I've also marked the arrow up and I got right and left.
I've got each one of my corners numbered. This is corner number one, number two, number three, and number four. I did that on the second box as well. It's very important that you label everything. As long as everything is labeled, you can't mess it up. Once that jig is set up, you're good to go so let's head on over there and start cutting these dovetails.
The next thing we need to do is route a groove on all the pieces to hold the bottom. I got a straight flute bit mounted in my router table here and on the side pieces, we're going to go all the way through. On the front and back pieces, will have to come down on the bit and then have a stop and then come back up this way. That way, the groove doesn't show through on the final piece.
Before we do any assembly, I'm going to take the front and back panels and make a little hole for our hands. To do so, I'm going to use a big Forstner bit, drill two holes then take a jigsaw and connect them. Now, I'm going to take the half-inch thick bottom piece and cut it to size. Time to glue these guys up.
Next, we're going to cut the bases to size over here in a table saw, and then we're going to install the dado stack and put a rabbet along all the edges so the crates will fit nice and snug in there, and the crates will then be removable and you can move them around if you want to. Then after that, we'll install some legs on the bottom so here we go.
I just got done sanding everything and I'm going to add one more element that I wasn't planning on. I can see down here where the crate meets the base, I want to create a little shadow line along the bottom. To do that, I'm going to take a chamfer bit in my router and make a little chamfer all the way around the bottom and that should give us a cool little black line, a little black shadow all the way around.
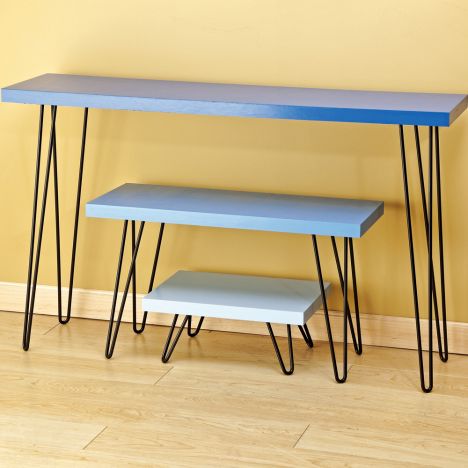
Looks like it's floating on there. Loving it. Let's get some legs installed on here and then put a couple coats of tung oil on. I got these hairpin legs from Rockler. I have it temporarily taped down here so I can flip it over, put the crate on here to see if I like the placement, which I do. I'm going to pre-drill the holes here. You'll notice that I do have them inset on the bottom here because there's not enough material where the rabbet is.
There we go. Of course, I'm going to take them right back off to put a finish on them. I got this tung oil from Rockler that we'll put on here. This is the moment right here. It's the big reveal. I love this part. You're ready to see it on these dovetails? Watch this. I don't know that you're ready for this. Look at that.
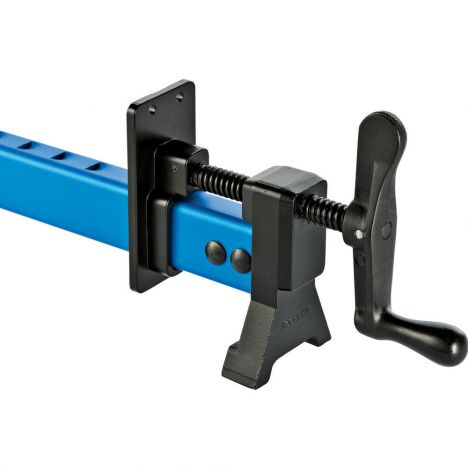
I would like to thank Rockler for their continued support. Nearly all the materials for this build came from rockler.com that includes the solid walnut, the legs, the dovetail jig, the router, and the clamps used this project. Visit rockler.com for all your woodworking needs.
Really cool. Super, super happy with the way it came out. The fit on there is perfect. There's just enough looseness for it to expand and contract. Something I do want to point out, the bottom of this crate, that bottom is not glued in. It's free floating and there's room for that to expand and contract. Usually, I use plywood bottoms for my boxes, and you don't have to worry about that expansion, but this is all solid wood, and so there is going to be some expansion. You don't want that bottom to expand, and then blow out your corners here.


Keep the inspiration coming!
Subscribe to our newsletter for more woodworking tips and tricks