Video: Build a Platform Bed with Storage
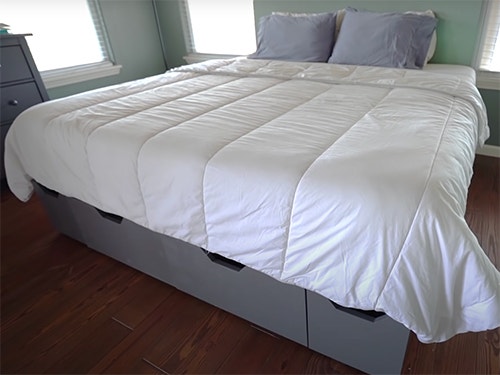
In this video, April Wilkerson builds a modular platform bed with a lot of storage.
April Wilkerson designs and builds a modular platform bed with four drawers along the front, and six open shelves along the sides. It's easy to assemble and take apart when you move.
You can find more great projects and techniques from April Wilkerson at her website.
Featured Tools:


April Wilkerson: I have been wanting to build a platform bed with storage for a while now. That's what I decided to tackle this week. In my design, I made it not only modular so that it's easy to assemble and take apart when I want to move it. It also has lots of storage. Four drawers along the front and six open shelves along the sides. Then on the inside are two drawers for long-term storage. Let me show you the process on how I built it. I designed the bed so that a king could be build from five sheets of plywood. I use my Armor workbench to move the first sheet onto my plywood workbench. Then I got started with breaking it down with my Triton track saw. I'll go ahead and warn you that it is a lot of pieces, but I have a set of plans with a full cut list, which drastically speeds up the process.
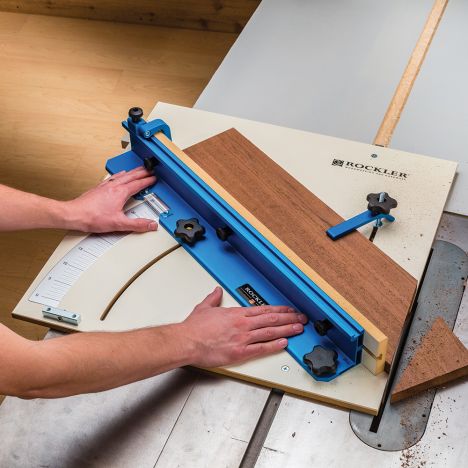
After breaking down my first sheet, I decided to paint my remaining sheets before cutting the rest. This also sped up the process since it's quicker to paint an entire sheet, rather than lots and lots of small parts. After reducing the size with my track saw, I'll use my table saw and the Rockler cross-cut sled to break them down even further, really utilizing the stop block, built into the sled to make many repeatable cuts. Before getting into it simply, let me show you my overall game plan so that you can understand the direction I'm going.
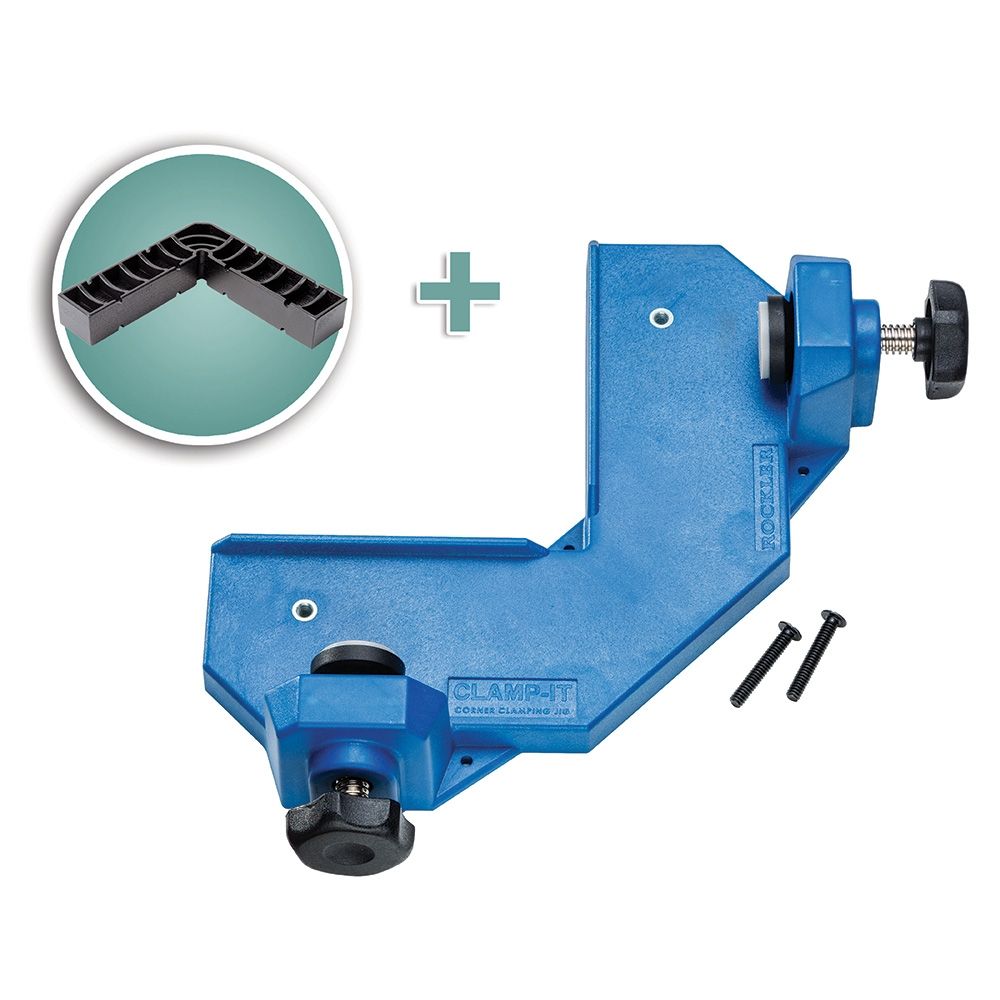
The bed is built in three main sections. The two sides are identical but mirrored with open shelving. Then the front spans across to connect the two and has drawers. I'm starting with building the two side sections, which is just a big old box with 90-degree connections. I used a few of the Rockler clamping jigs to align my parts. This is the jig that it has a square in the center and easily clamps two boards together at a perfect 90 so that once you align them flush, you don't have to worry about them moving as you're driving in screws.
I first attach the two end pieces, then move the jig down to repeat on the center dividers. You can see I'm using a scrap as a spacer. I use it quick bandy clamp to hold it down and then set my next board in the corner clamp. Then just have to bump the top up against the spacer to set it in place. Once I have them clamped in place, I flipped the unit down to make driving in the screws easier.
With those in, I could flip the unit over and attach the top. By the way, even though wood glue isn't as strong when applied to a painted surface, I still applied glue to every joint before backing up the connection with screws. After attaching the top, I flip the unit over once again and repeat it to attach the back, utilizing, a Rockler bar clamp here to bring in any edges that weren't perfectly flushed
One down. Let's go ahead and get that out of the way and repeat to build the second. I intentionally set the height of my Armor workbench so that I can slide items on and off my main workbench easily. Now, on to the front section. Building this box is just, the only difference is the dividers are spaced differently. Oh, and there also isn't a solid back on it. In order to not remove the mattress, anytime I want to get into the long-term storage drawers right there in the center, I designed it so that I can remove the two center drawers on the front, then pull the storage drawers through the same openings. All right, let's go on and put that on the ground and see how it looks. The front lines up to one of the side sections. Then the second side can easily line up after that.
It looks great to me. Let's build some drawers next. These are just smaller boxes. After cutting up my parts, I once again use the clamp of jigs to help assembly along. On my personal bed, I like the idea of open shelving on the side but if you wanted more drawer storage instead, the same process could be used to make them all drawers. To attach the face of the drawer, I used a few spacers to create the needed offsets, then applied glue and screws. Since these screws are on the show face of the drawer, I will later fill them with wood putty and paint over it when I do the touch-up paint to the rest of the bed. That is one drawer and two drawers. Next was the same process, but on a slightly smaller scale to create drawer three and then drawer four.
Now, I'm actually going to be putting those on sliders, but I ordered them a little late and was still waiting on them. I went ahead and paused that step and moved on to building the center section. The first thing I did was create a railing all the way around the inside of the three sections. This lip will later hold the piece to cover up the center section and hold up the mattress. I applied glue, then set the rail into place with screws. You can see that I'm again, using a spacer to line it up correctly. You want to set the depth of this rail so that the final board will be flushed all the way across in the end. After repeating that on the other two sections, I grabbed the pieces from my cut lists to start building a center support for the mattress.
This member is made up of a top and a bottom with some two by fours in between. If it were important to get the spacing correct, I would have used to space or to align them. Since it won't be seen, I just eyeballed the placement, then use wood glue and screws to attach everything together. Easy enough. Now, this can be placed here. Perfect. When looking at the bed at this point on the ground, I decided to add some feet if you will, to the bottom of each section to raise it up just slightly. I like the idea of it looking like it was floating. I ripped some boards down at the table saw that include two strips together. Then I could flip the three components on their top and attach these rails to the bottom, to create a standoff.
I set these back just slightly so that they won't be seen from the sides or face. All right. I got to apologize. I actually had a camera malfunction here. I forgot to hit record and I don't have the footage of assembling the drawers for the long-term storage, but it is the same process as making the drawers before. The intention here is to utilize some of the wasted space in the center section. Once I place my center drawers on casters, I next set the two final plywood sheets in place to create the rest of the platform. Well, I it left it as is. I didn't like how I had to move to the back of the bed to slide them off.
I decided to quickly cut in some handholds, just a place, big enough for my fingers to slip in and push back the top. I used a random radius in my shop to trace roughly around the center of this piece. I cut it out using my Triton jigsaw. To clean up this edge, I use a new tool to my shop, which is a Triton portable oscillating spindle sander. It was perfect in this application. As this part is too large to take over to the table. However, it is worth noting that Rockler makes the table for mounting the sander. Should you have a small part? That's easier to take to a table such as the drawer faces with the same curve, cut into them, then this is available. That is the bed almost done. The last thing to do is to mount the drawers to the slides, to make the front actually functional.
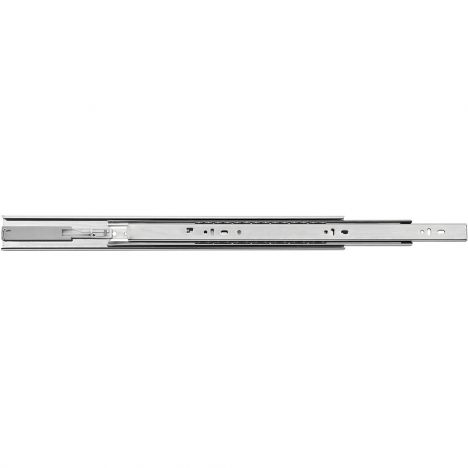
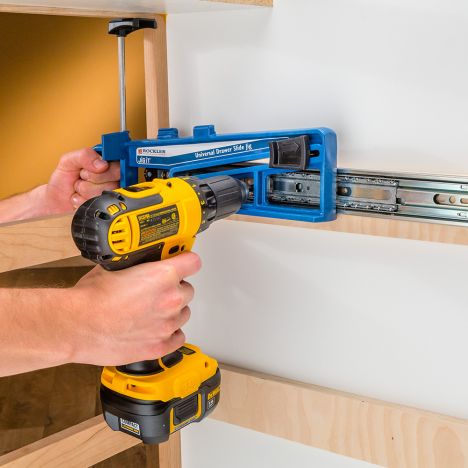
To make this go quick and easy, I use a jig from Rockler. You can set the slider into place and hold onto it by sliding the lock down and wedge it in. Now, you can position the jig on the sideboard of your cubby. With the built-in stops along the front of the jig, it aligns the slides in the same distance on all of them. It's worth mentioning that if you wanted to reference off the top of a cabinet instead of the bottom like I'm doing, there is a built-in positioning rod that's adjustable. Again, all the slides come out at the same position in the end. Then the way I personally install drawers is I keep the entire slide together when attaching it to the cubby. I place a small spacer at the bottom to set the drawer on top of, then still keeping the two parts together I pull up the second part and attach it to the drawer.
There we go. Easy as can be. That is a wrap with the build portion of the build. Now, all the sections can easily be moved inside and put together. After arranging the two side sections with the front, they can be screwed together from the inside of the small drawers. Then the rest of the parts can be added. I plan to store off-season clothes in the long-term storage drawers in the center, folded clothes, or linens in the front doors. Then the sides I'll use for shoes or baskets of items. All in all this build has a lot of pieces but it is very easy to put together. If you're needing a bed, then check out the plans with a cut list and material list over on my website. I have this design and all of the standard sizes. Of course, I have left you links to everything I used or mentioned in the video, down in the description below. I will see you on my next project.

Keep the inspiration coming!
Subscribe to our newsletter for more woodworking tips and tricks