Video: Build a Mobile Shop Cart
In this video, April Wilkerson gives a tutorial to build a mobile shop stand.
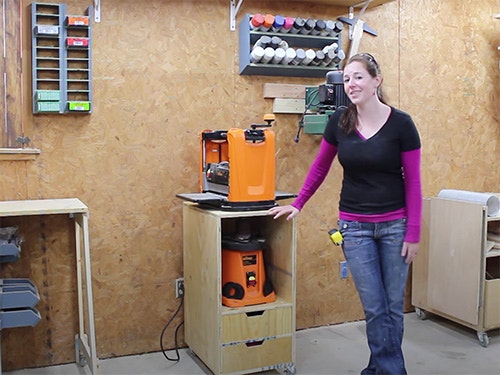
April Wilkerson decided to take the time to build a mobile shop stand to store and move her planer and spindle sander. She decided to keep the planer on the top and store the spindle sander in the body so whenever she needs the spindle sander.
You can find more great projects and techniques from April Wilkerson at her website.
Featured Tools:
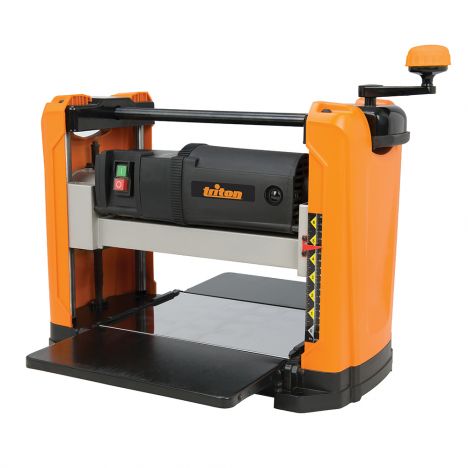
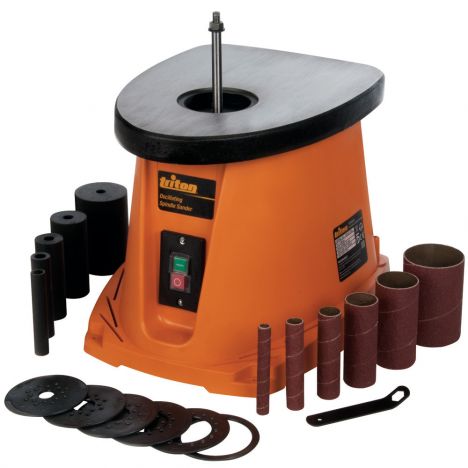


April Wilkerson: I actually got the Thickness Planer and the Spindle Sander from Triton a while back, but I didn't unbox them until recently because I just don't have anywhere to put them. This week I'm going to be making a dedicated stand for both of these units to go. I started off by breaking down my sheets of plywood. Now, if you're interested, I do have a set of plans posted on my website. Two things that I'm doing differently in my shop this week since I haven't been able to finish installing my Harbor Freight dust collector. I went ahead and moved my dust, right dust collector, and hooked it up to my table saw. The second thing is I'm using a Triton and multi stand for an outfeed table./
I really like this stand because I don't want to build an outfeed table and permanently give up any space. This I can fold up and sit against the wall. Whenever I'm done with the project, I took the side pieces and drilled a few pocket holes, then used them to attach a top and a bottom. Instead of purchasing sliders for this, I went ahead and just made a shelf for the drawers to sit on, to make installing these easier. I grabbed some scrap wood and cut some spacers, this way I can set the shelf directly on these spacers and then just drill them down. Again, I use pocket poles here. Also, I'm using a clamp pair just because my material was a little curved.
With the first one installed, I repeated the same steps to attach the second. I was originally thinking that this was going to be the bottom and that this was going to be orientated like this with the drawers on top. But now that I'm looking at it in this orientation, I think that I'm going to go- I think I'm going to move forward with the drawers being placed on the bottom and the Spindle Sander being stored here instead. That way I don't have to bend down this much further in order to pick up the Spindle Sander. I grabbed one of the front pieces and used its speed square to just draw a handle. Then I used, my band saw to cut it out. Now I did tape both of the front pieces together just so I could do it in one pass.
Before attaching all the drawers. I went ahead and grabbed the side pieces and the front pieces and cut a dado near the bottom. This will be a slot for the bottom to slide in and out of. Once I have the dadoes cut perfectly to match the bottom. I raised the blade up and then cut the two back pieces. This way, they're the exact height needed, where they're not interfering whenever you try to slide the bottom in or out.
To assemble the drawers, I typically use pocket holes, but this time I went ahead and used glue and brad nails, I attached the front and then repeated the steps to attach the back then it was just a matter of sliding in the bottom. I could just repeat the steps to make a second. Of course, at this point, I went ahead and move the unit to the floor so that I could have access to what will be the bottom. This way I could attach casters because I like everything in my shop to be mobile, if possible. I simply cut it back and attached it using glue and brad nails.
I think that's going to do it. I went ahead and put the drawers in test-fitted them, everything seemed to fit just fine. Now a modification I'm definitely going to do in the future is make this Spindle Sander slide out. That way, it's easier to get in and out of the storage compartment. Now I typically don't light drawers on things because they're just notorious for collecting junk. However, I want to get rid of this rolling cabinet. I needed a place to put the few things that I actually store in there. I went ahead and got that out of the way and then put this in its new spot.
I bet a lot of you are going to suggest that I add wings to the side so that I can run long joints through my Planer, but I'm not going to. I have a different idea that I have planned that I'll try in the next few weeks. Stay tuned for a feature project with Planer stand. Also, keep in mind that I'm using this for my Planer and spindle standard, but really it's a great all-around shop stand that you could use for a drill press, a belt sander, really just any piece of equipment that you need to stand for.

Keep the inspiration coming!
Subscribe to our newsletter for more woodworking tips and tricks