Vertical Alignment Drill Press Jig
By pairing up a simple jig with your drill press, it's fast and easy to get perfectly vertical holes every time — even in the narrowest of workpieces.
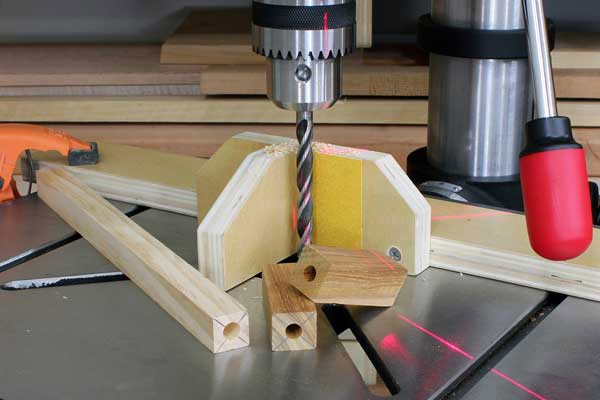
To get dead-on 90-degree holes every time, no tool in the shop does the job better than a drill press. With your workpiece solidly on the machine’s level table, the drill’s consistently reliable up-and-down travel ensures that the bit remains vertical in relation to the workpiece. However, when your workpiece is extremely narrow, as with pen blanks and other thin objects, holding it upright on the table throughout the drill’s travel becomes problematic. But a simple jig made with scrap-barrel cutoffs combined with a bit of careful setup will have you drilling one perfectly vertical hole after another.
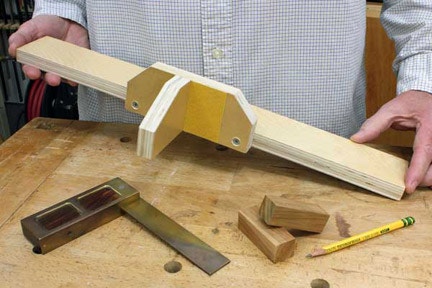
Step 1: The drilling jig couldn't be simpler, and consists of only three parts. The largest component, the jig base, can be any straight scrap of 3/4" material about two inches or so wide. The length should allow it to hang over the sides of your drill press table by at least an inch. To this, center a second piece measuring about 2-1/2" x 6". Finally, attach a third smaller piece of about 2-1/2" x 3" at a right angle to the second. Measure this carefully to be sure it's square to both the rest of the jig and the surface of the drill press table. The exact size isn't critical for either of the pieces attached to the base, but if you plan to drill primarily pen blanks you probably don't want it to be higher than the 2-1/2" I've used here. Note, too, that I've attached a piece of pressure-stick sandpaper against one surface; this will keep the workpiece from sliding when drilling.
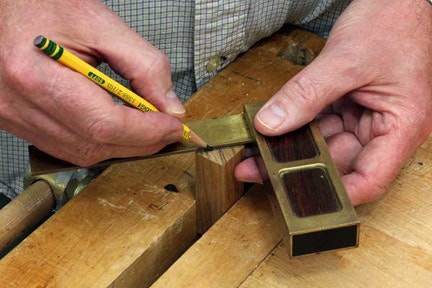
Step 2: Find the exact center of your workpiece. I've secured a pen blank into my workbench vise and made pencil marks from corner to corner. Now, if you're going to be drilling several blanks of the same size, no need to do this more than once. You'll see why shortly.
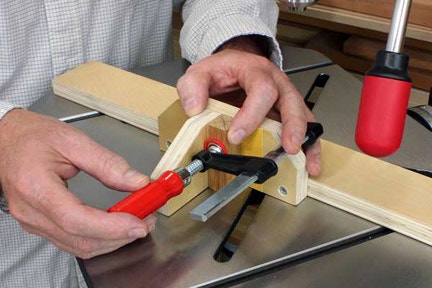
Step 3: Back at the drill press, clamp the blank to the jig so it nestles securely into the corner made by the two front pieces and is level with the table. Note here how cutting the corners off the two front pieces of the jig allows me room to set and adjust the clamp.
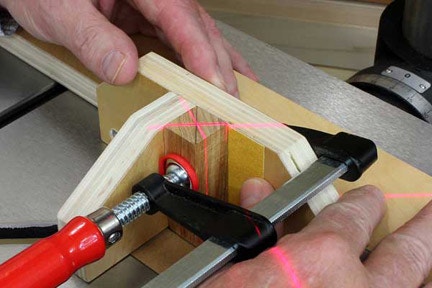
Step 4: Now, center the jig and workpiece underneath the drill spindle. If your drill press has centering lasers this is a piece of cake. Just slide everything around until the crosshairs line up with the center mark on the end of the workpiece.
If you don't have lasers, lower the drill bit and line the jig/workpiece assembly up with the tip of the bit. When you're satisfied everything's centered, leave it right where it is.

Step 5: Being careful not to move the position of the jig, clamp it solidly to the edges of the drill press table.

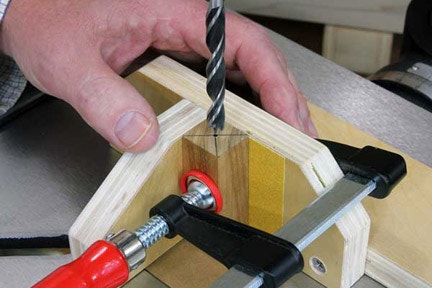
Step 6: Everything's ready, so turn on the drill press and drill your hole. Since you're drilling a very deep hole, be sure to raise the bit occasionally to clear chips. When you've completed the hole, unclamp and remove the workpiece from the jig, but leave the jig itself securely in place. I mentioned earlier that, when drilling a series of identical workpieces, you only have to mark the center of the first one. With the jig still clamped in place, the drilling point is still set; as long as all the subsequent workpieces are the same size, you can swap them in and out of the jig all day and hit the center every time.

Step 7: This jig will easily handle workpieces up to maybe 6" or 7". Higher than that and it gets a bit more difficult to ensure verticality; plus, on some drill presses the amount of room between table and spindle is limited. For longer workpieces — like the 12" high corner members of one of my wooden candle lanterns shown at the upper right of the photo — mount the workpiece in the jig so that most of the length extends down through the center opening of your drill press table. As long as the end of the workpiece being drilled is held snug in the jig, your holes will be perfectly vertical.


Keep the inspiration coming!
Subscribe to our newsletter for more woodworking tips and tricks