How to Use a Scroll Chuck to Turn a Wooden Bowl
A four-jaw self-centering scroll chuck makes it easier to hold bowl turning blanks on a woodturning lathe. Rather than fastening the turning blank to a faceplate, the blank is secured in a scroll chuck. Four-jaw scroll chucks are handy for bowl turning.
How to Use a Scroll Chuck
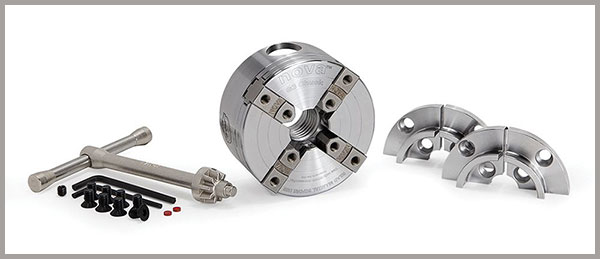
The Nova 48287 G3 Lite Chuck is a four-jaw self-centering chuck that features a reverse lock for turning in both forward and reverse. It has a 1'' x 8TPI direct thread, and is designed for use on lathes with 1'' x 8TPI spindles. It's strong but lightweight body has less overhang, which is perfect for smaller lathe spindles.
Preparing the Turning Blank
Cut down a tree ... actually, there’s so much free wood around, you'll be inundated with logs if ever you make the mistake of letting friends and family know that you want wood! I know this firsthand.
Select a log, cut it to a bowl-diameter length, then cut it apart along the pith. You can do this with a chainsaw or on your band saw. Next, cut the half-log section round. The band saw is the best machine to use. Check your bowl blank for major cracks. I personally avoid all cracks in green wood, as they often end up expanding over time. I remove the bark before I put the wood onto the lathe as it tends to fly off in huge sections during the turning process.
Keep the center marked, and also mark the center on the opposite side. I have round cardboard forms in a variety of sizes with a hole in the center for this purpose.
Turning the Tenon

You will need to turn either a recess or a tenon on your bowl blank so the chuck will have something to grab into or onto. The method of mounting the blank onto your lathe is the same for both.
For this article, I am rough-turning a bowl blank from green wood, and the bottom of the bowl is next to the bark-edge of the bowl blank. That’s where I will turn a tenon to accept the chuck.
You can mount the bowl blank between centers, or you can use a screw chuck. If you use a screw chuck, you will need to drill a pilot hole to accept the screw. Screw chucks are an accessory for chucks, and they are also available as dedicated screw-center chucks or screw-center faceplates.
I mount the wood between centers so the bottom of the bowl is at the tailstock of my lathe, making it easier to turn the tenon. Make sure the wood is securely fastened between centers, as some lathe’s tailstocks tend to creep backwards instead of tightening. As you progress with turning the tenon, check to make sure the tailstock is still tight.
To begin with, set your lathe’s speed at a slow RPM, somewhere less than 800 RPM, just to make sure the bowl blank is mounted safely and balanced properly. Increase the speed gradually.
Begin by cutting from the bottom of the bowl to the rim. To start with, your tool will hit wood, then air, then wood. If the bowl blank is balanced, increasing the RPM will make the cutting process smoother — you will spend less time "cutting" air.
Turn a tenon. The tenon should be as large a diameter as possible yet still fit into the jaws of your chuck: the larger the tenon, the more holding power. The shoulder of the tenon (the outside bottom of the bowl) should rest on the top part of the jaws. This will provide leverage for side-cutting pressure.
Please note: if the tenon bottoms out on the inside area of the jaws, this leaves a gap between the top of the jaws and the bottom of the bowl. Your bowl blank will be much more likely to fly out of the chuck when roughing out the inside.
The jaws of your chuck should not stick out too much from the body of the chuck (somewhat common with older model chucks). If they do, that becomes a potential hazard if you should accidentally brush up against them. It hurts!
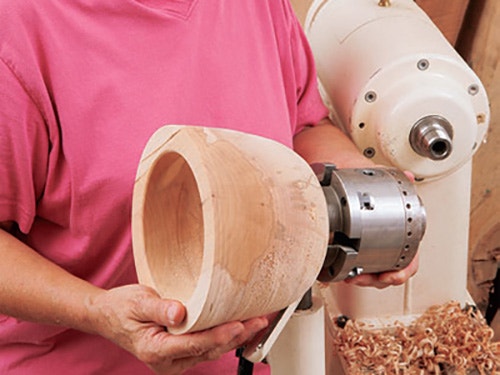
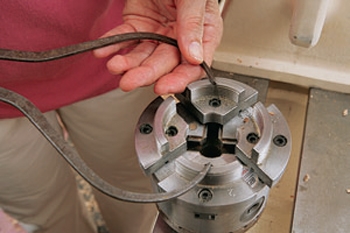
Mounting into the Chuck
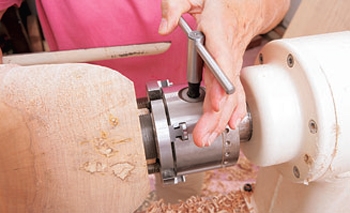
Remove the bowl blank, attach your chuck to the lathe, then mount the bowl blank onto the chuck. Tighten the jaws. You can use the tailstock to help hold the wood while you tighten the jaws. You can also keep the tailstock in place to help hold the bowl for initial turning.
Start the lathe at a slow speed, just to make sure the bowl blank is centered properly in your chuck.
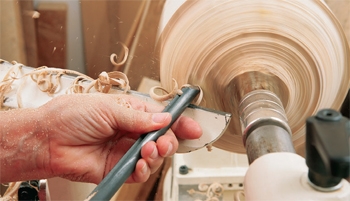
You can further shape the outside of your bowl or begin directly with the inside. I like to refine the outside of the bowl a bit, but I always leave sufficient wood on the shoulder next to the tenon.

Now comes the fun part. Remove the wood from the inside of the bowl using a bowl gouge. (Remember, roughing gouges are only for spindle turning.) Most green wood cuts like butter, and you’ll only be removing the bulk of the wood. Make the shavings fly!
Bowl Thickness and Drying Time
The wall thickness of your bowl will depend on the size of the bowl and the type of wood. Green bowls warp as they dry, so leave enough thickness for re-turning. If you leave the walls too thick, that will increase drying time and perhaps cause cracks. Experiment for a while to get it right.
Drying times vary with the season, the type of wood, and how wet or dry the wood was to begin with. Some will dry within a few weeks; others take half a year or more. If there are no cracks or voids to begin with, I find that bowl blanks don't crack when drying, so I tend to leave mine just sitting around my shop. Some turners, however, routinely cover bowl blanks with end-coat sealant and date them. Others like to put bowl blanks in shavings or in paper bags for the drying process.
It’s also possible to completely turn the bowl and be done with it. You can leave whatever wall thickness you want, but you might enjoy trying to make a paper-thin bowl from very wet wood. Wet wood holds up well and cuts smoothly, with no sanding.
You began the process by putting the assembly together dry with all the clamps and glue blocks in place. This ensured that everything needed was at hand, that the shoulder lines closed, and that the piece was square and out of winding. Once satisfied, the clamps were undone and laid out in order with the parts.
Re-turning Dry Bowl Blanks
Remount dry bowl blanks in your chuck for finish turning and sanding. The bowl can have a foot (the tenon) or that section can be turned off, leaving a flat bottom.
There are specialty jaws for chucks to hold bowls for turning the bottoms. You can also make your own, or invest in a vacuum chuck system. The point is, you can (and should) turn the bottom of your lovely creations!


Keep the inspiration coming!
Subscribe to our newsletter for more woodworking tips and tricks