Using Classic Hide Glue in a Modern Shop
Hide glue has fallen out of favor in the modern era, but Ian Kirby still finds a place for it in his shop.
The subject of this article floated through my mind one day as I stood in a workshop having a conversation with a colleague. Across the shop, one of the workers was preparing to glue up a piece of work at an assembly table. Years of teaching, an abiding passion, an inability not to be involved — who knows? — but I couldn't keep my eyes off the glue-up operation.
The worker was using one of the PVA glues. Having placed various parts of the piece on the assembly table in no particular order, he collected a few pipe clamps, a bottle of glue, and right away began dispensing glue. Then, realizing he had nothing to spread it with, he made a quick trip to the scrap bin to find a piece of waste adequate for the job. And so the glue-up proceeded. Although I can't recall a word of my shop conversation, I clearly remember thinking how radically gluing and clamping methods have changed simply because we have changed the kind of glue we use.
My purpose here is not to advocate a return to the use of hide glue, which was called Scotch glue in my day. Rather, it is to give you a glimpse of what your workshop experience would have been like had that glue revolution not taken place. I'll explain how the glue-up scene just described would have been so different, and I'll explain how making a butt joint and veneered work owed its methods to the glue. As well, there may be a touch of envy that today’s woodworker has it too easy when it comes to glue-up time, especially never having experienced the frustration — to say nothing of the stink — of a glue kettle boiled dry.
The Fall and Rise of Hide Glue
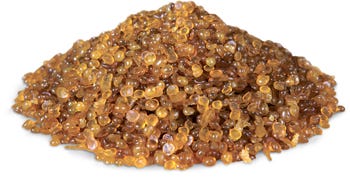
Although no longer in general use as a woodworking glue, it has become a specialty product used by makers of musical instruments, period furniture makers and furniture restorers. Early in my woodworking career, however, it was in everyday use. It came in slab form called "cake" glue, large pieces about 1/2" thick in a heavy jute sack. While it was still conveniently contained within the sack, you broke the slab into smaller pieces with a hammer, ready for use in the glue pot. A slightly more expensive version was called "pearl" glue. The transition from cake to pearl was considered a bold development at the time, which is not surprising considering that the cake form had changed little over the years. After World War II, the chemistry of wood glues developed rapidly and radically and led to major changes in the whole of the woodworking industry, both products and machinery — but that's another story.
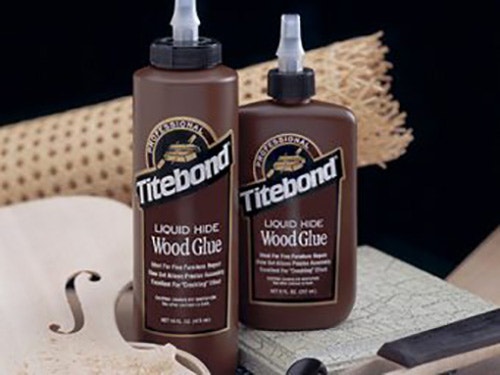
With the advent of PVA glues, everyone had thrown away their double-boiler glue kettles, leading industry to develop cold liquid hide glue in a bottle. It lacked some of the adhesive qualities of hot glue and, whereas the dry cake or pearl had an indefinite shelf life, the bottled version was only good for a year.
Manufacture of Hide Glue
Hide glue is made from the hides of animals slaughtered for beef. The nearest everyday product you might find in your kitchen is gelatin. However, the key ingredient of hide glue is called collagen, which is extracted from hides in a relatively long and complex process that is well controlled to yield very predictable results.
It's made in a variety of strengths for different applications other than woodworking, although even here there are some differences, because stringed instrument makers and piano rebuilders use a stronger hide glue than is deemed necessary for general woodwork.
In other words, somewhere someone knows all about the various kinds of hide glue, their gel strength, how they are best used and what for.
Preparing Hide Glue
In this section, I could lapse into nostalgia, because there was a definite pride and rigor associated with preparing the glue and keeping the shop supplied at all times. Indeed, the appearance and management of the glue station was a strong indicator of how well the entire shop operated, sort of a "by their glue station shall ye know them" appraisal. The glue station comprised a fairly large surface in a permanent location, covered with a sheet of metal. It would typically have two or three gas rings and maybe half a dozen glue kettles, plus the bags of glue and cleaning buckets. Imagine a restaurant kitchen with pots and plates left to pile up for a few days — convert that mess to glue kettles, and the importance of glue station cleanliness becomes obvious.
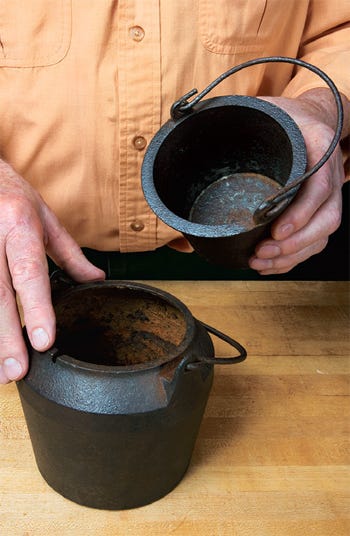
The glue was made in a glue kettle that consisted of two cast-iron pots, one fitted inside the other. The outer pot contained water, which was the means of supplying controlled heat to the inner pot that held the glue.
Shop practices varied, but clearly it was impractical to leave the responsibility of making glue to whoever wanted it when they wanted it. In my shop, you did glue duty — as well as your normal work — for a week at a time.
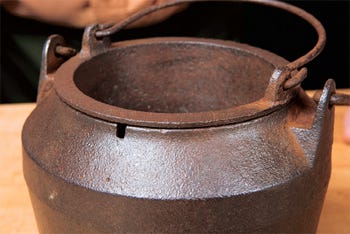
One of the unsung tasks of glue duty was to keep the inner pots clean. A full pot at the end of the day could be reheated, but since each reheating caused a loss of strength, twice was the max. However, adding more pearls and water to a used pot was forbidden, because the glue was then considered contaminated. That meant that cleaning the glue pots was an ongoing necessity. The procedure was not complicated: you simply boiled the submerged pots in a large bucket of water on the gas ring that the glue was made on. After about half an hour, there was a weak solution of glue in the bucket and clean and very hot pots. Come Friday, you boiled them all out so that the next glue handler had a clean start to the week.
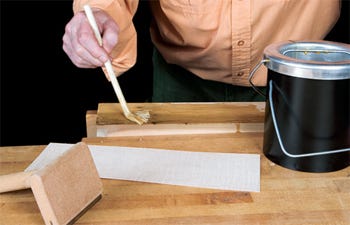
Making glue brushes was also part of the duty. They were made from about 3/8" diameter reed. The end was softened by soaking in water for a couple of days, then beat with a hammer to part the fibers and form an effective brush.
Hide glue requires minute-to-minute attention to ensure that there is always water in the outer pot. Apart from not having glue available when someone needed it — you just had to keep an eye on workflow for that — the sin that prompted the most scorn was to let a kettle boil dry. That event was announced by way of your nostrils, but unfolded so quickly that the smell grew even worse by the time you reacted. The stench of burnt glue undoubtedly gave the stuff its bad reputation
A pot of freshly made hide glue has a unique smell that evokes an earlier age, like the smell of heated oil and steam around a steam engine, and brings back fond memories more forcibly than words or pictures ever could. However, there is universal agreement that burnt glue stinks horribly — it's also worthless.
A Unique Quality
Hot hide glue gels as it cools. Gelling means that it becomes sticky, a process you might remember from using postal stamps or brown packing tape. Once the stamp or tape was wet, you pressed it in place. If you didn’t, it simply dried, and you could make it sticky again by re-wetting, provided you hadn't licked or wiped off all the glue. The glue-up is also reversible. If you haven't reversed the procedure yourself, you have probably seen an old film of someone steaming open a letter or steaming off a stamp.
These characteristics of gelling and reversal of sticking by heat and moisture are unique to hide glue, and they gave rise to a number of woodworking techniques that we had to alter to accommodate modern glues that behave differently as they cure or dry.
Rub Joint Recalled
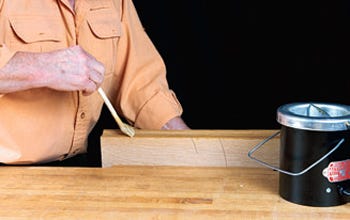
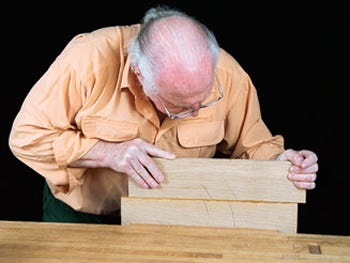
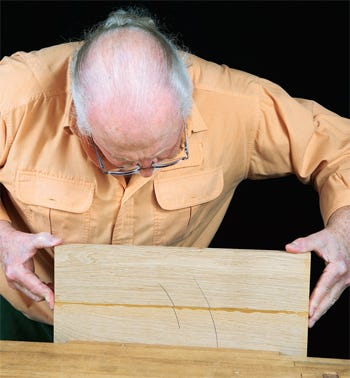
What today is called a butt joint was known as a rub joint. The name says it all. The joint was made, the same as now, so that the two edges were in as close contact as we could get them by hand or machine tools. Hot glue was applied to completely wet both edges. With one board in the vise, the second was positioned and rubbed back and forth a few inches while bearing down on it with as much force as possible to squeeze out the glue.
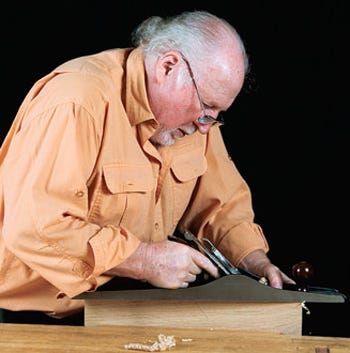
As cooling and gelling took place, rubbing became more difficult, and squeeze-out became less. At some point before it was too late, the top board was accurately positioned side-to-side and end-to-end with the bottom board. By the time you returned the glue pot to the gas ring, the board could be released from the vise and put on the floor resting upright against the wall on a support stick. No clamps required.
I've always thought that this joint, made this way, underscores the vital importance of wetting both glue faces: fail-safe gluing depends upon thorough wetting of the glue faces.
Although the glue was hot, in winter months shops and wood were often cold. The solution was to stand the jointed edges on the heating pipes for 10 minutes before gluing. I never had the courage to dry test the joint after subjecting it to this treatment, but there was no question but that the finished piece stuck together perfectly well.
If you have any doubts about the strength of hot glue, test results show that it is just as good as modern glues and is even superior in some conditions and applications. Testing to destruction will often break off large pieces of the wood tissue, leaving the glue line intact.

The oldest piece of furniture I have shows my first serious attempt at rub joints and demonstrates the strength and durability of hide glue. Made 54 years ago, my chest of drawers shows no sign of joint line failure. I would say that hide glue has done me proud.
Fulfilling a Musical Cause

Musical instrument makers and repairers use hide glue because of its reversibility. It's their version of steaming letters open to conduct their craft. Equally important is the glue’s ability to resist creep and glue line failure despite being under near-constant stress.
Hide Glue Legacy
I began by describing how I paid more attention to a glue-up I was watching than the conversation I was having. The big difference between PVA and hide glue is the limited amount of open time — the time between applying the glue and having to put the parts together before the glue gelled, making it impossible to join them. For this reason, you wouldn’t think of trying to glue and clamp a job by yourself. You needed a helper.
You began the process by putting the assembly together dry with all the clamps and glue blocks in place. This ensured that everything needed was at hand, that the shoulder lines closed, and that the piece was square and out of winding. Once satisfied, the clamps were undone and laid out in order with the parts.
Now came the glue-up and the need for a helper. Unless there were some oddities to explain, the helper knew his job was to put glue on his assigned parts, be at the tail end of the clamp that you chose to use, correctly position it and its clamping block as you closed the clamp, hold the tail end of the squaring rod — and do all this quickly and efficiently without discussion. The glue allowed no time for idle talk or confusion.
The brief open time of hide glue inspired the development of a very efficient method of gluing and clamping that was well-established long before I began woodworking. Despite the fact that modern glues don't make the same strict demands of preparedness and procedure, I follow the same rigorous glue-up practice today. It ensures an orderly, calm glue-up less prone to unintended results.


Keep the inspiration coming!
Subscribe to our newsletter for more woodworking tips and tricks