How to Use Sandpaper for the Best Finish

A personal axiom that I formulated long ago is that 90% of the work in any woodworking project is in the last 10% of the details. Much of this last 10% is in final surface smoothing and this invariably involves sanding. On most of my furniture I use very sharp hand planes for much of the leveling and smoothing, but sanding is still necessary if a gloss or semigloss finish is to be applied.
I have never met a woodworker that did not see sanding as drudgery, hating every minute of it. This prejudice is born out by the amount of less than spectacular finishes I see when I am called upon as a judge at club furniture competitions. Knowing a bit about sandpaper itself and proper technique can save a great amount of time.
Garnet paper is inexpensive and fine for sanding bare wood but open coat stearated paper are cheaper in the long run because they cut faster and last longer.
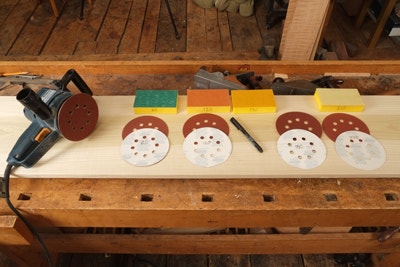
Not all sandpapers are equal, and you tend to get what you pay for. Experience has taught me that it is cheaper to buy a more expensive sandpaper because it cuts faster and lasts longer. Yes sandpaper is a cutting tool: a great number of small cutting tools actually. These cutting tools are the abrasive particles and better sandpaper has stronger, sharper particles that are arranged better. Sandpaper is sold in closed coat, where 100% of the surface is covered by abrasive particles and open coat, which has coverage in the 50 to 70% range. Open coat is much better for power sanding wood because the debris from sanding (called swarf) has someplace to go. A final quality that improves performance in wood is for a paper to be stearated. A coating of zinc stearate, a lubricant, is applied to the finished sheet. This lubricant prevents the swarf from sticking to the paper and clogging it.
Sandpaper made in North America is graded under the Coated Abrasives Manufacturers Institute (CAMI) while European papers are rated under the P scale dictated by the Federation of European Producers Association (FEPA). The later always has a P in front of the grit number so it is easy to tell. A grit size in one system does not exactly equal a grit size in the other, but from my experience you can use them interchangeably. There is not enough difference to affect the final finish.
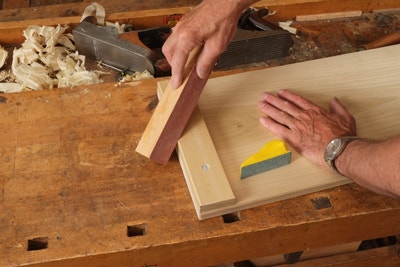
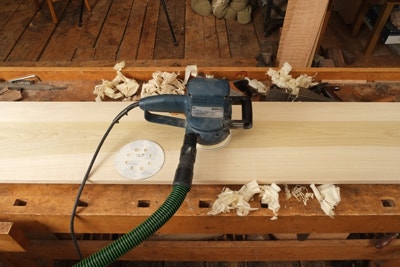
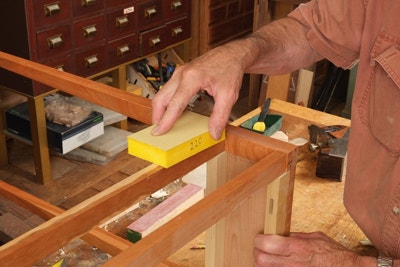
The most important first step is to start with coarse enough paper. This is the biggest mistake beginners make. If there are major imperfections in the wood surface or the surface needs to be leveled a bit, as when a rail meets a rail on a face frame, then start with 60-grit. With my hand planed finishes I start with 120- or even 150-grit so it is worth sharpening the plane iron. Sand longer than you think you need to in order to remove all of the surface imperfections. If hand sanding, using a padded block for your paper gives better results as does making the final strokes with the grain as much as possible.
The second important factor is to make small jumps in abrasive coarseness. If we take 60, 80, 100, 120, 150, 180 and 220 as being grits that are readily available, make no more than a two grit jump as you move to finer grits. Under this rule you would move from 60 to 100, 150 and 220. If you started with 80 (the regime I most frequently use) go to 120, 180 and 220 grits. For power sanding I like hook and loop backed paper because I can save partially expended sheets for later use.
The third important factor is not to sand too fine a grit. For most finishes, shellac included, sanding finer than 180-grit is counterproductive. Sanding with 220 and finer between coats is helpful if you want a glossy finish. Stearated paper is much superior for sanding finishes and using waterproof paper with some soapy water or mineral spirits is a great time- and money-saving trick.


Keep the inspiration coming!
Subscribe to our newsletter for more woodworking tips and tricks