Table Saw Maintenance: Miter Gauge and Rip Fence

Keeping a table saw in top-notch condition isn't difficult, it just takes a bit of regular maintenance including cleaning, inspection, replacement of worn parts, alignment and fine tuning.
It's one thing to own an expensive sports car or a luxurious boat, it's another thing to keep it in top condition over time. Regular maintenance is essential to keep all of our "adult toys" operating at their best. A table saw - or any power tool - is no different. A well-tuned machine is a pleasure to use, while a poorly maintained one is at best inaccurate and a pain to use and at worst can cause a serious accident.
I like to go over my saw and perform each of the operations I've described in this column at least once every six months - more often if I'm using the saw all the time. It's also prudent to go through most of these procedures on a brand-new saw right after you assemble it. Good maintenance will keep any kind of table saw - cabinet, contractor's or portable - performing both accurately and safely over the decades to come.
Adjustments for the Miter Slots and Gauge
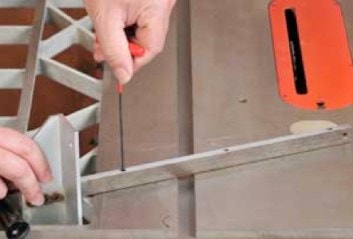
To keep your miter gauge crosscutting accurately, there are several checks and adjustments you'll need to make. The first step is to make sure that the bar on your miter gauge fits snugly, yet slides smoothly in the table slot. Some miter bars have special inserts that can be adjusted in or out with a small Allen wrench. If your gauge lacks this feature, you can replace the bar with an aftermarket steel bar that has adjustable spring plungers that keep the bar tight in the slot.
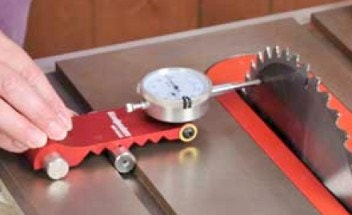
Next, check that the slots on your table saw are actually parallel to the blade. If they're not, you'll never get accurate miter cuts, no matter how perfectly the gauge itself is adjusted. Start by mounting a good, flat saw blade and raising it to full height. There are several ways to check the slot/blade parallelism. The easiest method is to use a dedicated tool. These specialized tools use a dial indicator to take readings on the front and rear surfaces of the blade body. If the dial shows a different reading front to back, then the slot is likely not parallel to the blade./p>
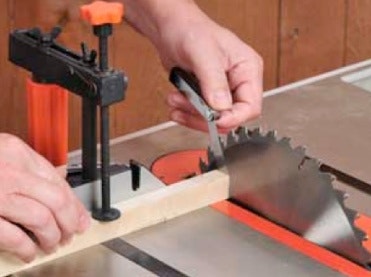
A lower-tech way of checking parallel is to clamp a scrap wood stick to a miter gauge set for a square cut. Extend the stick so that it just touches the front edge of the saw blade. Slide the gauge until the stick is touching the back edge and see if there's a gap (if there's resistance sliding the gauge, reset the stick to touch at the back of the blade and slide it forward). Measure any resulting gap between the blade and stick with an automotive feeler gauge. To make sure that any gaps aren't due to an un-flat saw blade, rotate the blade 90-180 degrees and repeat the process (also be sure and do this if you're using a special saw gauge).
If the parallelism test reveals a discrepancy of more than, say, .003-.005 in., then you should realign the blade and miter slot. On contractors' and some portable table saws, resetting parallel is done by shifting the saw's rear trunnion side to side on the underside of the saw table.
On most cabinet style saws, this job is accomplished by rotating the entire table top relative to the saw's base. In either case, loosen the necessary bolts and shift the position of the trunnions or top slightly, then retighten the bolts and recheck the parallelism of the slots and blade.

Finally, check the angle stops on the miter gauge head by taking cuts and 90 and 45 degrees, and comparing the cut ends as you did when adjusting the blade tilt angle stops, described above. Readjust the screws on these stops as necessary so that they yield accurate cuts.
Adjust the Rip Fence
One of the most important things to do to maintain the cutting safety and accuracy of your table saw is to make sure the rip fence is basically parallel to the blade. A fence set with its back end closer to the blade than the front end tends to pinch the workpiece against the saw blade, which can result in a dangerous kickback.
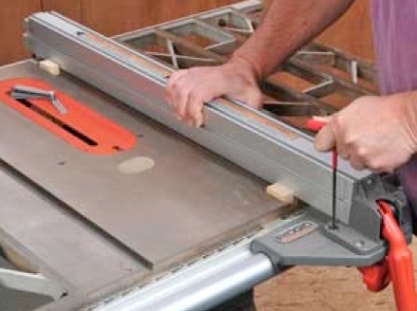
An easy way to check for parallel is to press two 3/4-in. thick blocks at either end of the saw's right-hand miter slot, then lock the fence down just shy of the blocks and measure the gaps. Ideally, the gap at the back edge of the blade should be just a skosh (.001 - .002 in.) greater than the front gap (this provides just a slight bit of clearance at the back of the cut). Use a feeler gauge to check the gap. If the setting isn't right, loosen the screws or bolts that secure your rip fences bar to the fitting on the front rail and reposition the bar as necessary. Retighten the bolts and recheck fence alignment.

If your table saw has a cursor and scale on the front rail, position the fence bar so that its face lightly touches the saw blade teeth and lock it down. Reset the fence's cursor to read zero on the rail's scale.


Keep the inspiration coming!
Subscribe to our newsletter for more woodworking tips and tricks