Table Saw Blade Organizer
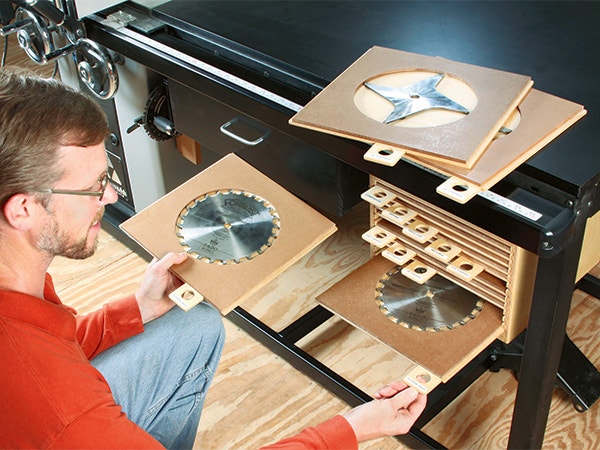
In addition to keeping your blades handy, safe and sharp, the trays have a place for a label that allows you to select the exact blade you need on the first try.
Saw blades don't come cheap, so they deserve better storage between uses than a cardboard sleeve. This project stows 12 blades in pull-out trays. Two magnets hold each blade securely in its tray for transport. I keep four 10" blades and an eight-piece dado set in mine.
Making the Carcass
Get started on your organizer by cutting the side panels (pieces 1) to size. Set up a 1/4"-wide dado blade and raise it to 5/16" to cut the 12 tray dadoes into each side panel. Position the bottommost tray dado 1-1/8" up from the bottom edges of the sides. Space the dadoes 3/8" apart.
Now re-stack the dado set for a 3/4"-wide cut, and lower it to 1/4" to cut the bottom panel rabbet and the top panel dado. Position this dado 3/8" above the top tray dado. Wrap up the milling process by raising the dado to 1/2" and cutting 3/4"-wide rabbets for the back panel.
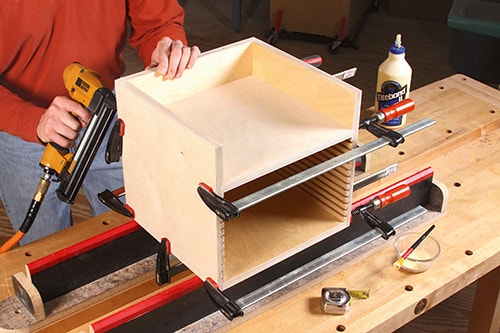
Cut the top, bottom and back panels (pieces 2 and 3) to size. Sand the inside faces of all the carcass parts, and apply finish now. When it cures, assemble the carcass with glue and brad nails.
Building the Blade Trays
Each tray consists of a base and a built-up guard that protects the blade teeth. Cut 12 bases (pieces 4) to size. When you study the photos, you'll see that the positions of the finger pulls on these trays are staggered in two rows of six. That means you really only need to lay out three pull positions for trays 1, 2, and 3, then flip them to suit 4, 5 and 6. The second tier of trays, of course, matches the first. So, I taped the blanks into three groups of four to speed up the machining process. Lay out the three different finger pull positions, one on each group of blanks. Tray positions 1, 6, 7 and 12 make up one group. Trays 2, 5, 8 and 11 form the second group. Trays 3, 4, 9 and 10 round out a third group. Bore the finger pull holes through each of the taped-up groups. Then gang-cut the pulls to shape on the band saw, ease the corners and untape them.

Re-group the trays, one set for 10" blades and another for 8" dado blades. Mark and drill the 3/4"-diameter blade release holes through these two new groupings. Follow the Drawings to locate the holes on the 10" blade trays. Move the release holes 1" further in to accommodate the smaller dado blades. Follow the same layout process to mark and drill pairs of 1/16"-deep pockets for the 3/8" magnets.

Set your trays aside and cut 12 blade guard blanks (pieces 5) to size. Use a compass to draw a blade cutout on each guard. Make these openings 10-1/4" in diameter for 10" blades and 8-1/4" for dado blades. Cut the openings with a jigsaw or on a scroll saw.
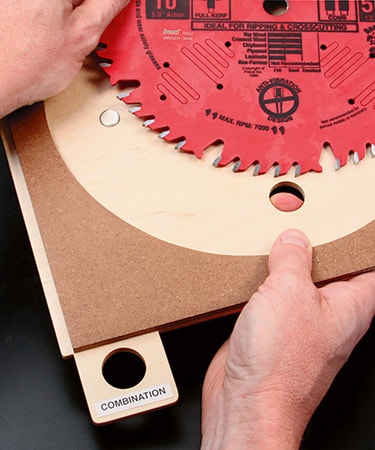
Sand the trays and blade guards up through the grits to 180, then glue and tack one guard to each tray, making sure to select the correct guard size for your full-sized blades or dado blade trays.

Once that work is done, you can apply finish to the trays and the outer surfaces of the blade holder. Install two rare-earth magnets (pieces 6) into each tray with dabs of quickset epoxy. Label each finger pull with the blade type the tray will house. I used laser-printed paper labels glued in place, then sealed them in with a few coats of shellac.
Installing the Fixture

Cut two strips of aluminum angle to length and bore pilot holes for screws to create hanger brackets (pieces 7). Fasten them to the upper edges of the holder with 3/4"-long panhead screws. Install the project on your saw where it's most convenient, fastening the brackets either to the underside of your side table or its framework. Now you've got a proper and convenient "condo" for a big blade collection!
Click Here to download a PDF of the related drawings.
-
 iGaging DigiCompass Precision Drawing and Marking InstrumentSpecial Price $37.49 Regular Price $49.99 Save $12.50Out of stock
 -
-
-


Keep the inspiration coming!
Subscribe to our newsletter for more woodworking tips and tricks