Reproduce a Spindle on a Lathe
Making exact copy reproductions of spindles looks difficult, but by following three key guidelines you'll get a perfect spindle every time — no matter how many you want to make.
Whether it's a chair rung, stairway baluster, tool handle or a table leg, if it's broken the chances are good you won't be able to buy a replacement that's an exact match. It's the same situation when you want to copy the spindles when making a reproduction of an antique item. That's why turning custom spindles is one of the most common tasks for the lathe in the home shop. But whether you're trying to make an exact single replacement or reproduction, or you're building a project from scratch that requires multiple turned spindles, the key is getting them to match. Taking a look at the intricate curves and profiles on an existing spindle, the prospect of creating a duplicate may seem daunting at first. In reality, however, the process is straightforward as long as you keep three things in mind:
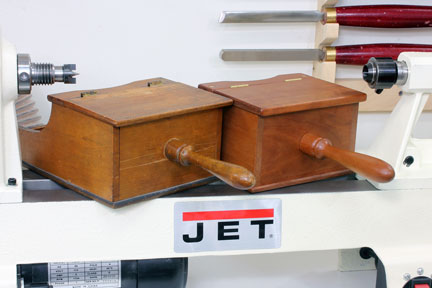
I recently completed a reproduction 19th-century ballot box that featured a lathe-turned handle on the original. Using that handle as an example, let's examine the process of copying a spindle turning.
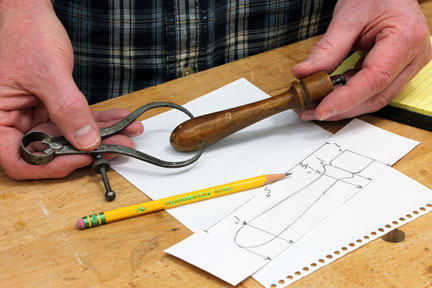
Step 1: Take exact measurements of the original spindle you want to copy and sketch out the general profile on a piece of stiff paper or cardboard. You don't have to worry about your artistic ability here; the important thing is to mark each differing diameter and the exact points where the profile changes on your sketch. I've used a caliper to transfer spindle diameters to their appropriate spots on my sketch, and then extended lines from those points to the edge of the paper.
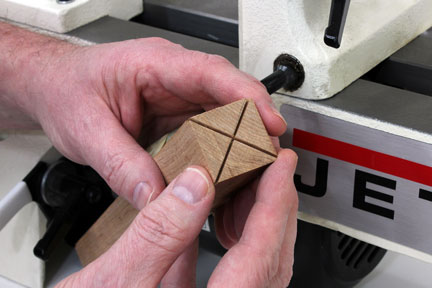
Step 2: Prepare a spindle of appropriate length. When turning spindles, I like to cut a crosshatch into the ends of the turning blank so the workpiece centers quickly and seats solidly on the lathe.
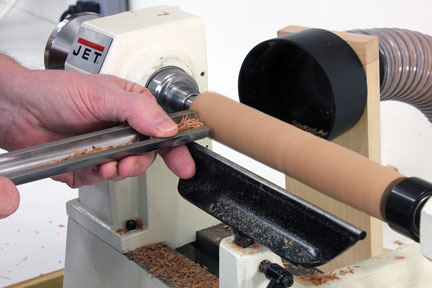
Step 3: Turn the workpiece to create a cylinder that matches the widest dimension of your original spindle. I'm using a roughing gouge to make a cylinder of 1" in diameter, which matches the largest diameter of my original spindle handle in three places.

Check the diameter of your workpiece frequently to ensure a uniform diameter along the length of the turning. A caliper is an essential tool for accurate spindle turning; if you don't have one, get one.
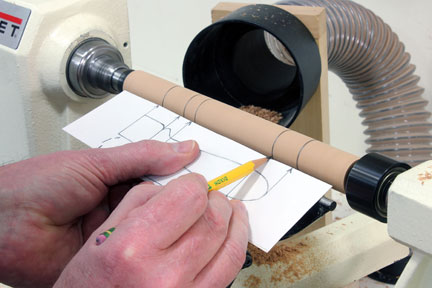
Step 4: With the lathe turning at a low speed, use a pencil to transfer the key marks from your sketch to the cylinder. Some of these marks will disappear quickly as you begin cutting, but they act as essential guides to get your cuts started in the correct locations.

Step 5: Kick the speed on the lathe up a notch and begin cutting the profile using your pencil marks, the sketch and the original spindle as a guide. The crucial thing to remember here is to work slowly, removing only a little bit of stock at a time. The idea is to sneak up on your target diameters while slowly shaping the workpiece to match the original. Note that I'm using a small round scraper here, but you may prefer a spindle gouge for this step.

Step 6: As the spindle begins to take shape, stop the lathe often and compare your turning to the original piece. Fail to make this critical comparison often enough, and you're likely to cut right past your target diameter and end up with a spindle that's not a perfect match. In this photo, you can see that I've completed the base and the lower detail of my reproduction spindle, and I have begun bringing the narrowest part of the spindle down to the target diameter. Note here that I still have one pencil guide mark remaining on the right side of the workpiece. This is the widest portion of the handle, and once I've brought the narrow part to size, it's simply a matter of cutting a gently curving taper up to that line.

Step 7: When you're satisfied that you've created a good match for the original spindle, bring the speed up another notch and sand the workpiece while it spins, working through ever finer grits to achieve the desired finish.

Step 8: Use a parting tool to separate the finished turning from the scrap ends.


Keep the inspiration coming!
Subscribe to our newsletter for more woodworking tips and tricks