Project: Modular Bookcase and Entertainment Center
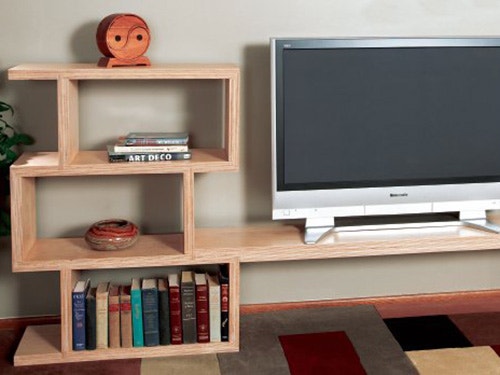
This bookcase project combines some deceptively challenging woodworking to create a durable, attractive and modern storage system.
A common woodworking misconception is that simple joinery is easy to make. While it's true that dadoes and rabbets are much more accessible than, say, secret miter joints, they must be cut to exacting tolerances to be done well. This is especially true when the joints remain exposed, as in these bookcases. Constructed from ApplePly, the joinery on the built-up shelves and uprights adds visual interest to the project's clean lines. If the joints are really tight, they look great. If they have gaps, well ... not so great.
For the Bookcase Drawings and Materials List in PDF Format, click here.
I say all of this simply to encourage you. Should you decide to build this piece, take your time at each machining step to fit the parts carefully. Also, be sure to stay focused. There is nothing tricky about constructing these modular bookcases but, as I found out the hard way, a moment’s lapse in concentration can necessitate a complete "do-over" on an individual component.
Ripping the Stock
ApplePly has two major advantages for this project (although it can be built from other sheetstock, should you so choose): first, its regular voidless veneer construction creates an attractive edge for the shelves. Second, it is sold slightly oversized as compared to other sheetstock (48-1/2" x 96-1/2"). That way, you can trim the edges off if they get dinged during shipping and handling.
I started the project by ripping 3/4" by 12-1/8" panels, the full length of the sheet. Then I glued and clamped pairs of the long panels into 1-1/2"-thick shelving blanks.
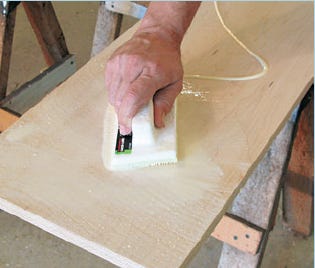
These are really large pieces to handle during a glue-up, so here's how I did it. Grabbing a large glue bottle, I swizzled a wiggly line of glue onto each piece. Then I borrowed a paint-pad usually used for wall painting, and dampened it with water. Using the painting pad, I spread the glue into a thin, smooth layer on each piece of plywood.
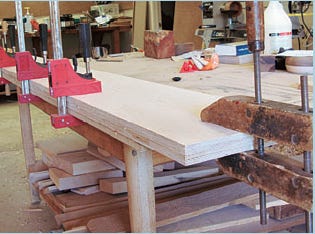
Assembling the glueblank sandwich, I clamped them together and to my assembly table using square-head clamps with additional Jorgensen woodscrew clamps on either end. Clamping to the assembly table ensured that the glue-up would remain flat. Due to the extra moisture content in the glue and the large surface area, I allowed a minimum of four hours for the glue to cure. Most of the blanks I left in clamps overnight.
Square and True
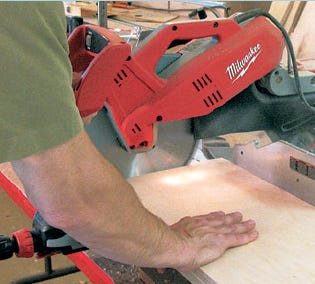
When the glue cured, I returned to my table saw and squared up the edges of the long blanks. With the second slice of the process, I ripped them to their final width. Then I used my power miter saw to crosscut the shelves and uprights (pieces 1 and 2) and even the TV shelf (pieces 3 and 4) to length. I cannot overemphasize how much trouble you will save yourself if these cuts are exactly square and true, so double-check your saw settings for each new cut.
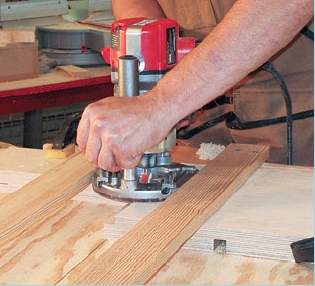
With the components prepared, it was time to start machining the joints. These are straightforward dadoes and rabbets, but since they're exposed, they need to fit snugly to look good. I decided to use a handheld plunge router to cut this joinery. These rabbets and dadoes could be formed on a table saw with a dado head just as easily. After I set up my router and made a few test joints using cutoffs from the actual stock, I continued to test the fit of the joints randomly throughout the routing process. Once the joints were all cut, it was time to assemble the bookcases.

I used a foam paintbrush to apply a thin coat of glue to the faces of each joint. I built up one compartment at a time, checked them rigorously for square and allowed the glue to cure. If your joints are cut well, this process will go very smoothly. I glued the TV shelf and the fascia strips together in the same manner.
The Finish Line
You can't escape it: now it’s time to sand. The maple veneer faces of the ApplePly need very little sanding, but the edges are a different story: they need to be sanded smooth right through to 180-grit. With that done, I applied three coats of dewaxed shellac and a final coat of wipe-on polyurethane.
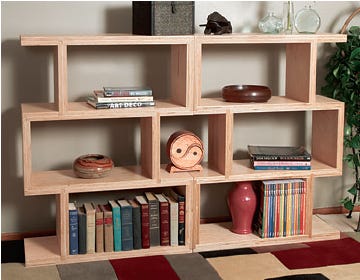
And even if I am forced to say it myself, I'm very pleased with the results — full-sized mockups, basic joinery, sound design and good material combine to create a lovely little bookcase set.


Keep the inspiration coming!
Subscribe to our newsletter for more woodworking tips and tricks