Project: Maple Shaker-style Dresser
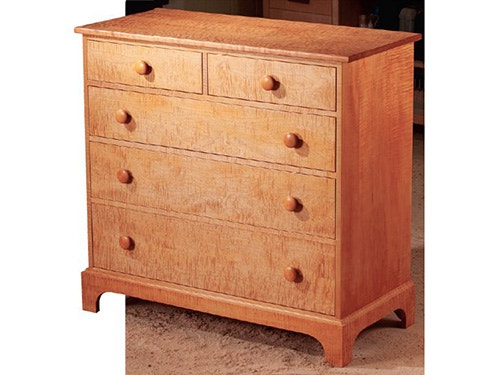
This classic American Shaker-Style dresser is modernized with some skillful techniques and attractive flared maple.
If you've worked with figured maple before, you know what a treat it is when the finish goes on and the wood's shimmery chatoyance lights up before your eyes. Who wouldn't be hooked? So, I decided to give figured maple a "go" on this Shaker-inspired dresser: quilted maple on top and flame maple for carcass, drawers and base. But this practical design could also be made from any other wood species you prefer.
For the Dresser Exploded View and Materials List in PDF Format, click here.
Big dresser drawers like these can get heavy when loaded with clothes, so I employed a couple of strategies to fortify them for long life and easy daily use. First, they ride on undermount ball bearing slides instead of wooden runners. And second, I beefed up their bottoms to 1/2" plywood — they’ll never sag under load.
Before You Get Started
For this project, the author chose Accuride slides for the drawers. You will need ten total slides for this dresser.
Making the Side Panels
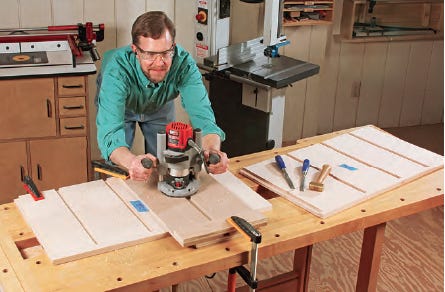
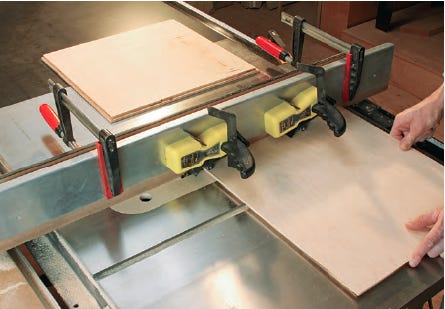
The dresser's skeleton consists of a pair of dadoed side panels that support five web frames. Start the construction process by gluing up two blanks for these two big panels (pieces 1), making sure they're flat and square. In order to produce even 1/16" reveals around the drawer faces of your dresser, this project needs to be accurate right from the start.
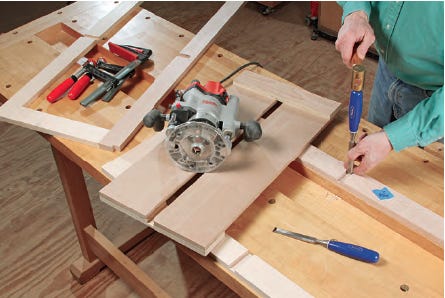
I used a slotted, shop-made router jig to guide a plunge router and a 1" O.D. rub collar for milling the five dadoes in each of the side panels. A 3/4" straight bit cut them to a final depth of 3/8" and my jig kept it all straight and true. Notice that the dadoes stop 3/4" from the front edges of the side panels; a stop block on my jig made these termination points easy to hit. Chisel them square. When the dadoes were tidied up, I cut 1/2"-wide, 3/8"-deep back panel rabbets at the table saw.
Building the Web Frames
The five web frames won’t benefit from a face frame to help true up their front stretchers, so be sure to surface your rails and stretchers (pieces 2 and 3) dead flat. It’s also important to match the web frame stock thickness carefully to the dado width on the side panels; you want a good friction fit of the frames in their dadoes to help strengthen the carcass.
Since I planned to use flame maple for the drawer faces, I made my five front web frame stretchers from flame maple as well, instead of the plain maple I used for the rear stretchers and rails. It's a small detail, but one that helps to harmonize the overall face of the project.
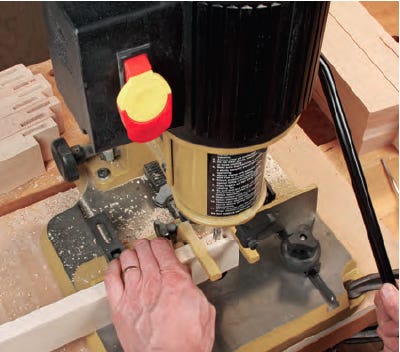
I settled on mortise and tenon joinery to attach the frame parts — these stout connections will prevent the frames from racking and ensure nice, square carcass corners. I stepped to my mortising machine to cut 1/4"-wide, 1-1/2"-long mortises on the inside edges of the stretchers, 1-1/4" deep. The rail tenons were easy to whip into shape at the table saw.
You could assemble the five web frames and then nibble their front corners to fit around the stopped side panel dadoes, but I notched the stretchers first at the table saw. I didn’t want to wrestle those big frames vertically against my miter gauge. Now glue up the web frames. To speed the clamping process, I pinned the joints with a few 5/8" brads.
Next, I reached for my slotted routing jig again to plow dadoes across the inside faces of the four top stretchers; they hold the vertical drawer divider square and lock it in place. The front two stretchers on this pair of frames have stopped dadoes, just like the side panels. The drawer divider fits into and around them. Chisel these two dadoes square.
Wrap up the web frames with one final step: select one as the topmost frame, and outfit it with pilot holes for screwing the dresser's top panel in place later. I drilled four evenly spaced holes along the front. Then I routed a series of 1/2"-long slotted screw holes in the rails and rear stretcher, all oriented parallel with the rails. This way, the top panel can move seasonally toward the rear but still show a consistent overhang in front year-round.
Assembling the Carcass

You're nearly ready to turn some loose parts into a carcass, but not before making the drawer divider. It's a two-piece assembly of a vertically oriented front edge (piece 4) joined by a tongue and groove to a longer horizontal rear member (piece 5). Again, my front edge was flame maple to match the web frame stretchers. But even if you build your dresser from plain-figured stock, make your divider's "show edge" from edge-grain stock and not end grain. That would soak up more finish and stick out like a sore thumb between the upper drawers. Notch the top and bottom front corners of the divider to fit into the stretchers’ stopped dadoes.
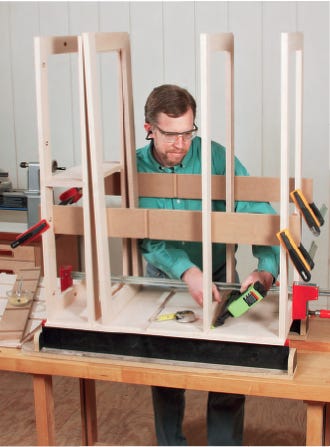
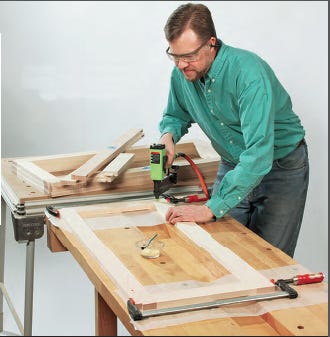
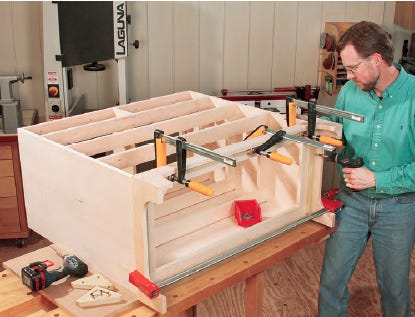
Start assembling the carcass by gluing and screwing the drawer divider between the two top web frames to form a subassembly. While that glue dried, I made several long braces from MDF and outfitted them with dadoes that matched the dado placement on the side panels. Clamped in place, these would hold my web frames vertically as well as square and parallel to one another as I assembled the big case. They really helped, since this is a rather unwieldly assembly.
To carry out the glue-up, I laid one side panel on the bench, set the drawer divider assembly in place in its dry dadoes and stacked the web frames on edge so I could install them one by one. Starting with the bottom web frame, I spread glue along only the first six inches of the dado (this allows the side panels to expand to the rear without cracking the panel or breaking a longer glue joint). I clamped the frame to two braces and pinned it to the side panel with several 1-1/2" brads. These were driven through the frame and into the end of the side panel.
Continuing to work up from the bottom, the third and second web frames came next. Each was fitted into its dadoes in the MDF braces and rested in a 6" bead of glue in the side-panel dadoes. The difference here, was that I drove shorter 1" brads at a steep angle through the bottom edges of the web frames to pin them to the side panel. Three evenly spaced brads were sufficient. Last to glue and pin in place was the drawer divider subassembly. As you install each frame, make sure the front edge lines up flush with the front of the side panel. (Note: The web frames are actually 1/4" narrower than the lengths of the side panel dadoes; this is by design to facilitate side-panel wood movement.) Glue and pin the other side panel into place.
Measure against your glued-up carcass to size and cut your dresser's back panel to shape. I installed mine at this point when I unclamped the braces to help square things while the glue joints set. However, don’t install it permanently. I used six screws for temporary attachment. You'll appreciate the ability to pull this panel off when mounting the slides.
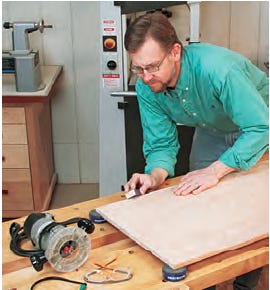
Prepare your dresser's top panel (piece 7) and set it aside for now. I routed the edges with a gentle bullnose profile.
Adding the Base
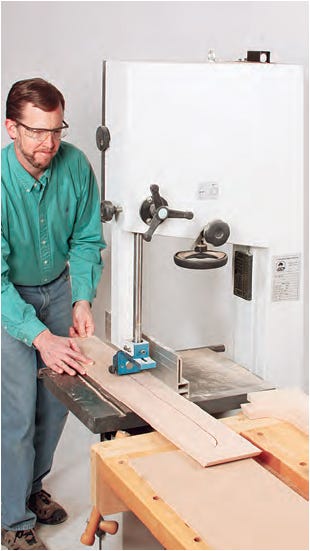
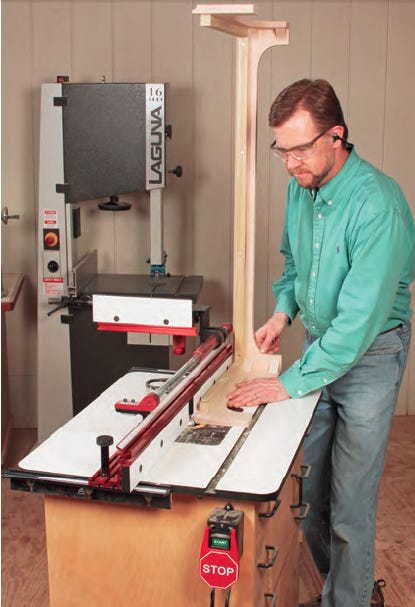
The dresser's base consists of a front and two sides (pieces 8 and 9) joined at the corners by miters. Cut overly long stock for these three parts, and miter the corners to refine the fit of these joints. Once they're airtight, cut the extra length off of the sides and create a template for marking the curved cutouts that form the foot shapes. I cut these out on my band saw and smoothed the edges on a spindle sander.

Glue and clamp the three base pieces together; a miter clamping jig, square backup block and a few long pin nails will ensure tight-fitting connections.
The dresser carcass rests on three long cleats (pieces 11 and 12) glued and screwed inside the base. Make and install those next. Now, reinforce the miter joints from behind with four small triangular glue blocks (pieces 10) — one pair butted under the cleats and the other two located 1/4" up from the bottom.
Mill a 1/2"-radius cove around the top outer edges of the base to add an attractive shadow detail here. Give the carcass and base a good sanding up through the grits to 180, and fasten the two components together with 1-1/2" screws driven into countersunk holes in the cleats.
A last reinforcing step is to add triangular support blocks (pieces 13) behind the rear feet. I installed these flush with the back edges of the web frame stretcher, using a combination of pocket and countersunk screws driven into the feet and down through the stretcher.
Building the Drawers
The five drawers have straightforward designs. Half-blind dovetail joints bring the front corners together, and a 1/2"- wide dado allows the backs to slip into place in the sides. Cut your drawer faces (pieces 14, 18, 22 and 26) to carefully fit their openings.
Mill 1/2" stock to make up workpieces for the side panels and backs.
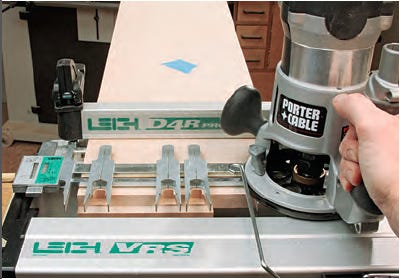
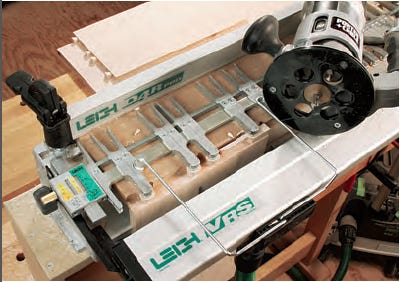
I used Leigh's D4R Pro Jig to cut variable-spaced dovetail patterns to connect the faces to the sides.
For the Shaker Drawer Exploded View and Materials List in PDF Format, click here.
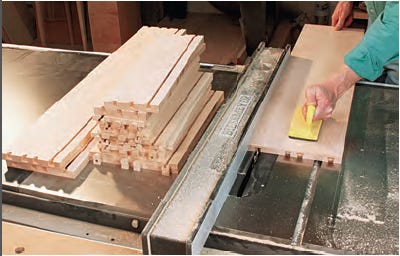
I set the drawer bottom grooves unusually far up in the drawer boxes — 7/8". This extra clearance allows room for the 1/2" drawer bottom panels, the slide hardware and shims that helped me adjust the vertical position of the drawers in their openings. Use a 1/4"-wide dado blade, raised 1/4", to cut the bottom panel grooves across the insides of the drawer faces and sides.
You'll need to mill rabbets around the front and side edges of your 1/2"-thick drawer bottom panels to fit them into their grooves. I adjusted my dado blade for 1/4"-thick rabbet tongues but made them 5/16" long to give me a bit of slip-space when fitting the drawers together.
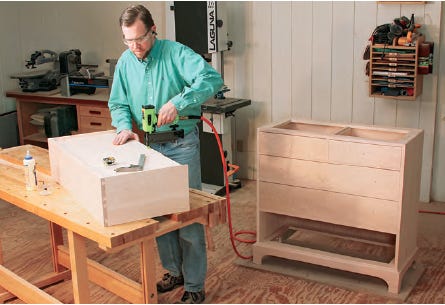
Assemble the drawers in the usual way, but check your drawers very carefully for square during the clamping process — there is so little clear space inside this dresser, given the nature of these inset drawers, that square boxes are absolutely critical. Be fussy and take your time!
Installing Slide Hardware
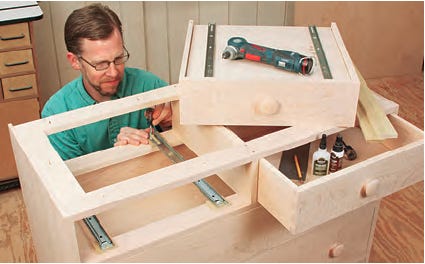
As I mentioned, shims (pieces 30 and 31) were my solution to "floating" the drawers evenly in their openings. I started the shims all at 5/16" thick and stock long enough to span the web frames front to back. After attaching the hardware to the drawers, I removed the dresser's back panel and laid pairs of long shims across each opening. Then I slid the drawers and slides inside to evaluate the top and bottom clearance. Some drawers had even reveals, but a few required me to shave the shims a whisper thinner.
When each drawer fit nicely, I sliced the shim strips into shorter segments to tuck behind the drawer faces and longer ones for the rear stretchers. I tacked them into place with CA glue. With the shims fixed, the slide hardware could be pulled apart and the carcass portion screwed down to the shims. Accuride outfits the slides with elongated holes that made it easy to tweak them left or right to give the drawers even side-to-side reveals in their openings.
With the drawers hung, I could finally install the back and top for good.
Finishing Up
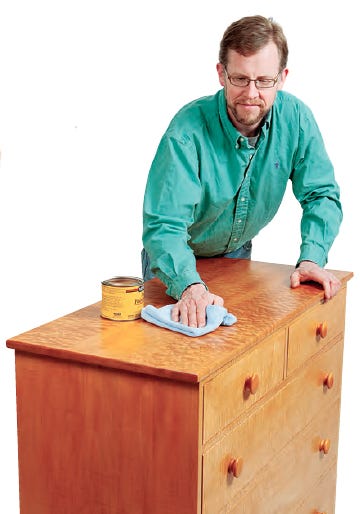
My challenge was to match the darker reddish quilted-maple top with the rest of the blonde flame maple. The finishing solution came in three parts: I polished the raw wood with 320-grit sandpaper to clarify the figure, then I applied Zinsser's amber shellac thinned 25% with alcohol to help tone the two color variations. Six light coats of aerosol lacquer later and then wax made the figure dazzle. All that was left was to thread on the drawer knobs and fasten the top panel. This showy dresser was ready to begin a lifetime of practical purpose.


Keep the inspiration coming!
Subscribe to our newsletter for more woodworking tips and tricks