Project: Eucalyptus Wood Bandsaw Box
Bandsaw boxes are an attractive project that can be completed in just a few hours in your shop.
I hope this project will be the first of many bandsawn boxes for you, because I am a real champion of them. Once you have the basic concept down as to how these clever little boxes are made, it's very easy to design your own. The most important thing to learn is the sequence of cuts that are required to get through the project. Use this eucalyptus wood box as an example of the process, and you will have no problem applying the same cutting sequence to other boxes.
Blade Width and Tight Corners
The width of a band saw blade is the factor that controls how small a radius you can cut. As it is designed and presented in the full-sized pattern here, you can make this box with a 1/4"-wide saw blade. If you choose to downsize the pattern, the radius of the curves will be too tight and you’ll need to put a 1/8"-wide blade in your saw instead.
For the Bandsaw Box Patern Diagram, click here.
Start off by grabbing a piece of scrap lumber and practice slicing tight curves that move from cutting on one side of your saw blade to the other. It is this transition that can go awry and give you trouble cutting a smooth-looking line.
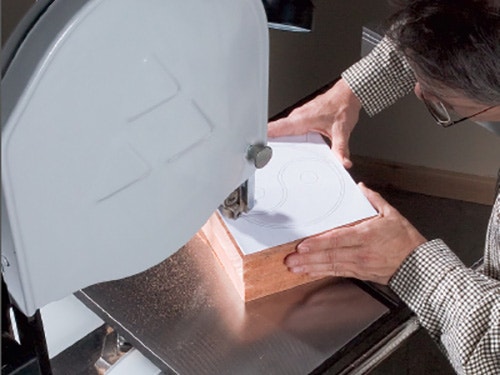
Once you've got your "saw legs" under you, attach the pattern to your blank with spray adhesive. I made my box blank by gluing together two pieces of 1-3/4"-thick by 8"-wide by 7-1/2"-long Lyptus® to create a single piece 3-1/2" thick.
Kicking it Off

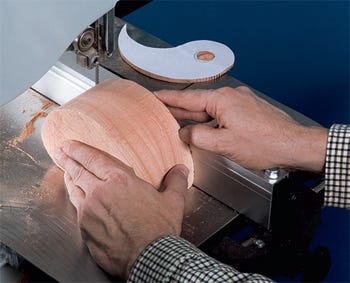
Start by tuning up your saw (Step 1) and cutting out the circular outside of the box (Step 2). I stayed just outside the line as I cut, doing my best to keep the blank moving slowly but steadily.

Try not to start and stop as you cut; it increases the likelihood of leaving extra-deep saw marks that you'll need to sand out later.
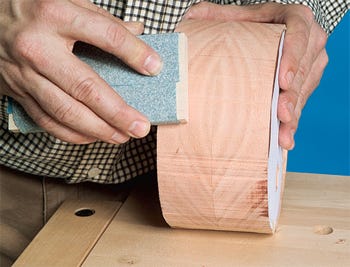
Save the scrap piece for making the base later. When you are done with the first cut, sand the outside of the circle smooth (Step 3). Otherwise the walls of the box will be too frail to sand later without potentially breaking them. It was at this point that I chucked a Forstner bit into my cordless drill (a drill press would work better if you have one) and bored the two shallow accent holes as marked on the pattern.
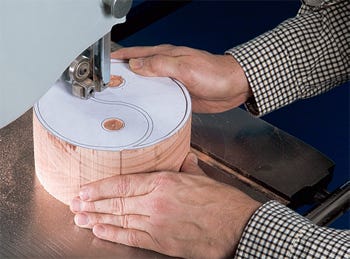
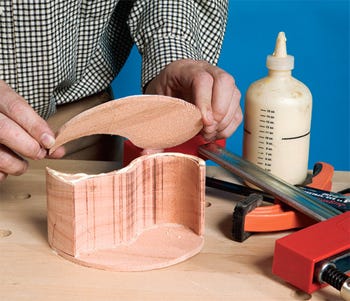
With your circular shape in hand, move back to the band saw and cut out the first tear-shaped core section. Make a straight entry cut aligned with the interior line on the pattern (Step 4).
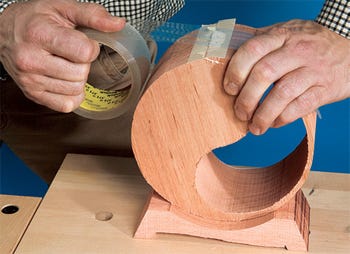
Do your best to make this a smooth, flowing cut. When this step is completed, glue the entry kerf cut closed to reattach the thin box wall to the circle (Step 5). I used clear packing tape as a "clamp" and yellow woodworking glue.
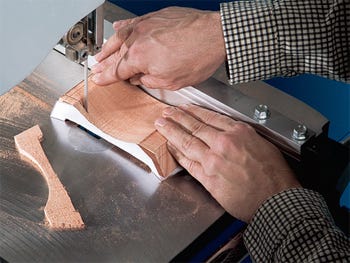
While the glue cures, take the core piece back to the band saw and slice both faces off (Step 6). These will become the front and back faces of the drawer. I used my fence set at 1/4" to guide the cuts.

Take the remaining core piece and mark out the lines to create the drawer cavity (Step 7). At this point in time, you will need to determine which is the top or bottom drawer. The difference is where the drawer opening is oriented, which you create by removing waste from the drawer. Check the pattern for further details.
Now you can glue the faces back onto the drawer core (Step 8). Hold the faces in place with clamps. While you wait for the glue to dry, repeat steps 4 through 8 on the other tear-shaped section to create the second drawer.
Make the Base and Finish the Box
When you formed the initial circle for the box, you set the leftover base blank scrap aside. Retrieve it now — it will make a perfect stand for your bandsawn box. Cut it to shape on the band saw using the pattern lines as a guide. Then tilt your band saw table to a 7° angle, and trim about 1/4" off of each long edge so the base will be angled all around.
Now you have a bunch of sanding to do. Believe it or not, I prefer to do this by hand using a sanding block. I round over all the edges of the box and drawers to provide soft shadow lines. (This also helps to hide small inconsistencies in the box's profile.)
When the sanding was done (all the way through 220-grit), I chose an oil finish, because it was easy to get into all the nooks and crannies. I colored the accent holes black and called it a day.

In the end, I was happy with the results — and I’m looking forward to making other box designs that sprang to mind as I built this one.


Keep the inspiration coming!
Subscribe to our newsletter for more woodworking tips and tricks