Project: Build a Toy Airplane
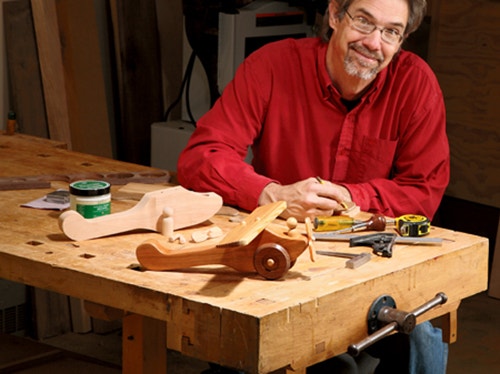
This wooden toy airplane takes your shop's scrap lumber and turns it into a wonderful heirloom gift.
It was the middle of the 1980s, I was self-employed, times were lean, and the holidays were fast approaching. Although my children were small, I still wanted to give them something special — and, as I had more time and wood than I did money, I decided to build each of them a wooden toy. This airplane is based on the one that I gave my son that year. This version has a couple of improvements ... it has a pilot that is secured by a magnet, and it has wooden axles and pegs where the original had screws, but all in all, it is the same airplane that was played with for many years after that Christmas.
First Things First
For the Airplane's Diagram and Materials List, click here.
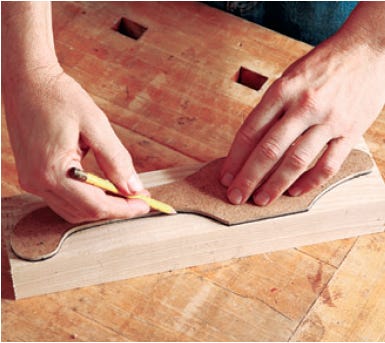
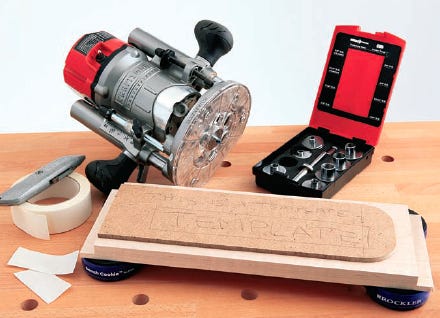
I fabricated templates for the wings, propeller and fuselage from 1/4" hardboard. Even if you are making only one of these, I would take the time to make templates. If you decide to make a few, they're a must-do task.
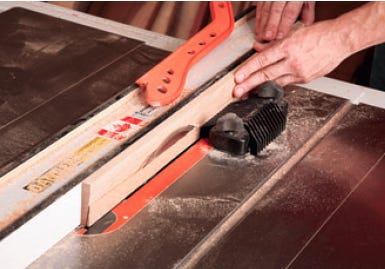
With that done, move to the band saw and saw out the tail section of the plane, leaving the rest of the blank squared up. The reason for this is that you will now narrow the tail section on your jointer. (If you don't have a jointer, you can do this on the band saw.)
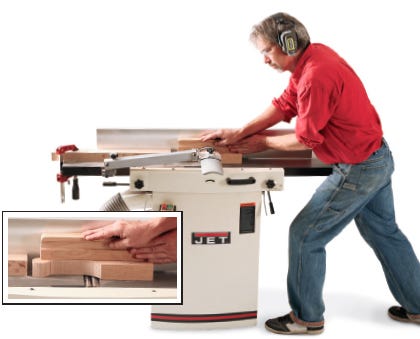
The way I skinnied-up the tail section of the plane was by setting my jointer to its deepest cut, clamping a stop block onto the outfeed table and carefully advancing the blank over the cutterhead. Note that I used a shop-made push block that is almost as long as the fuselage blank. The part of the blank that remains squared up is held securely against the fence. Do this to both sides.
For the Fuselage Diagram, click here.
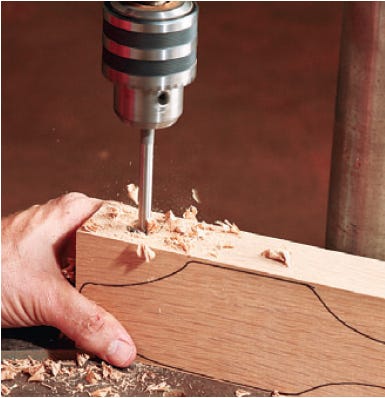
Now you can take the fuselage blank back to the band saw and cut out the front section of the fuselage. Go ahead and drill the axle holes and peg hole for the propeller, then set it aside for now.
Make the wing (piece 3) out of 1/2"-thick stock. Before you cut the wing down to length, it is a good idea to cut an over-long piece to width so that it will be easier and safer to cut the 7° angle onto the top face of the wing. Note that I used a featherboard and push stick for this procedure.
At this point, you can go ahead and trace the wing's end shapes onto the blank and saw it out using a band saw or scroll saw. Bore the mounting peg holes and set the wing aside.
Smoothing It Out
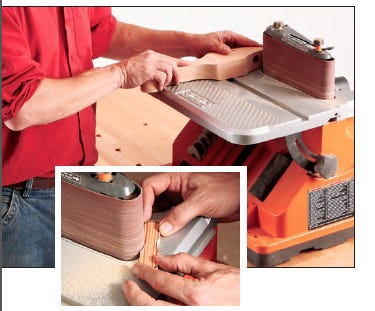
While sanding is necessary, it is not the most fun you will have in the shop. Sanding the wing and fuselage is best done on a spindle sander, or in my case, an oscillating belt sander. I was actually able to completely shape the propeller of the plane (piece 4) by using just the sander.
Where possible, I rounded over the edges of the wing and fuselage with an 1/8" roundover bit in my router table, but not every part of the plane can easily be reached by the bit. The remaining edges of the plane must be broken by hand using sandpaper. I also finish-sanded the pieces by hand up to 150-grit paper.
Rolling Along
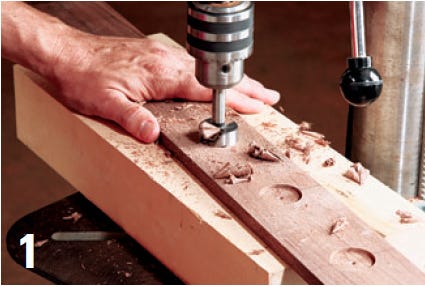
A toy like this would be pretty lame without operational wheels (pieces 5). The wheels in this case are made in a sequence of drilling operations on the drill press. First, using 1/2" stock, rip a strip to 3-1/2" wide. Next, mark lines every 4" and strike a center line. Chuck a 1-3/8" Forstner bit in the drill press and bore the hubcap holes 1/8" deep.
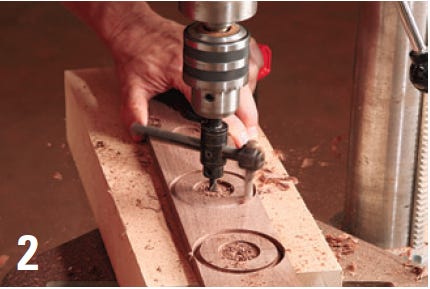
Switch to a wing cutter bit set to form a 3" circle and bore right in the center of the hubcap holes. Only cut halfway through the stock.
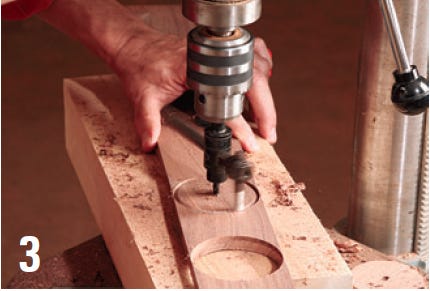
Flip the stock over and complete the cut from the other side, aligning on the holes bored through the stock.
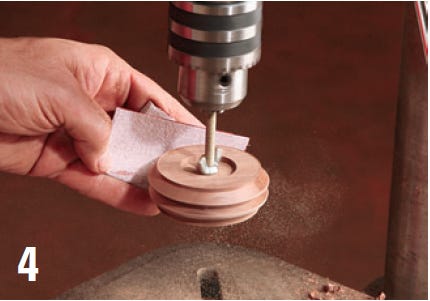
I sanded the edges of the wheels smooth by mounting a pair on a carriage bolt with a wing nut, chucking it into the drill press and sanding. You will need to expand the axle hole to a full 3/8" to mount the wheels.
To attach the wing to the body, drill only one of the peg holes in the top of the fuselage. Apply glue to both pieces and use the peg to help locate the wing. Clamp the wing to the fuselage, checking to be sure it’s square to the body. After the glue cures, drill for the second pin and glue it in place.
I found a can of spray shellac to be an effective way to apply a good clear finish to the toy: I used three coats with a rubdown of 0000 steel wool between them. Finish the wheels and propeller separately before you glue them in place.
You will need to cut the pegs for the propeller and the axles (pieces 6 and 7) shorter using a hand saw as they are too long out of the package. Before you attach the wheels, put a light coat of beeswax on their inside face. Attach the wheels with the axles, allowing the wheels to spin freely. Mount the propeller in the same way and allow the glue to cure.

The last task is to drill a small countersunk hole for a screw in the bottom of the pilot and then epoxy a rare earth magnet (piece 8) into the hole you drilled for the pilot. Now he won’t fall out during acrobatic maneuvers. Now all that’s left is to find a deserving 4-year old!


Keep the inspiration coming!
Subscribe to our newsletter for more woodworking tips and tricks