Making Spline-miter Box Joints
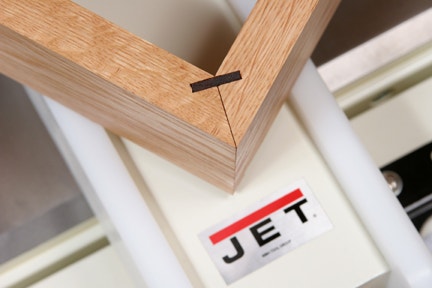
Splines can add strength and style to mitered box joints.
When you're making boxes but would rather not see the end grain, miter joints seem like a reasonable solution. But, they're tough to line up and clamp, and the end-grain mating surfaces make poor glue bonds. Want a simple solution to both problems? Add a spline across the joint. The spline provides long-grain surface area for more effective gluing, and it also creates a sturdy, self-aligning mechanical connection. You can downplay the look of these joints by using spline stock that matches the rest of the box, or choose a contrasting-colored wood for a custom touch. Here’s how to make these joints with your table saw.
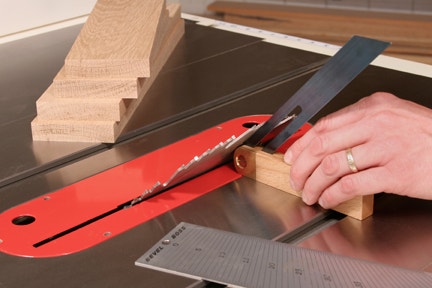
Step 1: You can cut the mitered ends of your box parts on a miter saw, but a table saw and miter gauge can be just as accurate with careful setup. Raise your blade all the way above the table, and tilt it to 45°. Verify the angle with a bevel gauge set to 45° or with the head of your combination square. It's crucial that the angle is spot-on, or the miter joints won't form square corners.
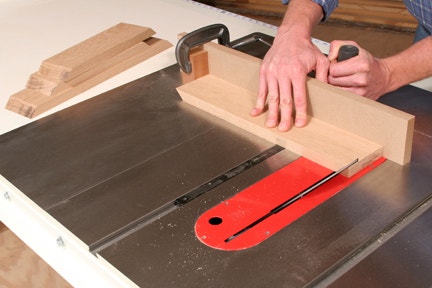
Step 2: Square up your miter gauge, and fasten a long auxiliary fence to it. If your box parts are relatively short, you can use the scrap fence and a stop block to cut the workpieces accurately to length. Start by miter-cutting one end of each of the parts, then clamp a stop block to the fence. Position it so the distance from the block to the blade equals the part length you want. Set the mitered end of the workpiece against the block, and miter-cut the other end. Cut the other matching part before repositioning the block, if necessary, to cut the remaining two parts.
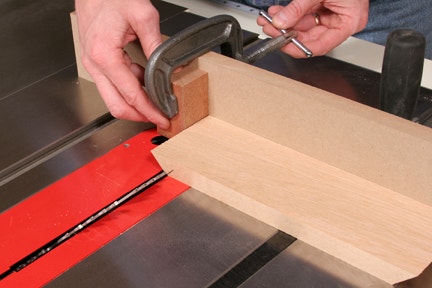
Step 3: Splines don’t have to be thick to be effective, but their placement in the joint is important. Locate them at or near the inside corner of the joint for maximum strength. Use the stop block, again, to register the spline cuts. Mark one miter where the spline will go. Now clamp the block to the miter gauge fence so the blade touches your layout mark on the waste side of the line, with the workpiece pressed against the block.
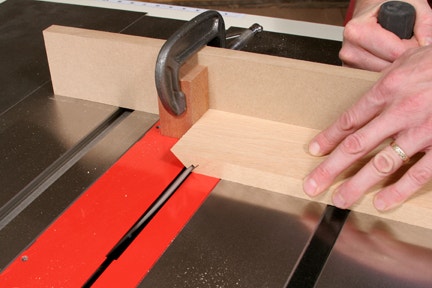
Step 4: Adjust the blade height to cut half the spline width into each mitered end. On 3/4-in. stock, a good approach is to set the blade so the spline cut will be slightly less than 3/8-in. deep. It will enable you to use 3/4-in. material for the splines, and it also prevents the spline slots from actually weakening the joints. Make a test cut on scrap stock first to check the depth setting, then cut the spline slots on all four workpieces.
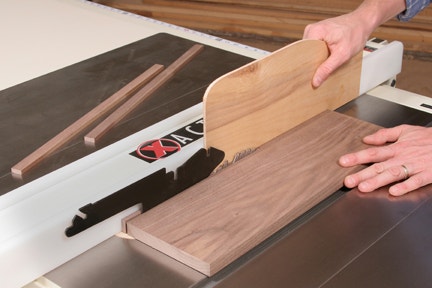
Step 5: Rip strips of spline stock off the edge of a long piece of scrap. The thickness of this scrap should match the combined width of the spline slots. Make these strips about 1/4-in. thick so there’s room between the fence and blade to push the material through with a thin push stick. (You’ll bring the splines to final thickness using a planer in the next step.) Rip one more strip than you need for use as a test piece.

Step 6: Planing your spline stock is a good way to give you full control over accuracy. Use double-sided carpet tape to fasten the strips to a flat piece of scrap (called a slave board). MDF works well for this purpose. Make sure the length of the slave board is at least 14- to 16-in. long or more to prevent it from getting caught inside the planer. Run the slave board and splines through the planer in several passes to reduce the splines to final thickness. Pop one of the splines off the board when you get close to the thickness you need, to check its fit in the slots. Leave the splines a hair tight at this stage.

Step 7: Test-fit the spline stock in the slots. Use a block plane, set for a thin cut, to shave them down for a good slip-fit. The splines should slide in easily but not loosely. One or two passes with a plane should do the trick.

Step 8: Cut the splines to length. Leave them about 1/8-in. longer than you need so you can sand them flush after gluing. Set the box joints together, and slide the splines into the slots. If they hold any of the joints open, take a few shavings off the edges of the splines to close up the miters.

Step 9: Carry out a full dry-fit before you glue your box together. Check the corners for square. A strap clamp is ideal for applying even pressure to all four joints. If you don't have a strap clamp, you could also pull a wide piece of packing tape around each joint to hold it closed until the glue dries. Then, sand the splines flush, and you'll have a mitered box that's as tough as it is attractive.
-

-
Powermatic® 15'' Planer with Helical CutterheadSpecial Price $3,419.99 Regular Price $3,799.99 Save $380.00
-


Keep the inspiration coming!
Subscribe to our newsletter for more woodworking tips and tricks