How to Make a Dominos Game

Learn how to make a wooden domino set. The game of dominos is fun and easy to play. It only requires a set of 28 domino tiles, so it's also a great travel game. Making a set of dominos seems fairly simple, but the trick is accurately marking all of the dots on each domino game piece. In turns out this is perfect project for a CNC machine because it can quickly and accurately drill all those dots with the touch of a button. In this demonstration we show you how we used the Next Wave Shark HD510 to make a domino set. We also share a FREE link to Download the CNC Files for Making the Dominos.
Even if you don't have access to a CNC machine, you can still make a wooden domino set using Rockler Domino Templates and Self-Centering Drill Bit. The templates make it easy to accurately lay out each domino game piece.
VIDEO: Using a CNC Machine to Make a Domino Game
Step-by-Step: How to Make a DIY Domino Set with a CNC
I used 1/4"-thick hardwood stock to make the pieces. The Domino Game CNC Programming is designed to make use of two 5"-wide by 24"-long blanks, with 14 tiles coming out of each piece. I’ll also add, there are two CNC routing programs to use here. Cleverly named "One" and "Two," you'll need to run both to get a properly configured group of 28 dominoes.
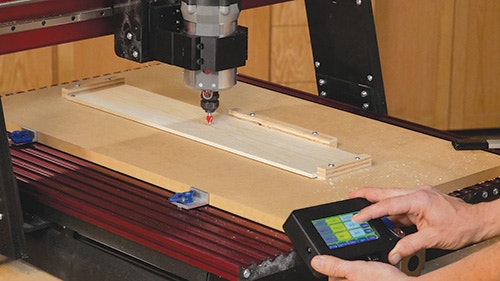
Because it takes two boards to make one set, it’s important that you can register each board accurately on your machine. The benefits of being able to take a partially machined blank off the machine and return it for the rest of the cutting process will become even more clear in just a moment. In addition to using a backer board on my CNC Shark's deck, I mounted location blocks with screws to position each piece of hardwood exactly. (This, of course, only works if each piece of hardwood has exactly the same dimensions.) With this system, you only set your X and Y coordinates once. I recommend setting your Z-axis for each piece of wood — it only takes a second.
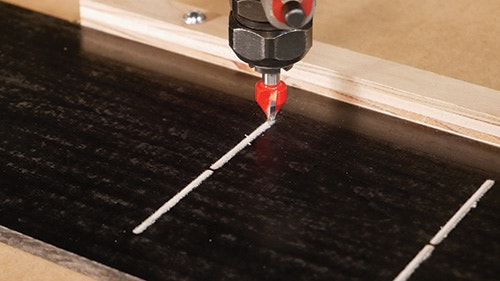
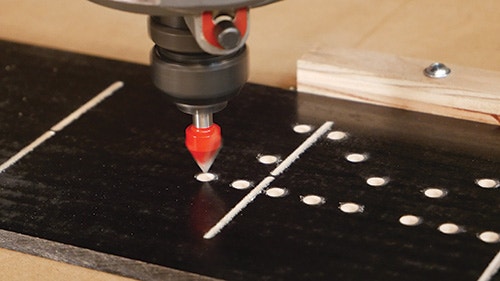
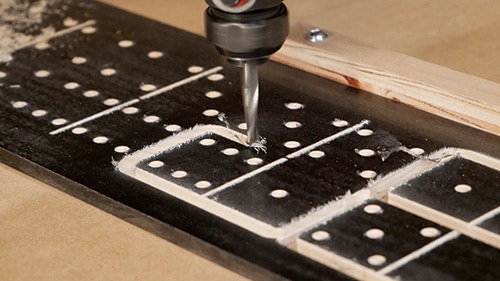
You need two router bits to machine the tiles, the first being a V-bit. Ralph Bagnall, our CNC programmer, recommends a high-speed steel down-spiral like the Onsrud bit sold by Rockler. I used a 1/4" down-shear finishing bit, which I think is pretty similar. It did a fine job. The first process is using the V-bit to score the dividing lines in the center of each tile and also drilling the holes. As I mentioned earlier, there are two sets of tiles — one set per board — and the hole patterns are the difference between the two. The cutout program is the second of the two to run. It leaves small tabs on each tile to keep them from flying around the room as they are cut free of each blank.
Planning Ahead
While making these tiles is not exactly the most demanding woodworking a person will ever do, there are still opportunities to be a bit creative and have some fun! Let me explain. Most of the images here show dominoes being made from maple lumber. The maple was painted black to allow the scribed lines and the drilled holes to show through the paint. As you can see, it worked great, creating nice black dominoes with white dots and divider lines.
Taking that two-color idea to the next level, I also used some wenge stock and put a lacquer finish on the wood before machining it. When the lacquer cured, I then put a layer of Frog Tape on top of the board and used the CNC to cut the divider lines and the tile holes. At this point, I took the blank off the machine and painted the dividers and holes white. (Quick tip: it does not work to just spray the masked-off blank with a rattle can of white lacquer to color the dots and lines, or the paint tends to go on too thick.)
So with the Frog Tape still in place, use a stiff paint brush to paint the holes and lines by hand. It does not take long at all. Once it dries, remove the tape and step back to the CNC machine. Using the location blocks, slide the blank in place, secure it to the backer board and cut out the dominoes. The wenge version looked so good that I repeated the process using padauk wood and painting the dots and dividers black. They looked great too.

When the tiles are cut out, the CNC leaves small tabs connecting the tiles to the larger blank. Carefully break the tiles free and then sand the tabs flush to the edges of the tile. I used a benchtop belt sander and actually sanded all four edges of each tile smooth.
How to Finish

We don't necessarily think of the rabbet as a flat edge-to-edge joint, yet we all know of the shiplap joint.
A shiplap joint is formed by overlapping rabbets cut into opposite faces of adjoining boards. I'd call it a carpentry kind of thing, used in siding and natural wood paneling. But you'll see it in the backs of centuries-old cupboards and cabinets.
The joint allows individual boards to expand and contract seasonally without opening gaps between it and its neighbors. And that's the whole point of shiplaps. The rabbets are quickly cut, absolute precision is irrelevant; yet they serve a valid purpose.
One quick safety note: while dominoes are not a little kid game, they could get their hands on them. When they do, you can bet they will put them in their mouths. (We made these tiles large enough to not be a choking hazard, but still, keep them away from little kids.) Be sure to use paints and finishes that are non-toxic when they are cured — which is almost all of them. It is always better to be safe than sorry.
Speaking of finish, I left the edges of my dominoes unfinished. I liked the contrast between the surfaces, and there is no reason to finish the edges to control wood movement. (Plus, it would have been a pretty fussy process.)
If you'd prefer to finish all the surfaces, a good way to do that is to wait for the main finish to cure completely and then wipe a coat of paste wax onto each tile. In a minute or two, wipe the wax off and you will have finished the edges with a minimum of fuss.
A final idea that I have not yet tested would be to apply a really fancy veneer to both sides of a contrasting core. You would need to apply veneer to both sides to keep the pieces from distorting. Veneer options are pretty inspiring. Imagine bringing out your Carpathian elm burl dominoes — very fancy!
Whether you make these dominoes using a CNC or a drilling jig , the result will be a custom-made game that will provide years of pleasure.
Download the CNC Files for Making the Dominos.
Step-by-Step: How to Make a DIY Domino Set with a Template and Drill/Driver

Not every woodworker has a CNC router, but don't let that stop you from making a few sets of dominoes if the urge strikes you. Rockler has a drilling template and a specially designed drill bit that makes this a totally manageable task for any home-shop woodworker. And while you could use the technique we practiced in the CNC-made dominoes — painting either the surface of the tiles or painting the dots — another great way to achieve good looking dominoes.

Quarter-inch-thick walnut veneered plywood, when drilled, reveals a lovely white interior wood. How you finish them is up to you, but we would recommend applying a spray finish from a rattle can before you start cutting them out. Then touch up with the same spray once they are cut.

If you have a table saw, handheld drill and a router table, making dominoes can definitely be on your project horizon.


Keep the inspiration coming!
Subscribe to our newsletter for more woodworking tips and tricks