Make Your Own Longworth Bowl Chuck
Our easy-to-use patterns will take you through the trammel routing process for making your own Longworth Bowl Chuck.
This is my second holiday season as a woodturner, and I've "graduated" from making gifts of pens and bottle openers to bowls. And, like many woodturners, I’ve been searching for a good way to clean up, sand and finish the bottoms of my bowls.
Jam chucks, Cole Jaw sets and the strapping tape/faceplate method may be generally accepted practices, but once I ran across this bowl chuck (also referred to as a Longworth Chuck, after its inventor), I knew it was just the ticket. It is similar in concept to a set of Cole Jaws: rubber bumpers provide outside or inside force to the walls of a bowl, exposing its bottom and holding it secure on the lathe for light cutting, sanding and finishing. Instead of using a scroll chuck's expansion and contraction to snug up the bumpers, this chuck uses contrary motion of the arc patterns on two discs to move its bumpers, which are bolted in place using through-hole knobs. There are eight arcs: four shorter and four longer. With hardware in all eight arcs, the jig provides eight points of contact for larger pieces. If your workpiece is smaller, you can remove the hardware from the shorter arcs — the four remaining points of bumper contact will be sufficient for smaller bowls.
The trickiest part of this jig is cutting the arcs. If you were a geometry whiz, you could lay out the arc pattern yourself, but I helped you bypass all of that math by offering a paper pattern that can easily be glued to your stock.
To get started on the jig, secure your two disc blanks together with four screws driven just inside the circle area, draw the circle with a compass, and band saw the assembly to rough size.
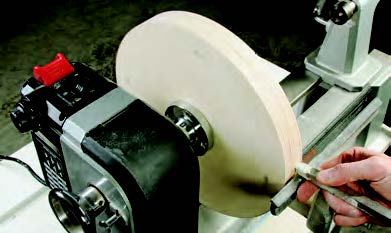
Attach a faceplate to one side, then true up the discs on your lathe.
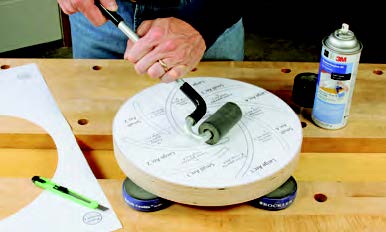
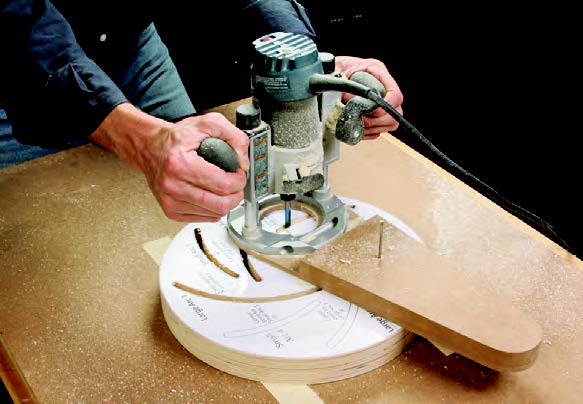
Now apply your routing pattern with spray-mount adhesive. The pattern includes marks for pivoting a simple trammel jig mounted to a router, which cuts the arcs with a 5/16"-dia. straight bit.
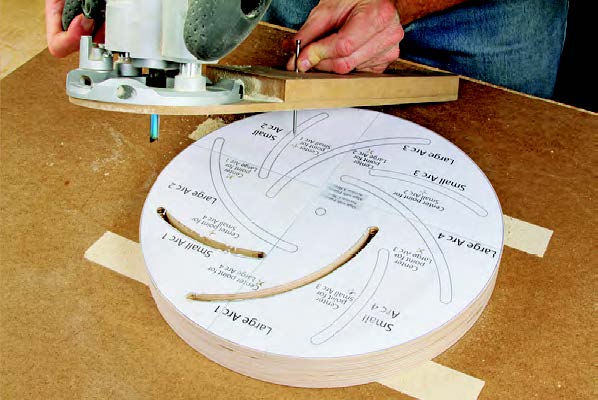
Rout the arcs in a series of deepening cuts until the bit passes through both discs. Back your work up with scrap to prevent damaging your work surface.
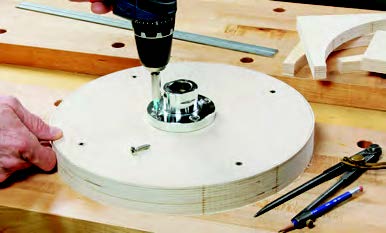
Once you are done routing the arcs, keep the discs screwed together. Put the jig on the lathe and bore a 5/16"-dia. hole through the center of the discs using a Jacobs chuck in your tailstock. At this point, you can unscrew the disks, but keep the faceplate attached.

I also drilled four recessed thumb holes at 90° points around the front disc using a 1"-dia. Forstner bit. This makes tightening easier when securing a workpiece into the jig.

I used solid stoppers and drilled the holes for a snug fit with the bolts. The flexibility of the rubber provides extra "grip" as the knob is tightened and the stopper plumps out. My large discs are made from 3/4" plywood, but MDF could be used as well.
Before final assembly, I applied a few coats of spray lacquer to both discs and some paraffin wax to the sides that will be facing each other. This isn't necessary, but I found that it reduces friction and allows for smoother disc movement.
Flip one disc over so the two arc patterns face opposite directions. Fasten the discs through the center hole with a bolt, washers and locking nut and then outfit eight bolts, washers, bumpers and through nuts in each of the intersections (see Drawing). Align the panels so the bolts for the bumpers go through the same-length channel on both the front and back discs.
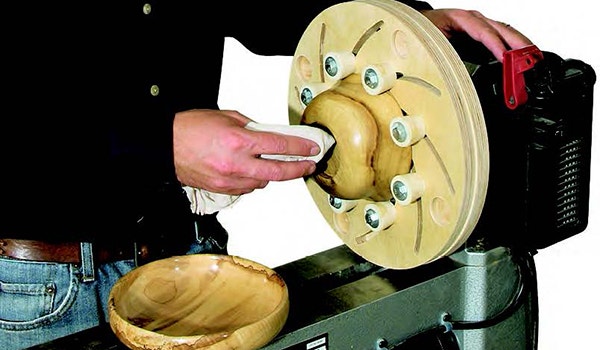
With the jig now assembled, you’re ready to put it to work. Thread the faceplate onto your lathe's headstock. I found that it"s easiest to lock the spindle and rotate the front disc using the thumb holes. The eight bolts will move in tandem around your bowl, and tightening the knobs on the back will secure them in place. This jig adds a significant amount of spinning mass, so make sure you’re wearing safety gear during its operation. I use mine primarily for sanding and finishing at low speeds, but it can also be used for lighter cutting if you need to clean up a bowl's foot, too.
Cutting the Chuck Discs Using CNC

The CNC allowed me to go from 13" x 13" square pieces of plywood to perfectly round discs with the arcs precisely located.
When building the CNC file, we added a recess for my particular faceplate. The diameter of the recess had to be very snug to the faceplate. This allowed me to get the faceplate perfectly centered right off the bat — any slop meant that my jig would not be centered on the lathe, which reduces its effectiveness. And, the recess means I can remove my faceplate to use for other turning projects but then reinstall it accurately again on this chuck.
CNC is incredibly precise and provides repeatability, so I can make these chucks for all of my colleagues that want one for their lathes.

Click Here to download a PDF of the related drawings.


Keep the inspiration coming!
Subscribe to our newsletter for more woodworking tips and tricks