Making a Lazy Susan
A splash of inlay embellishes this useful table accessory, the lazy susan.
A lazy Susan is really just three pieces: a base, a top and a ball bearing swivel in between. But, place it in the center of your dining table and it becomes a focal point at every meal. Here's a perfect spot to showcase a special piece of wood you've been saving. For the project shown here, we'll use a scrap of two-toned curly maple as an inlay medallion and cherry for the other components. You could choose any species of wood you prefer. You'll also need:
- a low profile 12-in swivel base
- wood dry dye powder in the color of your choice
- quick setting epoxy
Here's how to make this lazy Susan.
Step 1: Glue up a 3/4-in.-thick blank for the top and a 1/2-in.-thick blank for the base. We'll make the final size of the top 14 1/2 in. and the base 13 in. Leave the blanks oversized for now. Mark the centerpoint on both faces of the top blank with a scratch awl so it will be easy to locate after machining and sanding. Mark the centerpoint of the base as well.
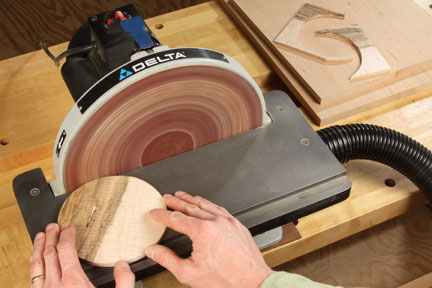
Step 2: Select the stock you'll use for the inlay medallion, and plane it down to 1/4 in. thick. Determine the size of the inlay circle you want on your project, and use a compass to draw the shape. Cut it round. Sand the edges as needed to smooth them and to refine the circle. Our medallion measures 5-3/4 in.
Step 3: We'll rout the recess for the medallion, its black border and the stripe near the edge of the top. In this case we used a circle cutter to rout the recesses. You could also use a small router outfitted with a trammel. Drill a shallow, 1/8-in.-dia. centerpoint for the circle cutter's pivot pin in the top blank. Drill a second stopped hole to serve as a starter hole for the router bit. Position this hole so its inner edge marks the edge of your inlay's diameter. By using a 1/8-in.-diameter router bit, the circle you'll rout in the next step will end up being 1/4 in. larger than the inlay.
Step 4: Install a circle cutter, lock it to the correct cutting diameter and set the bit depth to 1/8 in. Rout the outer edge of the inlay area, rotating the tool carefully around the pivot point.
Step 5: Reset the circle cutter to mill a groove for the outer inlaid stripe. We set this diameter at 13-1/2 in. Make this circular groove 1/8 in. deep as well. When you're finished, remove the circle cutter.
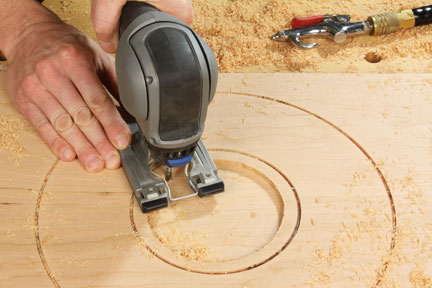
Step 6: Switch to a 1/4-in.-diameter straight bit, set the cutting depth to 1/4 in. and rout out the waste from the medallion area. To do this, start in the center and feed the tool clockwise in an enlarging concentric circle, removing the waste slowly and carefully. Blow or brush away the debris as you work to monitor your progress. Stop routing when you reach the inner edge of the groove you made in Step 4. The goal here is to leave a tiny rabbet that will help center the inlay in its recess and form a shallower pocket for the inlay's black border.
Step 7: Glue and clamp inlay into place. To help distribute the clamping pressure evenly, place a larger piece of scrap over the inlay to act as a caul, and apply clamps all around it.
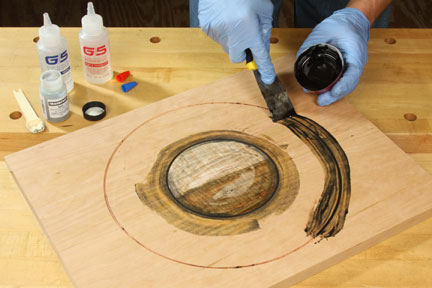
Step 8: The inlay's black border and the accent stripe are made by mixing a small amount of aniline dye power with two-part epoxy. The exact ratio of epoxy to dye powder isn't critical, but aim for about a 4-to-1 blend of epoxy to dye. Mix this "liquid" inlay in a shallow cup, and fill the recesses with a putty knife or paint scraper. Scrape away the excess before it sets, and allow the epoxy to cure overnight.
Step 9: Plane, scrape or sand the top blank smooth to clean up the inlay stripes and flatten the surface of the lazy Susan.
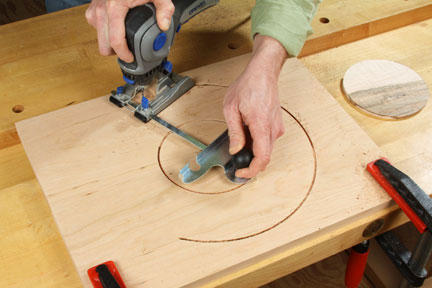
Step 10: Use the centerpoints of both blanks to draw the top and base to shape with a compass. Cut out both circles and sand the edges smooth.
Step 11: Rout an edge profile around the top, if you like. We made ours with a 3/8-in.-dia. cove bit in a router. Ease the remaining edges of the top and base with a 1/8-in.-dia. roundover bit.
Step 12: Use a compass to lightly draw circles on the top and base for centering the swivel hardware, according to the instructions that come with it. Bore a 3/4-in.-dia. access hole through the base for driving screws through the swivel and into the top; this also will be explained in the hardware instructions. Drill pilot holes in the base and top for #8 x 1/2 in. installation screws now.
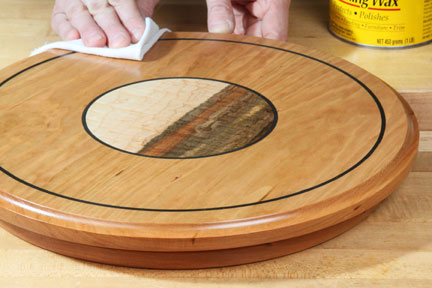
Step 13: Sand the top and base up through the grits to 180 and apply your choice of finish. A heat- and moisture-resistant finish such as varnish is a good choice for this project.

Step 14: Mount the bearing hardware to the base with panhead screws.

Step 15: Mount the base assembly to the top with screws, driving them through the access hole in the base
Step 16: Apply adhesive-backed felt tabs to your lazy Susan base. Now it's ready for tabletop display — and years of good use!


Keep the inspiration coming!
Subscribe to our newsletter for more woodworking tips and tricks