How to Install Window and Door Trim with Rockler Trim Gauge
Learn how to measure, cut, and install window and door trim. The new Rockler Trim Gauge makes it easier to measure and cut window and door trim molding to the perfect lengths. Use the Trim Gauge to mark consistent and clear reveal lines on the jamb and casings. Integral rare-earth magnets and hook slots hold your tape firmly in the Trim Gauge while measuring. Attach the Trim Gauge to the window frame to hold the end of the tape and measure the length of short or long windows. Then use the gauge to transfer that measurement to the trim molding.
See More Time and Money Saving Trim Molding Installation Tools

How to Use the Rockler Trim Gauge
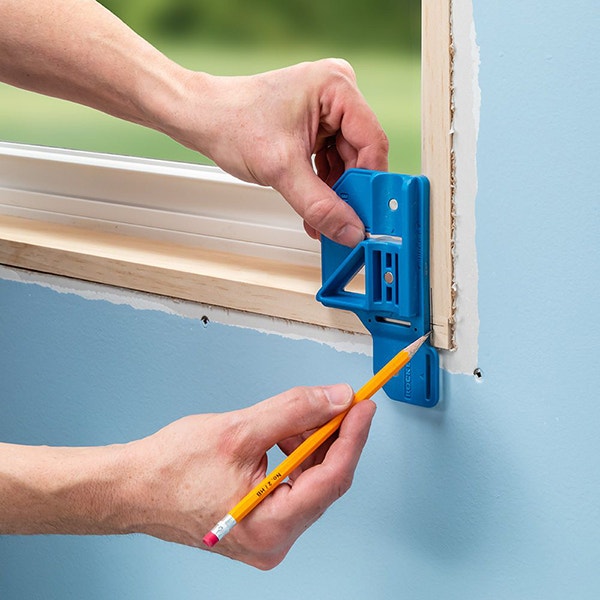
Tuck the Rockler Trim Gauge into the corners of your window or door frame to mark 3/16'' reveal lines.
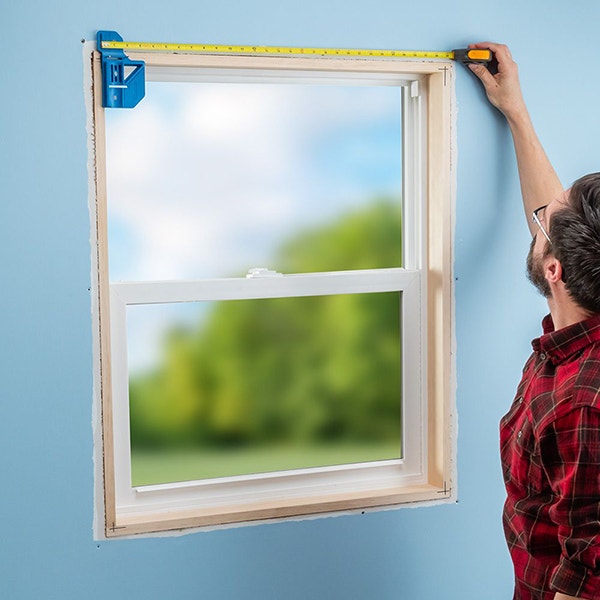
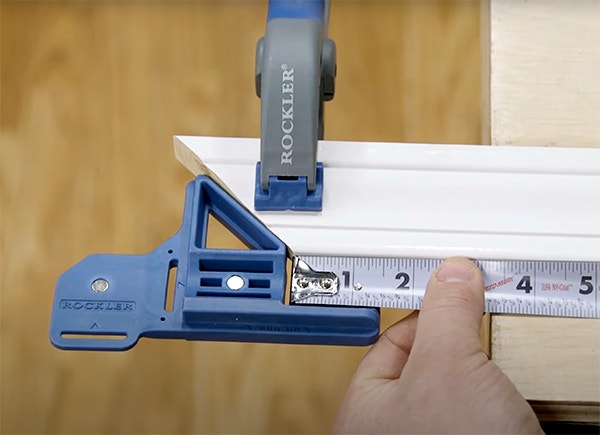
Hook your tape measure into the slots on the Rockler Trim Gauge to measure the precise length of the inside edge of the molding — no math calculations needed. The gauge holds the end of your tape, like a helper, on long windows.
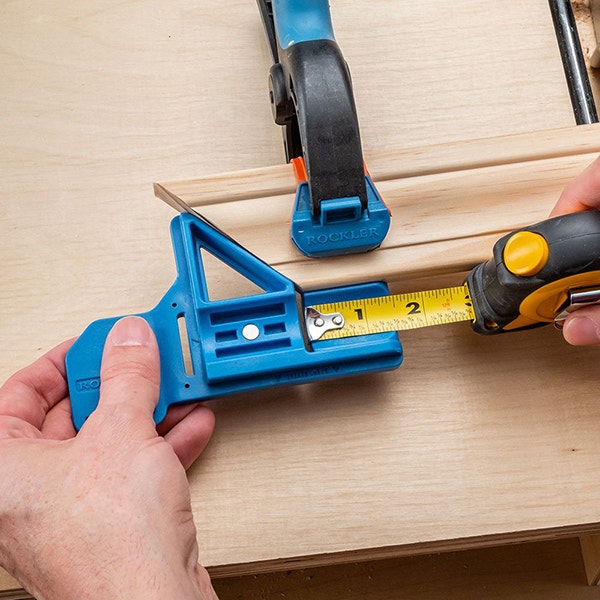
After taking the measurements from the window or door, use the Rockler Trim Gauge to transfer the measurement to the trim molding. Then cut and install the molding.

The Rockler Trim Gauge makes it easy to measure and install trim molding on windows and doors. Install trim in a mitered frame style (left), with mitered top corners and a stool and apron (center), or around a door (right) .

Keep the inspiration coming!
Subscribe to our newsletter for more woodworking tips and tricks