How to Make Shaker Cabinet Doors

The clean and timeless look of Shaker cabinets make them a popular style choice. The secret to building frame-and-panel Shaker cabinet doors or drawer fronts is to use the Rockler Rail-and-Stile Shaker Router Bit Set. Rail-and-stile joints, also referred to as cope-and-stick joints, feature a frame profile that surrounds the panel and a groove that contains the panel. Watch the video (below) to learn how easy it is to set up and use a cope-and-stick router bit set. We have everything you need to make and install Shaker doors for your next furniture project or complete kitchen remodel, including the lumber, tools, fasteners, finishes, and hardware. You can even determine your door part dimensions using our Woodshop Calculator tool.
Video: How to Make Frame-and-Panel Doors with a Router Table
Shaker Rail-and-Stile Frame Profiles
The beauty of using a Rail-and-Stile Shaker Router Bit Set is that they accomplish all three important operations when making a frame and panel door. First, they form the perfectly mating profiles to join the rails and stiles . Second, they form the profile that will be features around the inside edge of the frame. And third, they form the groove that will capture the panel in the door frame.
Rail-and-Stile Router Bits
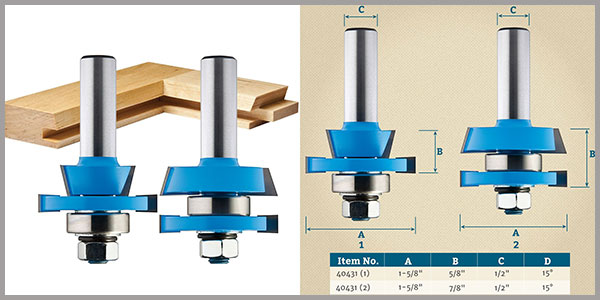
Rail-and-Stile router bits are typically sold as a matched set. The rail bit or coping bit cuts the tongue and coped profile (the reverse profile features on the inside edge of the frame) on the end of the top and bottom horizontal rails. It's the one that has the pocket in the middle with a big bearing on the inside. Because as you can see, that pocket creates the tongue. The bearing on the inside is a telltale sign.
The other bit is the sticking cutter or the stile cutter, but unlike the coping bit, the sticking bit has a bearing on top rather than on the inside. It's responsible for cutting the decorative profile around the inside front edge of the frame, which in the case of the shaker stile bits that are featured in this post are a simple 15 degree bevel profile. This bit also cuts a 1/4"-wide groove for a wood panel or glass. Now, the misleading thing about calling this a stile bit or a stile cutter is that it doesn't just cut the stiles, it also cuts the decorative profile and the groove on the rails as well. To help keep things clear, many woodworkers tend to call this a sticking cutter and not a stile cutter.
Tip: All of these cuts are made with the front faces of the rails and stiles pointing down on the router table.
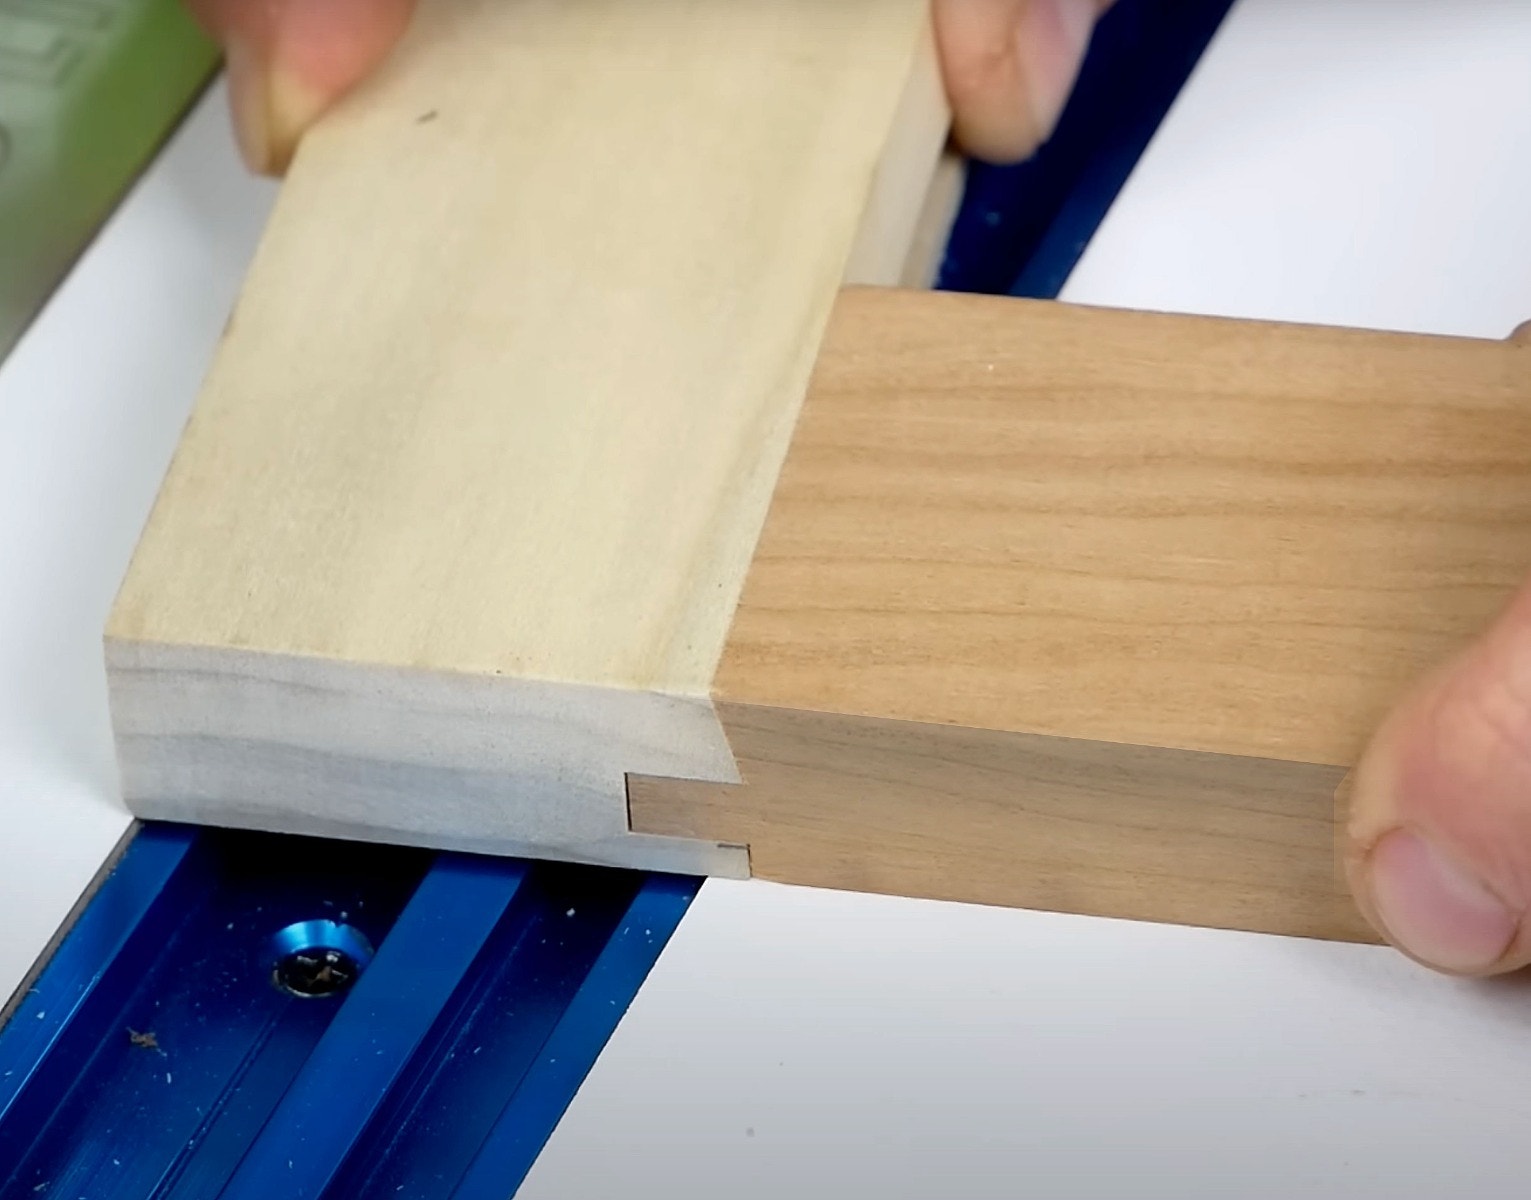
Forming Cope Profile in Rail Ends
We recommend making the cope cuts on the ends of the rails first because it's easier to set up the sticking cutter using one of the coped rails.
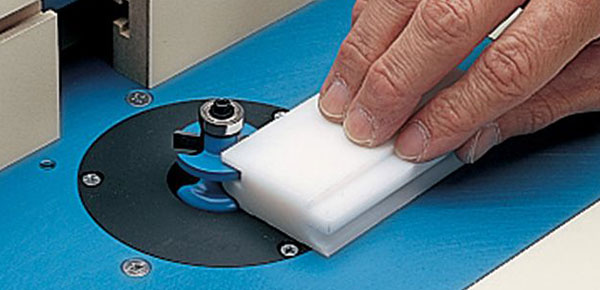
Follow the router bit instructions to set up the coping bit. To dial in the height of the coping bit, set a test scrap on the sled and raise or lower the bit until the bottom edge of the top cutter is about 1/8 inch down from the top edge of the scrap. Then set the depth of cut. To do that, take a straight edge, set it against the rim of the bearing, and slide your router table fence over until it makes contact with the straight edge. Then lock the fence and double-check your settings. Next, make a test-cut, starting the router, and cutting across the end grain in one smooth pass, feeding the sled from right to left. If the cut is clean and even, and the back shoulder is about 1/8-inch deep, you're ready to cope the rails. Clamp your actual rail into the sled facedown, and repeat the process. Cope one end of the rail, then turn it end for end, re-clamp, and cope the other end.
You want to stabilize the workpiece from behind to keep it from rocking, and of course, to keep your fingers safe. The Rockler Rail Coping Sled features a phenolic base, a couple of fences on either side of the workpiece, and most importantly, a hold-down clamp to lock a rail in place securely during routing, and of course, these couple of handles here will keep my hands safe. The smooth-sliding phenolic base and sturdy toggle clamp holding your stock firmly against the fence will deliver the cleanest, squarest cuts you can imagine.
Make Rail/Stile Bit set up fast and easy with a Router Bit Set-Up Jig that matches the router bit profile that you are using. Simply bring the router bit up through the table and align the jig with the cutting edge of the bit. This system is ideal for making accurate rail-and-stile construction.
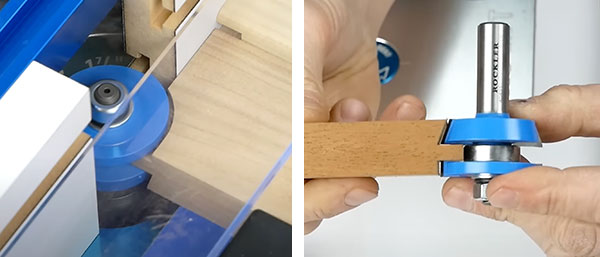
Forming Shaker Profile and Groove in Stiles and Rails

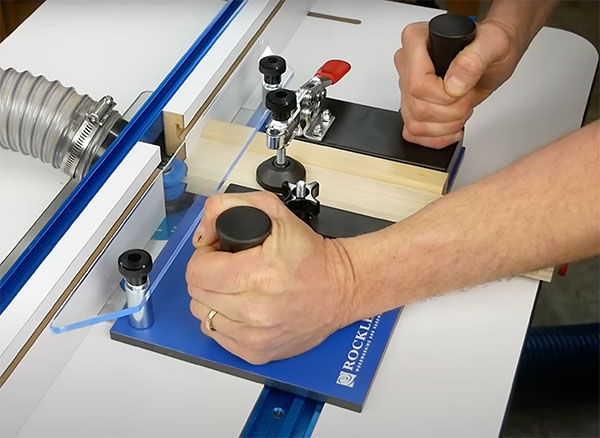
Next, move on to the sticking cuts to finish these frame joints. Install the sticking bit in the router table. Make sure that the rail has the back side facing up and adjust the bit height until the slot cutter lines up with the tongue on the ends of the coped rails. Just as you did for the coping bit, use a straight edge to adjust the router table fence until the rim of the sticking bits bearing is flushed with the fence spacings. Lock the fence. Make test cuts on a scrap piece. Install a featherboard on either side of the bit opening and use one of your work pieces to help maintain consistent downward force on the work piece. Now, start the router and run a test piece through your setup using a push stick to keep your fingers clear. Test the fit, making sure the faces of both parts are flush and the tongue in the rail fully seats tightly in the groove in the stile.

Once the sticking bit is adjusted and you're satisfied with the fit, go ahead and rout the inside edges of the actual stiles (left) and rails (right). Make sure the edges you want on the inside of the doorframe are the ones you present to the router bit. Be careful not to get them turned around. Marking the parts with arrows can help.


Keep the inspiration coming!
Subscribe to our newsletter for more woodworking tips and tricks