How to Handcut Dovetail Joints
Making hand cut dovetail joints isn't as challenging as you may fear, thanks to an ingenious aluminum sawing jig.
You can cut dovetails with a router and dovetail jig, which is a perfectly acceptable option. But if you want to make narrower pins than your dovetail jig will allow or the freedom to space the dovetail pattern as you like, then the best option is to cut your dovetail joints by hand instead.
Start by preparing your stock, cutting it to final size and making sure the ends are square. Mark the outside "show" faces on the panels, and label the corner joints to keep their orientation clear.
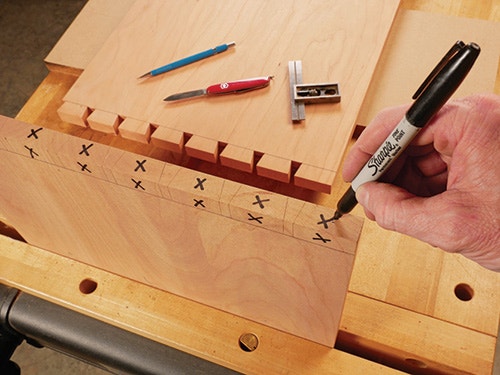
Lay out the tails on the front panel. Start by scribing a baseline for the tails all the way around both ends of the panel with a marking gauge. Set these scribe lines about 1/32" deeper than the thickness of the side panels (this way, the tails will protrude ever so slightly when the joints are assembled so you can trim or sand them perfectly flush). Then lay out the centerpoints of the pins, with a half pin on the top end of the chest only. I laid mine out with eight pins, spaced 1-7/8" apart, on center. The bottoms of the pin sockets are 1/2" wide, and I set the angles of the tails to a 1:6 slope (about 10°). Use a sliding bevel to draw the tails to shape with a sharp, fine-point or mechanical pencil.
Extend the tail reference lines across the ends of the front panel with a square. Scribe baselines for the tails onto the back panel. Then clamp the back panel to the front panel with their inside faces against one another and so the ends and edges are even. Transfer the tail lines from the front panel to the back panel. Use these lines as references to draw a matching pattern of tails on the outside face of the back panel.
Next, saw the tails down to the baselines with a fine-toothed dovetail saw, following your layout lines. If you're skilled with handsawing, you'll do these freehand.
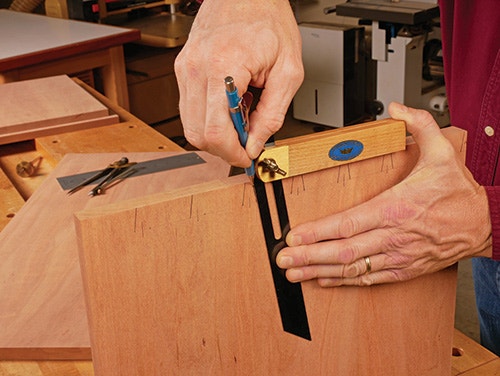
With the tails now cut to shape on both the front and back panels, clamp a side panel to the edge of your bench with an end facing up, and align the correct tail board over it. Carefully transfer the angled tail pattern onto its end to mark for the pins. Use a sharp, thin-bladed pocketknife or a marking knife to scribe these lines. Repeat for the other three corner joints.
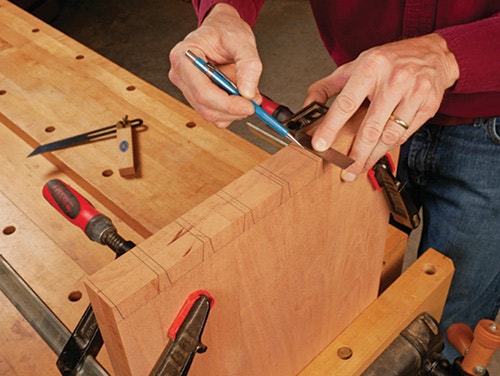
Grab your marking gauge, again set 1/32" deeper than the thickness of the front and back panel, to scribe baselines across the faces of the side panels so the pins will protrude slightly beyond when the joints are assembled. Darken the knifed pin lines with a sharp pencil to make them easier to see when sawing. Then draw straight lines down from the knifed lines on the end grain to the baselines to complete the pin shapes.

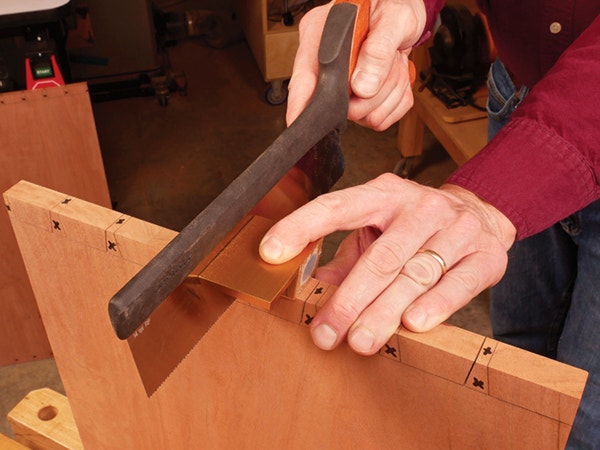
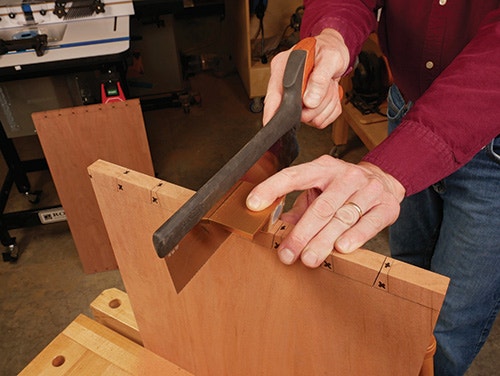
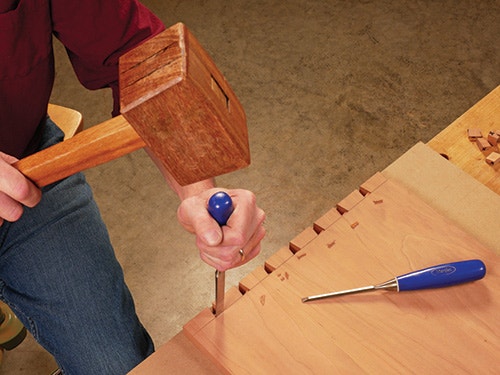
With each side panel clamped at a comfortable working height for hand-sawing, cut straight down to the baselines to form the angled faces of the pins. Aim as best you can to literally split these layout lines with the saw blade — it will help to minimize the amount of paring you'll have to do next to refine the fit of the joints.

Saw or chop out the waste in the tail socket areas. Effectively, the process is the same as when clearing the pin socket areas, but here there's more waste to remove. Use wider chisels to help speed the process along, and work carefully when you're chiseling up to the baselines to keep them straight and evenly aligned with one another. The scored baselines will give your chisel edge accurate registration here.

Now, fit the corner joints together one joint at a time. If you've cut carefully, the pins and tails should engage one another at least partially, right from the start. If they don't, you've got some paring to do to improve the fit. The important point of note here is to pare as little material away as possible so the joints will close snugly. Remove too much, and you'll open up gaps that will show. Remove too little, and the panels can crack if it takes excessive force to engage the dovetails. Pare only from the angled, inside faces of the pins, leaving the tail pattern alone. Work slowly and carefully. Continue to test-fit the joints until they close easily enough to tap together by hand without undue force.

The assembly process you follow will depend on the project you are building. In this example I was building a blanket chest that has a plywood bottom.The chest's plywood bottom panel recesses into a 3/4"-wide, 3/8"-deep rabbet in the bottom inside edge of the carcass panels. I milled milled these rabbets with a wide straight bit in the router table.

Then, I finish-sanded the inside faces of all four chest panels up to 180-grit and assembled the chest carcass with glue and clamps, making sure the box is square by measuring across its diagonals. Don’t rush the job — I glued up the back corner joints in one session with the front panel dry-fitted as a spacer. Then, when those joints dried, I glued the front corner joints together. Once the carcass comes out of the clamps, clean up the outside faces of the corner joints by planing or sanding until the ends of the tails and pins are flush.


Keep the inspiration coming!
Subscribe to our newsletter for more woodworking tips and tricks