How to Cut Mitered Bridle Joints - A Free Video from the Center for Furniture Craftsmanship

Like a regular bridle joint, a mitered bridle joint has a lot of long grain to long grain glue strength, but it has an attractive miter where the grain wraps around. This could be used on a door frame or the top of a jewelry box when a smoother aesthetic is desired. A mitered bridle joint has more steps to cut than a regular bridle joint, but this video breaks it down simply.
This video was produced for its free video library by The Center for Furniture Craftsmanship in Rockport, Maine. The Center is a nonprofit, international woodworking school dedicated to providing the best possible education in wood craftsmanship and design.
How to Cut Mitered Bridle Joints with Tim Rousseau
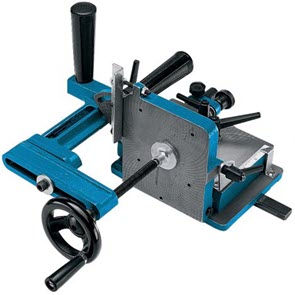
In this video, Tim Rousseau, an instructor at the Center for Furniture Craftsmanship, demonstrates how to make a mitered bridle joint. The first step is to cut a slot in the "mortise" component as one would for a regular bridle joint using a tenoning jig.
Next, cut the miter on the slotted component, change the blade to a single, non-dado, blade, and use a miter gauge and a perfectly cut 45-degree piece of wood or MDF to act as a carriage to cut the miter. A great trick is to slightly wet the component, so it doesn't slip off the mitered wood while cutting. Always make test cuts and check for a true 45-degree angle.
Using the same 45-degree sled against the fence, run the "tenon" component over the lowered table saw blade to cut the miters. With the tenoning jig back on the fence, attach two of the 45-degree sleds to the jig for the "tenon" component to ride in and cut the waste off to create a mitered tenon.
If the joint isn't a perfect and clean fit, either run it again over the table saw or use a jointer plane on a shooting board at the bench to true up inconsistencies.
Check out the video above for a step-by-step walk through of how we cut mitered bridle joints at the Center for Furniture Craftsmanship.
Related Product Categories


Keep the inspiration coming!
Subscribe to our newsletter for more woodworking tips and tricks