Glazing with Aerosols
You can now buy ready-to-spray glazing stain in aerosol cans, and that it is available in two formulations: one for wet glazing and one for "breakaway" or dry glazing. Let's look at what those are, how to use them, and how they can add character to our finishes.
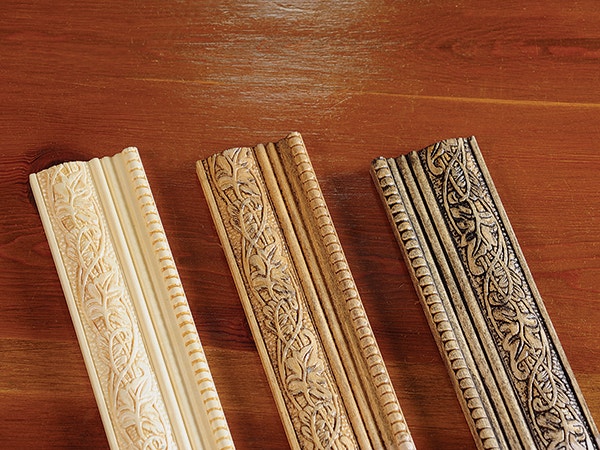
What is Glazing?
Most woodworkers have seen glazing, even if they don’t know it by that name. That's because so much commercially finished furniture is glazed. Glazing is a technique to add color to wood, add depth and contrast, and make physical features stand out.
Glaze is essentially a pigmented stain, but instead of going onto raw wood, it goes in between coats of finish. Traditionally, glaze is made from Japan colors or oil colors mixed with boiled linseed oil and mineral spirits or, for water-based glazes, from acrylic colors or paint.
The one stress it doesn’t resist effectively is tension. It doesn’t prevent the shelf from pulling out of the side, in other words. Only glue or fasteners can do that. Because all of the gluing surfaces involve end grain, the glue strength is limited.
Getting the glaze just right is not easy. It must stay wet long enough for you to manipulate it but still dry fast enough to recoat in a reasonable amount of time. The mixture must be thin enough to work with, thick enough so it doesn’t drip off, yet still have the right intensity of color for the job. It must also contain enough binder to prevent it from causing delamination between the coat below it and the top coat that will be applied above it.
You can see why very few hobby woodworkers bother with glazing. It’s a messy job that requires a long learning curve, excellent mixing skills and the ability to work the color very quickly. Luckily, glazing has recently become very much easier, thanks in large part to Mohawk Finishing Products.
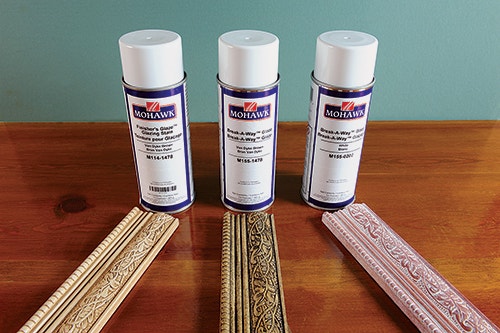
What's Changed
When Mohawk came out with pre-mixed glaze in aerosol cans, it was a game changer. These aerosol glazes come in a range of typical wood finishing colors, are ready to use, perfectly formulated for manipulating and, because they spray on, are easy to apply evenly.
Mohawk offers two major types of aerosol glazes: glaze you manipulate wet and breakaway glaze, which is worked after it dries. Let's take a look at both types to see how to use them, what they look like on wood and which is best suited to each glazing task.
Seal First
Glazes do not go on raw wood, but over sealed wood, so apply at least one coat of finish before you glaze. You can glaze over shellac, lacquer, varnish, polyurethane or paint. Glaze will wipe right off most clear finishes, allowing you to remove it all and start over if you mess up. However, glaze may stain some latex wall paints or chalky paints, making it hard to remove the glaze completely.
Choose a glaze that complements and contrasts your background color. For instance, you might use raw umber or burnt sienna over white paint to create antique white; Van Dyke brown or burnt umber to bring out character on any light wood; and white glaze to create a limed or pickled finish on oak or ash. If the background is a solid color of paint, anything goes; be creative.
Wet Glazing
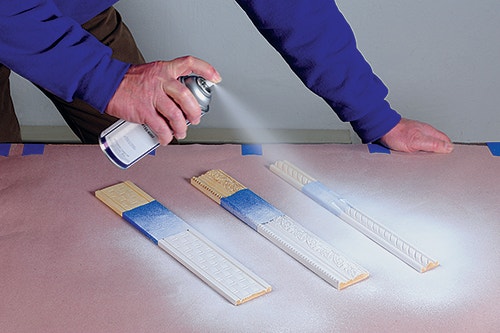
All aerosol glazes contain a lot of pigment, so make sure you shake the can vigorously a full 60 seconds after you hear the ball start rattling inside. That will help disperse the color and give you consistency.
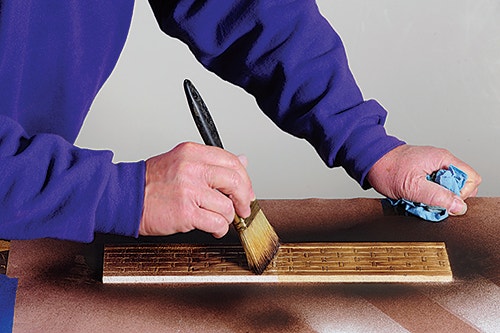
Spray the wet glaze on evenly, as lightly or heavily as you like. If you put on too much, wipe some off with a paper shop towel. Blend the wet glaze using a clean, soft bristle brush. You can blend so the glaze density is the same all over, or use the brush to blend patterns, like a dark corona, or highlighted patches. The brush will both pick up and move the wet glaze. When the bristles get too wet, wipe them off with a paper shop towel and keep working.
Once you have the background even, intensify the highlights by wiping them with a pad to remove even more glaze from the high spots. Use a shop towel balled up like a French polish pad so you have a smooth, rounded surface that lets you control where you remove glaze. Obviously, do all of this before the glaze dries.
Breakaway Glazing

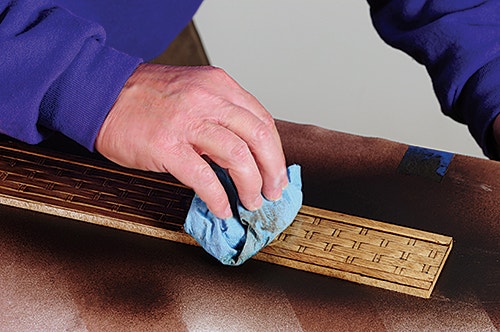
Again, agitate the can thoroughly. With breakaway glaze, it's important to spray lightly and evenly, as if you are applying a very thin coat of a solid color of paint. Let the glaze dry; it will turn chalky when completely dry. Rubbing with either a nylon abrasive pad, steel wool or fine sandpaper, remove the glaze from the high spots, or wherever you want the wood to show through.

The advantage to breakaway glaze is that you have an almost unlimited time to work the color since you don't start manipulating it until after it is dry. This can be very handy if you are trying to glaze a very large piece, like a breakfront, or a complex piece, like a rocking chair or a spindled crib.

Whether you used wet or breakaway glaze, you must topcoat the piece after glazing. With wet glaze, wait until the glaze dries completely, usually overnight, and seal it with whatever clear finish you prefer. When using breakaway glaze, it is dry as soon as you are done abrading it, so all you need do is brush or blow off any dry dust (the removed glaze) before spraying a top coat.
As easy as aerosols make this job, it still has a small learning curve, so do what I did: make up practice pieces first on scrap. Chances are, you'll be glazing like a pro before you know it.


Keep the inspiration coming!
Subscribe to our newsletter for more woodworking tips and tricks