Getting the Most from Your Planer
You've got your planer, and you're eager to put it to work thicknessing and smoothing rough lumber. But before you do, let's make sure you're set up for success. This guide will give you some tips to get you there, such as how to position the planer in your shop, how to corral all the shavings it's going to create, and how to accessorize it to make your planing easier and more accurate.
Proper positioning—infeed and outfeed clearances
To start with, let's make sure you've positioned your planer properly in your shop. Measure the infeed and outfeed clearances to be sure you 've got enough room for your maximum stock length to feed into and out of the planer. We like to have at least three additional feet of buffer beyond the maximum stock length. As an example, if you work with 10' boards, shoot for about 13' of clearance on either end of the planer. This will help ensure that the material doesn't hit the wall when the feed rollers are still pushing the material, which risks tipping the planer over. Note that for the same reason, you should never position yourself between the ends of the material and the wall. Always stand to the side. If one end of the planer will have more clearance than the other, make it the outfeed side. That way, it's impossible to feed stock into the planer that's too long for the outfeed side to accommodate.
 |
Planer TipTo maximize clearances in a small shop, consider orienting the planer diagonally. Check out our selection of mobile bases, which let you wheel the planer wherever you need. |
Bolt down the benchtop models
If you've got a benchtop planer like the DeWalt DW734 or DW735, it's very important to bolt it down to prevent a tipping hazard. Long boards become long levers as they're being fed into and out of the planer, and the weight of the board itself can cause the planer to tip. For the DeWalt benchtop planers, check out the DW7350 Mobile Stand. Not only do you get sturdy support, but the foot-operated caster system lets you easily roll the planer into position and lock it with just a flip of the pedal.
Another option is to bolt your planer to a shop-made stand like this Ultimate Planer Cart from Woodworker's Journal. These can be made with all kinds of customized features, but the Ultimate Planer Cart features an extendable infeed/outfeed table that runs on ball-bearing drawer slides, plus folding side wings to hold your material.
|
Planer TipFor a simple, fast solution that's great for jobsite work, you can bolt the planer to a piece of 3/4" plywood, and then clamp the plywood to a pair of sturdy sawhorses on site. You can use this trick in your shop, too, by clamping the plywood to your workbench, provided the bench is on casters and can be positioned properly. |
Stand tall with infeed and outfeed stands
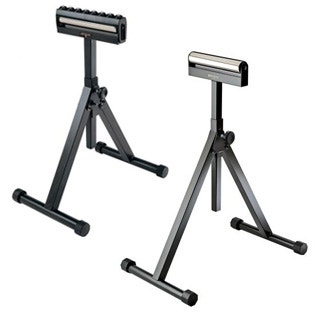
We already talked about bolting down your planer to prevent tipping, but you should still use infeed and outfeed stands to keep your boards level as they feed through the planer. This helps prevent snipe—those annoying gouges the planer can sometimes leave at the end of a board. For planers, we recommend a roller stand with a single wide roller like our Rockler Roller Stand or our Fliptop Roller Stand. The broad, flat surface of the single roller will support both wide and narrow stock, as well as stock being planed on edge.
Safety considerations—taming the decibels
Planers are hardworking tools, and, let's face it, they will tell you very loudly how hard they're working. Never operate your planer without hearing protection—your ears (and your nerves) will thank you for it. Check out our ear protection options here, including many that will replace the noise with the music or podcast of your choice. Also, if you're planning on planing a lot of rough lumber, a good pair of gloves will help fend off splinters. Spending time with the tweezers is nobody's idea of quality woodworking time. As always eye protection is a must, and also be sure to check out our selection of masks and respirators.
Dealing with the chips on your shoulders
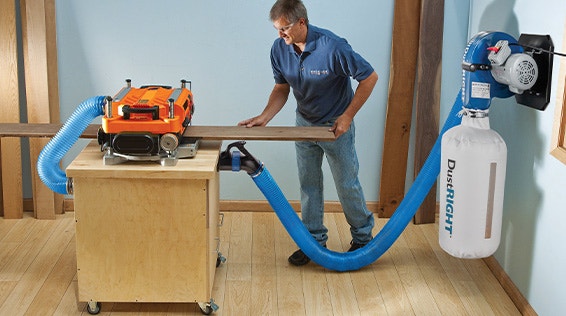
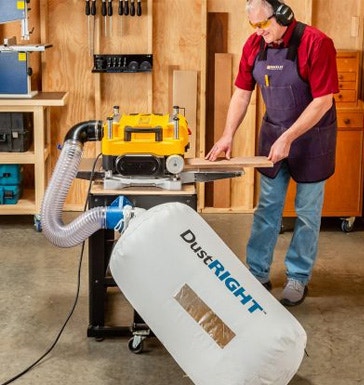
We all know that planers generate buckets of dust and chips with every pass of a board through the planer. This is a good thing—it would be a lot of work to generate those shavings by hand! But especially when planing wide boards, if you don't deal with dust at the source, you'll soon be wading in it. The good news is that it's mostly chips and not much dust. Chips don't hang around in the air like fine dust does, and you can collect the chips separately using a two-stage dust collector. With a system like this, the heavier chips fall into a separate container before ever reaching your dust collector. This means you won't have to empty the bags nearly as often, and your dust collector will maintain strong suction for longer.
For a more affordable option, you can also build your own two-stage system with our 4" Dust Separator Components and FREE plan. Note that this kit does not include hoses or hose clamps. A popular choice for the hose is our 4" Clear Flexible Hose and our 4" Keyed Bridge Hose Clamps to hold everything in place.
As for the dust collector that does the grunt work, you should use a dust collector with at least a 4" diameter hose. We recommend a CFM rating of 500 or greater for a 12" planer, and 600 to 900 CFM for 15" planers and larger. Shop vacuums are not recommended for planers, as they are underpowered, and the narrow hose will quickly become clogged with the bulky shavings.
|
Planer TipIf you own the DeWalt DW735 planer, you have the benefit of a built-in dust blower. This allows you to plane with nothing but a 4" hose and a dust bag—great for jobsite use. For the short length of hose, we offer 4" dust collection hose by the foot, and our Dust Right 5-micron Dust Collection Bags or 30-micron Dust Collection Bags, are perfect for capturing the chips. |
The magic of maintenance
Any power tool will run better with a little TLC. For planers, it's important to periodically clean and lubricate the threaded columns, level the tables with the bed, and wax the bed for friction-free feeding. Check out this video on planer maintenance for a more in-depth look at tuning up your planer.
|
Planer TipHave a nick in your blades? You might be able to solve the problem by shifting one of the knives so the nicks are staggered and cancel each other out. If that doesn't do the trick, we offer replacement knives for most of the planers we sell. In fact, it's best to keep a set or two on hand to minimize down time in the middle of a project. Shop all replacement planer blades. And if you plane a lot of rough lumber, be sure to pick up the Lumber Wizard Metal Detector to prevent any disastrous run-ins with metal objects. From nails and staples to lead shot, you never know what you're going to run into when planing rough lumber. |
Make precision part of your process
When planing to a specific thickness, the last thing you want is to plane a whole board too thin because of a thickness scale that's inaccurate or hard to read. That's where inexpensive add-ons like a digital caliper and/or a digital read-out can boost your confidence and save you money. Check out this digital read-out for a great option that fits a wide variety of planers, including the DeWalt benchtop planers. If you're not up to installing a digital read-out, just buy a dial caliper and store it on top of your planer—they're incredibly accurate (to within a thousandth of an inch) and useful for countless applications outside of planing.
Hopefully these tips will get you up and running with your new planer! But this guide really only scratches the surface, so don't forget that we have expert staff in our stores, online and available by phone to help out if you have a question that's not answered here.
Shop all Planers, Jointers and Accessories .


Keep the inspiration coming!
Subscribe to our newsletter for more woodworking tips and tricks