How Do I Fix a Drawer Box That Won't Sit Flat?
My finger joints didn't come out quite right, and now my drawers won't sit flat. How can I fix this?
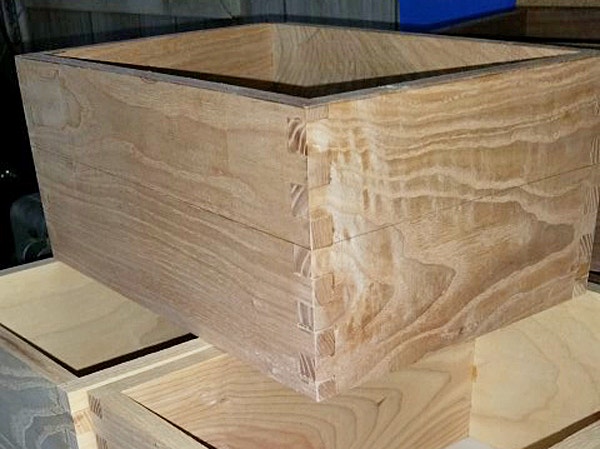
After gluing up box joints, I sometimes find that a corner is misaligned just enough so that the finished box "rocks” and will not sit flat on a surface. Sanding just will not correct this satisfactorily. I'm wondering if there's any solution to trim the top (or bottom!) to make the box sit flat. - Dale Larson
Tim Inman: Gluing up by clamping your box down onto a flat surface like a saw top or marble tile is the first best way to avoid your current troubles.
Once the glue has set and you discover a "tippy" box, then I'd suggest some colored chalk and a flat surface - along with a piece of good sandpaper. Chalk the bottom edges so you can see what's happening when you sand. Make one corner your reference point. Now, push and pull the box over the sandpaper a few times and inspect the chalk. Don't let the box tip as you're sanding. At first, you'll see only a small area or two that are sanded clean, probably on opposite corners. Rechalk. Do it again. Inspect. The cleaned area should be getting bigger. Rechalk, and repeat. Do this over and over until the chalk is completely cleaned, then stop!
You may need to turn the box over and do the top the same way. Measure the sides to be sure they stay parallel
Next time, use a flat reference surface to do your glue-ups so you don't have to go through this "fix."
Chris Marshall: Dale, I'll venture a guess that most all of us who make box joints have run into this same "mismatch" problem. There are various reasons for why it happens, but one of them is that the workpieces are slightly wider or narrower than the pattern of pin and socket cuts the jig makes. So, once cut, that last pin or socket on the edge isn't exactly the same width as the rest, and the offset occurs. I try to fix this problem from the start by cutting test pieces to check for final fit before committing to the "good" parts. But, sometimes I miss it, so I catch it before glue-up by either ripping the box parts narrower as needed so the joint edges become flush, or by jointing them.
But, maybe this isn't your problem. If the edges of your joints line up evenly when you dry-fit them, then consider your clamping strategy more closely. Do you have to force the joints together for them to close properly? Sometimes over tightening the clamps can twist a box out of flat, too. I aim for an easy friction fit of the joint parts, then I use just moderate clamping pressure to close them up when the glue is applied. If the joints fit well, it shouldn't take tremendous force to pull them together. I also make sure to double-check how flat they're sitting while the glue is still wet. If the box has assumed a twist, I back off on the clamping pressure and shift the clamps to try to correct it.
After the glue dries, a twisted box is the toughest to fix. Yet still, it can happen. At that point I grab a block plane set to a fine pass and work the edges of the box by hand until it sits flat. Hand-sanding just mucks up the flatness of the edges, but a block plane keeps them straight and neat. Or, try Tim's trick.


Keep the inspiration coming!
Subscribe to our newsletter for more woodworking tips and tricks