Evening Out Walnut Color Tones?
How do you match walnut pieces that are different colors?
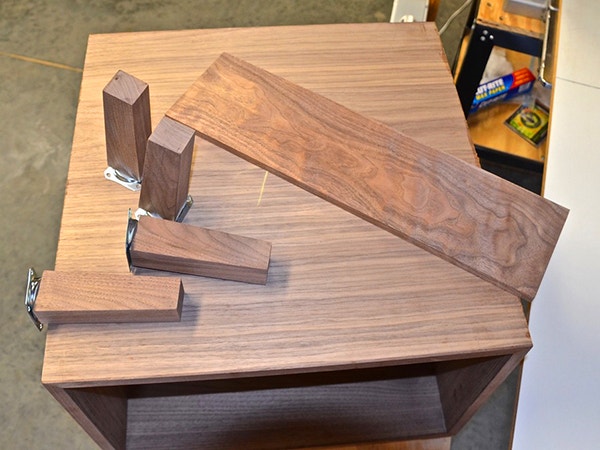
I am in the process of completing a walnut Mid-century nightstand piece. The image above shows the solid walnut legs, a solid walnut drawer face to be attached and one side of the walnut plywood case body with solid walnut edging applied. None of these pieces are final-sanded yet; no finish has been applied. The legs and edge banding are the same walnut color tone. The walnut plywood is another walnut color tone, slightly lighter and grayer than the legs or banding. The drawer face, which I cut to show the grain pattern, has a little bit of red in the walnut color. My question is, how do I ensure that the finished piece does not look like three types of wood? How do you bring all these color tones together, evening them out? – Greg Stringer
Tim Inman: The best short answer for your question is a one-word answer: glaze. Glazes enable the blending, masking and enhancement of color tones. They can also be used to minimize color variations. Get some professional furniture glaze materials, read up on the subject and then begin practicing! One word of caution when you do your homework: Glazes to a furniture finisher are opaque. Glazes to a fine arts person are transparent materials. When you do your reading, be sure you know whether the author is speaking to the furniture trades or to the fine artists out there. Learning to glaze is well worth your time. It gives you a complete new level of control in your work.
Michael Dresdner: Start with a stack of cutoff scraps from each of the three walnut color variations, all sanded to the same level you plan to sand the final project. That includes the plywood as well – sand it through the same grit sequence as you sand the solid wood, which will help it take stain more consistently and aggressively. Obviously, go easy on the coarser grits so you don’t sand through the veneer.
There are a couple of staining strategies you can use. One is to buy stain the same color as the darkest of the three, and use it to stain the other two to match. You may have to dilute the stain, which is where the scraps come in. Also, you may need a different dilution for each of the two lighter segments.
Another technique is to start with a fairly weak, light orange water-soluble dye on everything. Flood it on liberally and wipe it off completely right away, leaving only what the wood has absorbed. This will help eliminate the gray, add background highlights and will bring all three somewhat closer together in color.
Follow that with a pigment stain to get back to the color you want. This two-stage coloring technique adds some highlights where they are lacking and does a surprisingly good job of bringing together different tones of the same wood without obscuring them or turning them into overly dark walnut.


Keep the inspiration coming!
Subscribe to our newsletter for more woodworking tips and tricks