Essential Tools for Spindle Turning
A convincing substitute for rosewood, this beautiful lumber is now CITES protected.
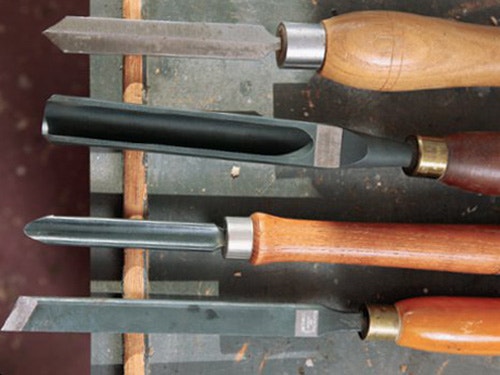
These tools all come in various sizes, so make your selection based on what you plan on turning: choose larger size tools for larger work and small-scale tools for smaller work. In the accompanying photos, I’m using medium-size tools. Spindle turning, if done correctly, requires little or no sanding. As such, the time you spend practicing proper cutting methods with these four tools will easily be made up by a reduction in your sanding time.
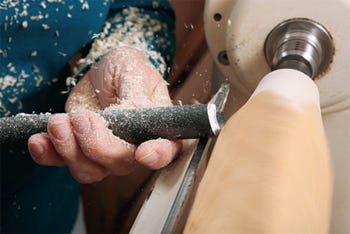
Get Your Lathe Speed Set First
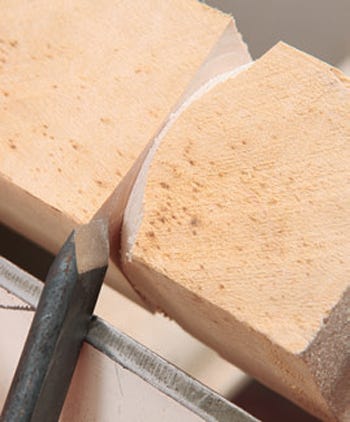
For spindle turning, lathe speeds should be higher than for bowl turning, somewhere in the range of 1,500 to 3,000 RPM. The higher speeds result in a smoother cut, especially when turning square stock into a cylinder. When the edges of square stock rotate at a high speed (as opposed to a slow speed), there is less rotation time between wood and open space. The tool hits the wood more frequently in time, effectively resulting in less chatter. Take care, however, with large-diameter stock. If you are not yet an accomplished turner, I suggest cutting the corners off on the band saw before turning large-diameter stock.
Roughing Gouges
Most turning begins with square stock that will then be turned to a cylinder. This is accomplished with a roughing gouge. Roughing gouges are heavy-duty tools, manufactured to withstand the impact involved with the four rotating corners of square stock. If you've never used one, you’re missing out on a splendid way to go from square to round. In a pinch, a large bowl gouge will suffice, but it's not nearly as sturdy as a roughing gouge.
Many roughing gouges are made with a small-diameter tang, which fits into the handle. This style is fine, but if you are considering investing in a new roughing gouge, consider buying one that has a larger-diameter tang. These are sturdy and will provide ample stability for cutting stock from square to round, no matter what size wood you are tackling.
Roughing gouges are almost impossible to use incorrectly. Their bevel is very short and steep compared to other gouges, which makes cutting with them straightforward and simple.
If what you are turning requires a gradual transition from square to round, begin with a roughing gouge. Simply hold the gouge on the toolrest and advance the cutting edge into the wood near end of the stock, cutting gradually toward that end. Reduce the diameter of the wood until you achieve the desired dimension.
Skew Chisels and Abrupt Transition
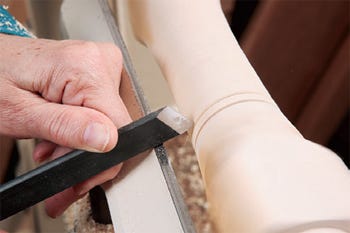
If what you are making requires an abrupt division between square stock and round stock (a tenon with a square shoulder), here's where a skew chisel is a necessity. Use either the heel or the toe of the skew to cut into the square stock.
Arch the tool into the wood — don’t simply jab the point of the tool into the wood — and begin with light, small cuts.
I use the toe of the skew chisel to make this cut; I find that I can see and control the cut better. It seems, though, that many others who teach spindle turning use the heel. Try both methods and decide for yourself.

Make small cuts. I work gradually, beginning my cut a slight distance from where the final cut will be made. The objective is to have the final shape be smooth and located just where I want it to be. With this cut, there’s usually not much room for errors. You might want to mark your stock with a reference line for where the end of the shoulder should be.
After I've established the initial cut of the shoulder, I switch to a spindle gouge to finish cutting the tenon. Be careful not to let the gouge become tangled up with the sharp corners of the shoulder.
Skew Chisels and V Grooves
The skew chisel is an excellent tool for making V-grooves. As with the shoulder of the tenon, begin your cut with an arching motion. Make small cuts, first from one angle, then from the opposing angle. V-groove cuts, made in this manner, will be cut cleanly and will require no sanding.
When using the skew chisel, remember that there are potentially four cutting edges and four bevels. When you are using one of the four cutting edges, stay away from the other three! They are: toe, heel, right side and left side. Each of the cutting edges has a corresponding bevel associated with it.

When making a V-groove cut with the toe of the skew chisel, there needs to be slight clearance on each of the side edges because you are using the tip of the tool as the cutting edge. The same thing applies if you use the heel of your skew for cutting the V-groove. Remember, if you are using one of the four cutting edges, stay away from the other three.
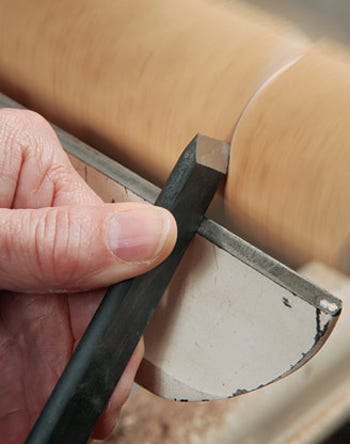
True Purpose of Parting Tools

The name "parting tool" causes a bit of confusion for many beginners. Parting tools are used, not for parting the wood off the lathe, but for parting through the wood to mark a specific diameter. They are often used in conjunction with calipers, preset to measure a correct diameter.
Parting tools are straightforward to use. Simply arch them into the wood and push a bit, and they do the cutting almost automatically.
Something you may not know about a conventional style parting tool is that you can use the side edge for cutting. Simply lean it slightly into the end grain area, and that sharp edge will actually clean up torn grain.
Spindle Gouges Take Practice
OK, here's where I confess: I sometimes get lazy and use a bowl gouge when I ought to use a spindle gouge. It's perfectly safe, but admittedly a bit lazy. The bevel on a bowl gouge is at a shorter angle, which makes for a less grabby cut. When I have a student who is struggling to master a spindle gouge, I have him or her try a bowl gouge, usually with much greater success. When I’m struggling with spindle turning, I grab a bowl gouge. Bad days: bowl gouges. Good days: spindle gouges.
Spindle gouges work great when they're sharpened with a long, steep bevel and a more pointed end in comparison to a bowl gouge. This type of edge profile allows for a clean cut and also allows for getting into tight areas between elements of the turned object.

When making a cut to create a cove, begin with a series of cuts, high point to low point: cut with the grain. As you make successive cuts, work toward the middle of the cove's low point.
Spindle turning requires that the wood always be cut from the high point to the low point. In other words, downhill. Even if you were to use a scraper for spindle turning, results are better with a downhill cut. Visualize a cat sitting on a chair and imagine how much howling would happen if you pet its fur in the wrong direction, tail to head!
Cutting Beads with a Spindle Gouge
I cut beads with a spindle gouge, which has been sharpened to somewhat of a point. This allows me a bit more control than using a skew chisel, especially when I’ve not practiced my skew work recently. We bowl turners don’t often practice using the skew chisel.
I begin the bead at the top and roll the gouge first to the left side of the bead, then to the right side of the bead, turning the gouge on its side and leading with the tip as I make the cut. Because my spindle gouge is sharpened with a relatively long, steep bevel and somewhat of a point, it actually acts a bit like a skew chisel, only not as grabby.
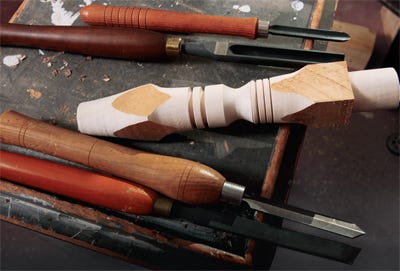
Good Options for Spindle Turning

I've selected a 2-1/2"-diameter piece of soft maple for the cuts in the photos. It's an excellent species for practicing. It’s easy to cut, inexpensive, and you can achieve a good surface without torn grain.
Pine or fir is a challenge to use for spindle turning because it is very soft and the grain tears easily. But if that’s all you have, give it a try.
Most other hardwoods are fine for spindle turning, with some being better than others. I like the qualities of ash and walnut. Almost any wood that has been air dried cuts well.
Best of all for practicing spindle turning is green wood. Carefully select a small branch from your maple tree — one that won't be easily missed — then cut it into modest lengths. Simply mount it between centers and cut away. You’ll have more fun than you've ever had spindle turning, plus you’ll have a pile of exotic kindling for your next outdoor bonfire!


Keep the inspiration coming!
Subscribe to our newsletter for more woodworking tips and tricks