Edge Glue Thin Panels Using Lap Joints
Lap joints help align thin panels and strengthen the joint.
Making a thin solid wood panel can be a bit tricky. If your edges don't align well, you can significantly reduce the thickness of the whole panel if you flatten it to the lowest point. (And those thin edges are hard to line up!) Here is a trick that can help align the edges — and even make the joint stronger.
There are tons of uses for thin (but relatively wide and long) wood panels. And while 1/4-inch plywood can be a perfect choice for some tasks, sometimes you really want the quality of a thin solid wood panel. Making fancy boxes for jewelry or perhaps to hold real "silver" silverware are examples where solid wood thin panels are just right. Also, when you're working with solid wood thin panels, you can choose from a variety of wood species, some of which may be hard to locate in a manufactured plywood sheet. But edge gluing thin stock can get to be a bit of a pain, and that pain can grow as the panels get wider and longer. A simple lap joint machined into the edges of your thin stock can make this task much easier.
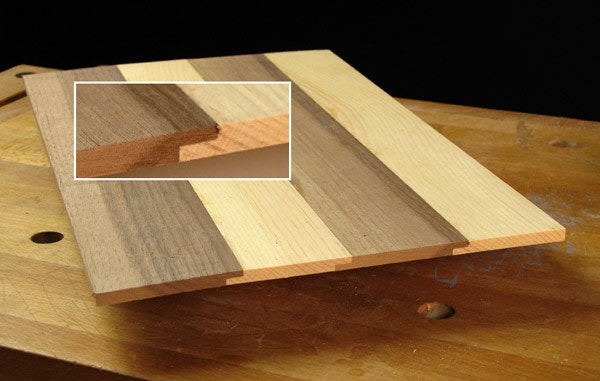
The lap joint not only helps you align the thin pieces of wood accurately as you glue them together, but it adds glue area and can make the joint stronger and more stable. The overlapping joints will be hidden in most applications, and in any event, are not overly distracting in their appearance. Here, in our example, we used two different species of wood, to highlight the joint. If you were using this in a real application, gluing like-colored wood, you would not have the distraction factor. On the face of the glued-up panel, it looks like a typical butt joint.
Making the Lap Joint
The lap joint is not a tricky joint to make, as long as you prepare your stock properly before you make the lap. (Make a couple of extra pieces of stock to use in setting up the router table later.) First, bring all your pieces of wood to the exact same thickness — here we used a standard planer to do that. (All the pieces you see here were resawn from thicker stock.) Then you need to edge joint the pieces so that the edges mate perfectly, just as you would if you were making a typical butt joint.
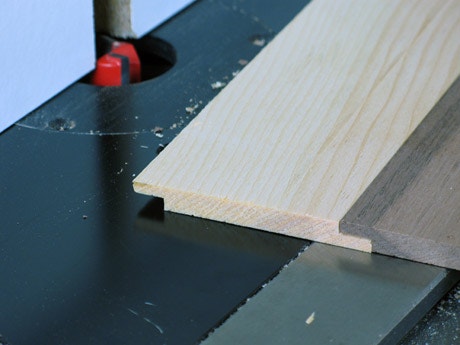
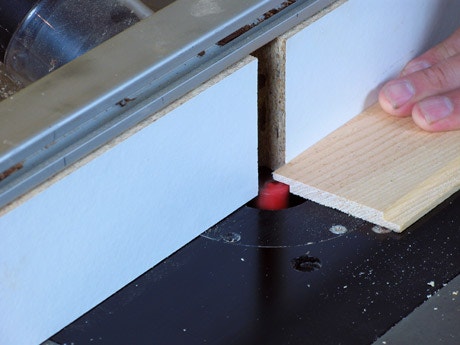
Now step over to the router table. Chuck a 3/4-in.-diameter straight bit into the table and set the width of the cut to be just a bit wider than the thickness of the stock you are using; it does not need to be an exact measurement. Then adjust the depth of the cut to be exactly half the thickness of the stock. This cut needs to be dead-on, so use the extra stock you surfaced to test it. Once you have that right, simply rout the tiny rabbets into the edge of your stock. For the pieces of wood in the center of the panel, rout the rabbets on the opposite faces of the wood. For the two pieces of wood that are at either edge of the panel, only one rabbet is required.
Gluing Up the Panel
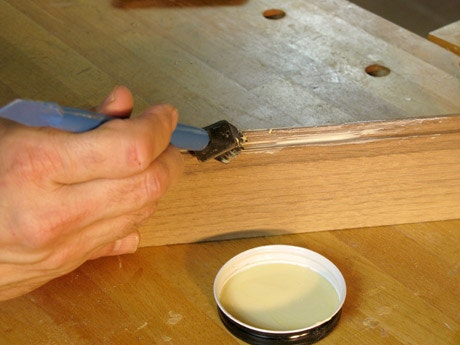
When you are ready to glue the pieces together, dry fit them and apply a clamp to make certain that they fit together nicely. Apply a thin coating of glue to both edges of each joint. That's a THIN coat of glue to BOTH faces of the joint. As you engage the pieces together, gently rub the lap joint back and forth with each piece, squeezing them "level" to one another. The adhesion of the thin coats of glue will hold the edges aligned right from the start.
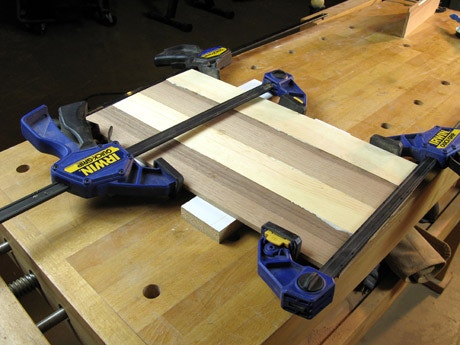
When the last piece is in place, gently clamp them together, taking care not to bend the panel by over clamping. Allow the glue to cure, scrape off any glue squeeze-out, and you are ready to sand the panel smooth.


Keep the inspiration coming!
Subscribe to our newsletter for more woodworking tips and tricks