Cutting Circles on the Band Saw
How to make and use a simple shop-made jig for your band saw that will have you cutting perfect circles in no time.
With its narrow blade, the band saw excels at cutting smooth curves. For nonsymmetrical shapes and workpieces made up of multiple curves, cutting freehand usually does the trick. As long as you keep it slow and steady you can follow your cutline pretty closely, and then clean up the results later with sanding. But even with the most careful sawing, following the cutline for a perfect circle, the most basic of symmetrical shapes, can be daunting — the results are seldom perfect. However, with a simple jig that you can make quickly and easily, you'll be able to cut an exact circle every time on the band saw without the need to follow a cutline. In fact, you won't even need to draw the circle on your workpiece, so you can leave your compass in a drawer.
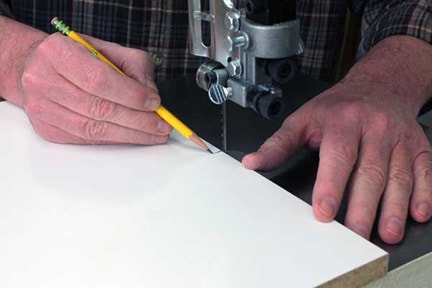
Step 1: To create the jig, cut a piece of sheet stock to the width of your band saw's table. For circles up to 16" in diameter, a jig 10" to 12" long is fine. I prefer laminated material such as melamine, as it allows your workpiece to slide easily while cutting, but regular plywood or other sheet stock with a smooth surface will work fine. Center the jig on your band saw's table — the edges of the jig should be flush with the edges of the table — and slide it till it just touches the blade. Make a mark on the front edge of the jig even with the tips of the blade teeth.
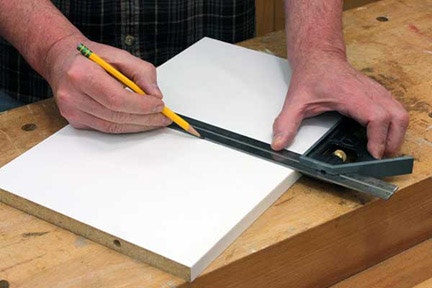
Step 2: Starting at your mark, use a reliable square to continue the line across the surface of the jig. You can see here that I've drilled holes into the jig's side edges that will accommodate a pair of fence clamps to secure the jig to the band saw's table. Now, measuring from the front edge, make a series of marks 1" apart along this line.
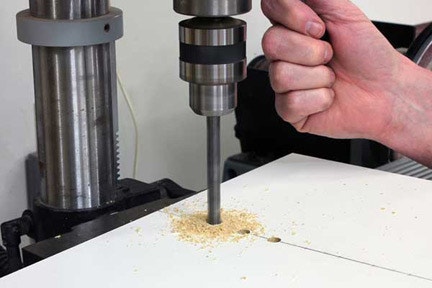
Step 3: With a 1/4" or 3/8" bit in your drill press, bore holes exactly on each of your marks. Drill just short of going all the way through the jig. When cutting the circle, the workpiece will pivot on a short length of dowel inserted into one of these holes. Because the workpiece rotates at these holes, each marks the exact center of the circle, with the distance from the front edge of the jig determining the circle's radius. Thus, the first hole drilled at 1" will be the pivot for a 2" circle; the hole drilled at 2" gives a 4" circle, and so on. You might find it helpful to mark your jig with a permanent marker as I've done here.
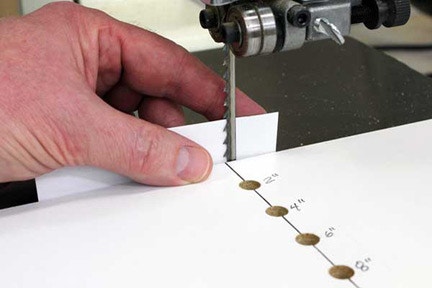
Step 4: Place the jig on your band saw's table so your line of holes is perpendicular to the blade and even with the tips of the blade's teeth. A piece of paper held behind the blade makes it easier to see the teeth. With the jig correctly positioned, clamp it securely to the saw's table.
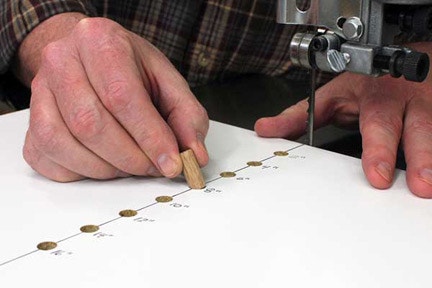
Step 5: Cut a short length of 1/4" or 3/8" hardwood dowel for your pivot. This dowel should be short enough that it will fit into a hole drilled on the underside of your workpiece but still allow the workpiece to rest flat on the table. For this example, I've decided to cut an 8" circle, so I'm slipping the dowel into the hole that is 4" from the front edge of the jig. (Remember, the distance from the blade is the circle radius.)

Step 6: Cut a workpiece slightly larger than the desired circle; for our 8" circle here I've cut a workpiece measuring 8-1/2" x 8-1/2". Now, measure exactly 4" from the center of the front edge of the workpiece and drill a hole sized to accept the pivot dowel. The purpose you have in mind for your circle will determine how deeply to drill this hole: For an unblemished top surface, don't drill all the way through. If the top surface isn't critical — if you're cutting wheels, for example, that require an axle going all the way through the circle — it's OK to drill all the way through the workpiece. Note here that I've marked an arrow pointing to the front edge to keep things straight.

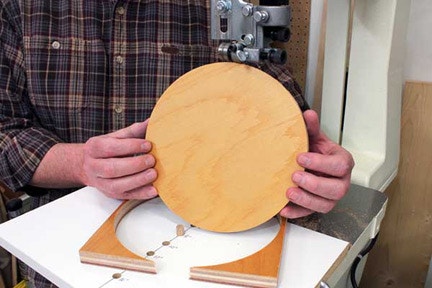
Step 7: Drop the workpiece onto the dowel, making sure to keep the front edge oriented toward the blade. If you've done everything correctly, the workpiece will fall into place with the front edge just kissing the blade.

Step 8: Turn on the saw, and rotate your workpiece smoothly on its pivot to cut a perfect 8" circle. When the circle is complete, power down the saw and let the blade come to a full stop before removing the workpiece and waste.
For the jig in this example I've drilled the pivot holes at 1" intervals, but feel free to set your jig up to create circles of any desired size. Just remember that the pivot holes should always reflect the radius of your desired circle. Also, if you think you may use your circle-cutting jig frequently, consider attaching a cleat to the underside that will fit the miter slot on your band saw's table to make setup faster and easier.


Keep the inspiration coming!
Subscribe to our newsletter for more woodworking tips and tricks