Make a Weather Station Using CNC
A weather station is an old-school way of predicting your local weather.
They need no batteries, make great use of scrap lumber that is too good to throw away and are lovely gifts to top it off. We used a CNC router to shape the piece, but you can do it old-school if you prefer. Just follow the directions here and use the downloadable weather station PDF pattern.
Free .tap files are available to use on your own CNC machine by clicking here.
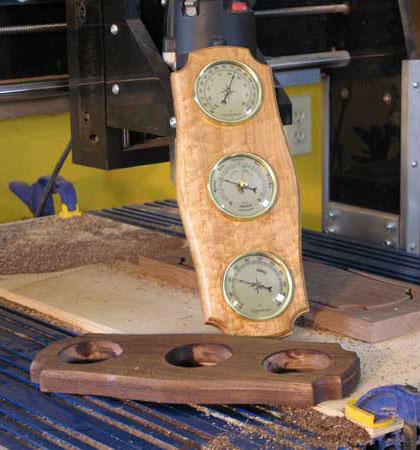
You've probably seen these classic wall-hung weather stations by the score over the years. They track temperature, humidity and barometric pressure. They're practical for a vacation home, your regular domicile, or even a woodshop. In this case, we used some leftover bird's-eye maple and black walnut to make several weather stations.
Use a CNC for the Shaping
If you are going to use a CNC machine to make your weather station, there are a couple of things that almost go without saying … almost. You will need a backer board on the deck of your CNC, to prevent cutting into your machine deck. Test out the programming with scrap material first. The files are designed to use a 1/4" straight bit.
While the CNC could be programmed to cut out the circles for the dials and even to cut the routed profile on the edge of the weather station blank, we chose simply to have it cut the shape of the blank. The reason for that is that the CNC will cut the profile perfectly every time, and while you are making your next blank, you can set up your drill press and router table to do the next machining step while the CNC is doing its magic. Very efficient.
When you have finished machining your pieces, sand them smooth and apply the finish of your choice. We used a spray shellac from an aerosol can. A couple of coats with a light sanding between will do the trick nicely. Then slide the instruments into their holes and use a hanger clip or strip to hang it from the wall. The weather station can be oriented either vertically or horizontally, as you choose.
The Standard Construction Method
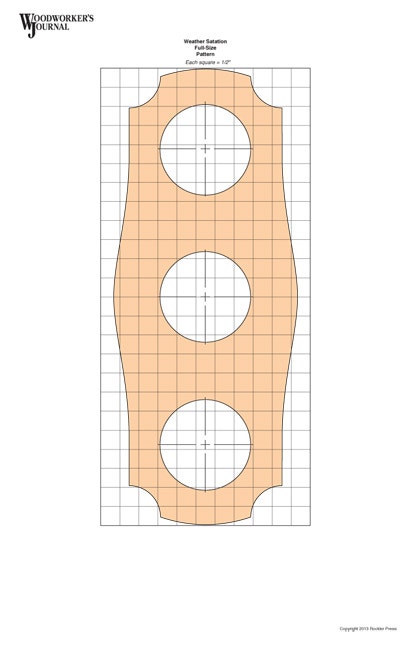
If you are going to make the weather station without the benefit of the CNC, the best way would be to create a template of the station's shape made from 1/2"-thick MDF or Baltic birch plywood. Use the downloadable weather station PDF as a guide. When you have the MDF shaped with all the curves faired, use it in combination with a flush-trim router bit. Trace the shape of the weather station onto a piece of wood, and cut it out on the band saw, staying just outside of the lines as you cut. Attach the pattern to the prepared piece of wood with double-sided tape. Then chuck the flush-trim bit into your router table and trim the blank to size, running the bit's bearing against the MDF template. When the routing is finished, go ahead and complete the weather station as described above.


Keep the inspiration coming!
Subscribe to our newsletter for more woodworking tips and tricks