How To Apply A Clear Natural Finish To Softwoods
Learn how to apply a natural finish to softwoods like Pine, Cedar and Poplar.
How to apply this finish:
1. Sand the project up through the grits until at least 220-grit. It is a good idea to sand pieces that will be hard to reach before assembly.
2. Wipe the project with mineral spirits to check for glue splotches.
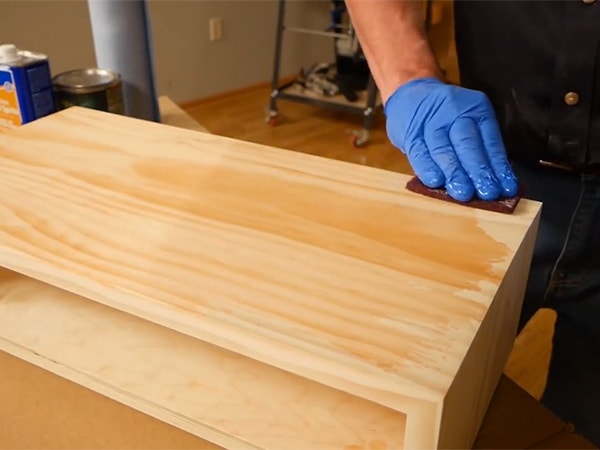
3. Apply a sealer coat (Zinsser Sealcoat) of a shellac-based finish by wiping: flooding the surface with finish and wiping it off.
4. If you have any nail holes, cracks or defects in the wood, fill them now with a wood filler putty that matches the color of the oiled wood (sand smooth).
5. Apply at least two coats of a wipe-on polyurethane.
6. Optional: After the finish has cured for 72 hours, apply a coat of high-quality paste wax and then polish it off.
Supply Checklist:
Video: How To Apply A Clear Natural Finish To Softwoods
Rob Johnstone: Today, we're going to demonstrate how to apply a clear, natural finish to softwoods like pine, red cedar, or Douglas fir. Softwoods take a clear finish really well and it's a great example of a no-fail finish. As you likely know, the key to any successful finish is proper surface preparation, and that generally means sanding. I like to start at 80 grit, and then work up all the way through the grits. In this case at least a 320, but in fact with a clear finish like this one, the higher you go, the better, if you went at 600 grit even better. Here's a tip to make sanding even easier.
Move the sander slowly across the surface about one inch per second. Most people move the sander far too fast. Avoid heavy pressure. Just let the sander do the work. Remember, as you advance to each finer grit, your goal is simply to remove this last scratches and sanding marks.
One nice thing about softwood is that sanding process is faster because the wood fibers are not as dense. We've got one more step to do before you start applying the finish, and that's to check for glue spots, say, you left a smudge with a finger, or a glue drip and it survived the sanding. The way you do that is by rubbing on some mineral spirits. Look for the spots. If the spots are there, they'll absorb the finish differently and they'll show up.
If you find one, get some sandpaper, start at 80 grit and sand all the way up through the rest of the grits, and then you can apply your finish. One tip that's important is if you have things like this drawer face or drawers, take the project apart and finish them separately. It'll be a lot easier and you'll get a much more successful finish. Next, with softwoods, I recommend using Zinsser SealCoat. It's a specially processed shellac, and it makes a really good first finish. You just flood it on, and then you wipe it off.
The great thing about it is it dries in like 15 minutes and you can put your next coat on. Super easy that way. Now with the first coat of finish on is the time to fill any holes or cracks that you have. What it allows you to do is match the color more accurately. In this case, this putty is just about the perfect color right out of the container but if it wasn't the right color, the great thing about Wunderfil is it comes in multiple colors and you can mix them together to get almost any hue that you want.
If the putty holes filled and sanded, I'm going to apply one more coat of shellac or maybe even two. The advantage of shellac is that it dries so quickly that you can build up a film coat very quickly, and it's durable. We're going to add a coat of polyurethane on top of it to add durability for things like alcohol. The reason to apply a coat of poly is that it comes in a variety of sheens, and we can be controlling how much of a gloss that we have on the finish by using the polyurethane.
Wiping on polyurethane lays down a very thin coat. Again, just flood it on like you did before, get the whole surface wet, and then wipe it off with shop towels. I recommend at least two or three coats of the poly. If you used an oil-based poly like I do, you need to dispose of the rags properly by laying them out in a single layer and allowing them to dry. When they are dry, they're landfill safe. Shellac or water-based poly, those rags wouldn't spontaneously combust, so you can just throw them right away.
I have one more tip for you. After the polyurethane is cured for a little bit, get some high-quality paste wax, rub it on, polish it off. It'll provide a nice low luster to it, and it'll feel so great. I hope you've learned a couple things here in this video. Thanks for watching.


Keep the inspiration coming!
Subscribe to our newsletter for more woodworking tips and tricks